
Azure Functions is an event driven serverless compute solution that lets you to execute your code without provisioning or managing the infrastructure to support it. “Functions” are blocks of code that can be executed when you need to respond to specific events. As the number of requests increase, Azure Functions automatically allocates as many resources and instances of your function(s) as necessary to respond to the increased demand. Inversely, as the number of requests decrease the resources and application instances are automatically reduced. This means you only pay for the compute resources you need when you need them
Here are few scenarios where you may want to consider using Azure Functions:
Timer or schedule based triggers
Real-time streaming or event processing
Processing files during a data upload
Processing IOT data streams
Let’s get started creating an Azure Function with Python!
Prerequisites
- Azure Subscription
- Visual Studio Code with the Azure Functions extension and Azure Functions Core tools installed.
- Python installed on your local machine. As of this time, Azure Functions supports Python 3.6.x, 3.7.x and 3.8.x.
Create the Azure Function Project
- Open Visual Studio code.
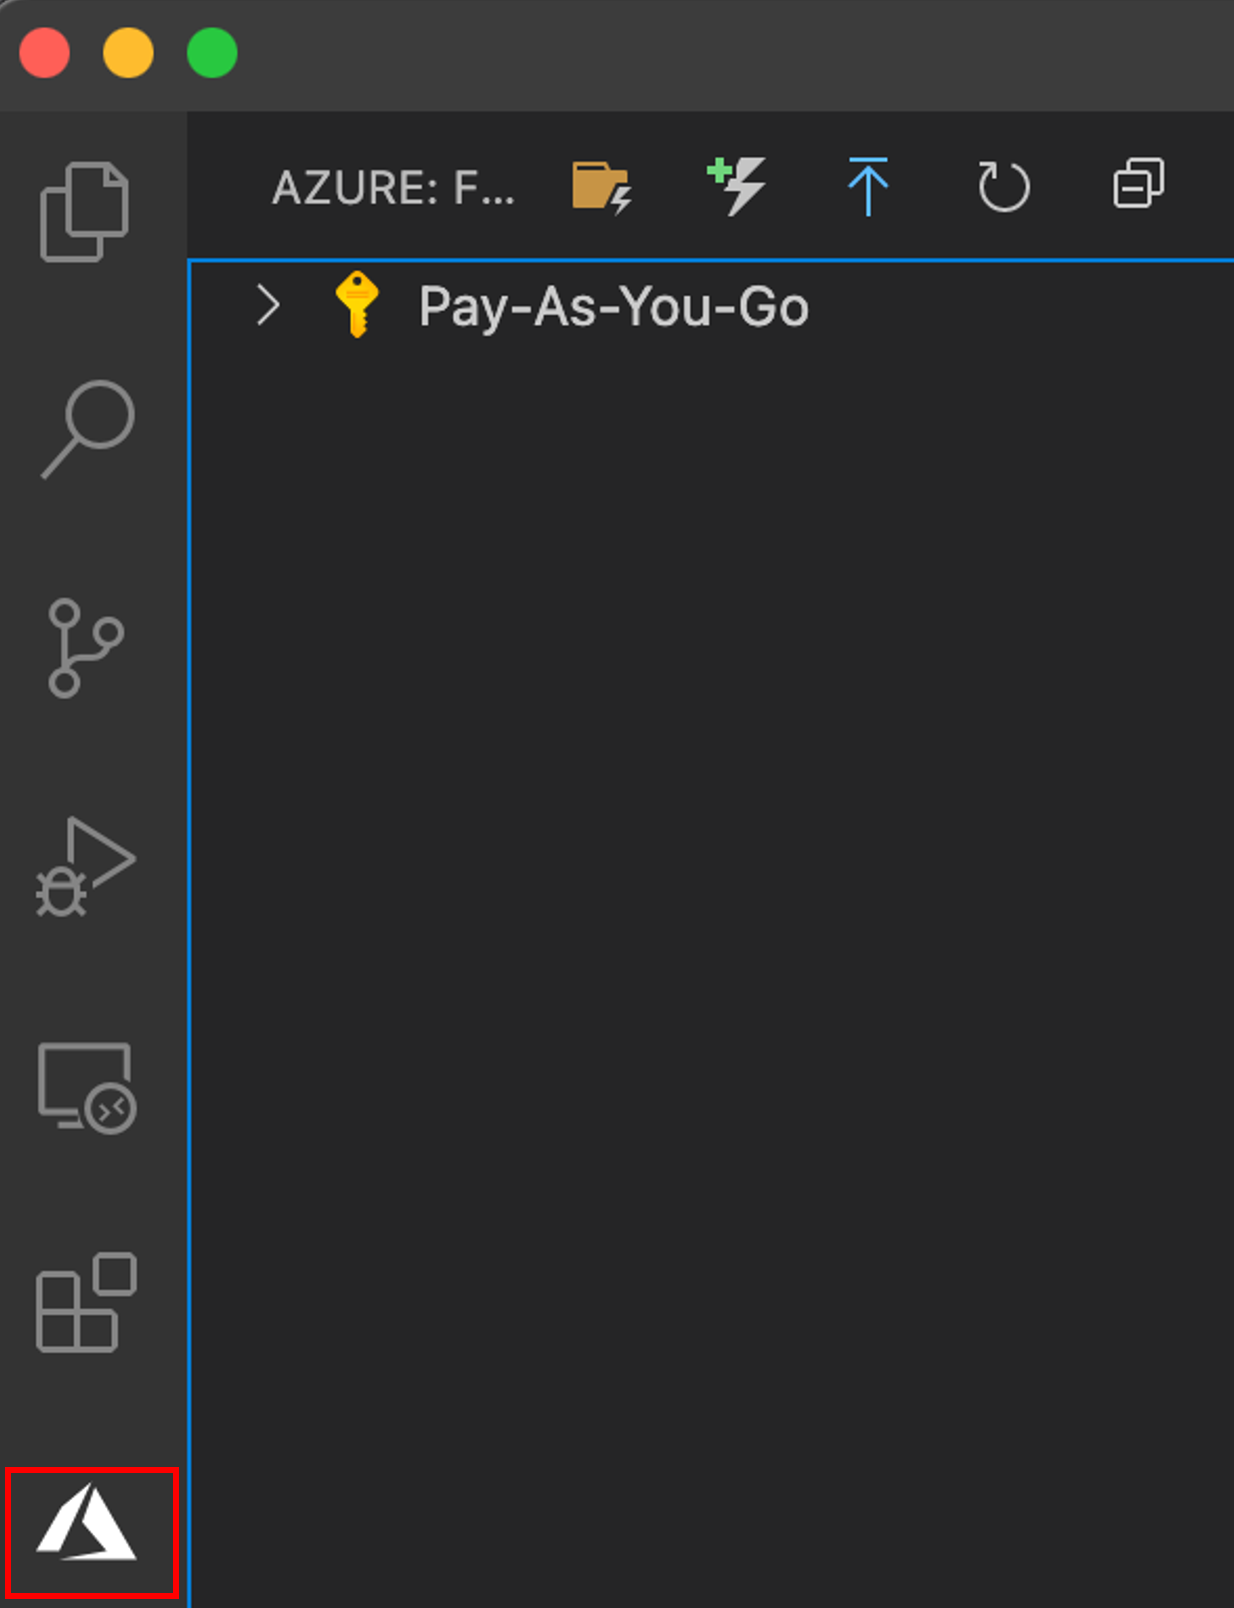
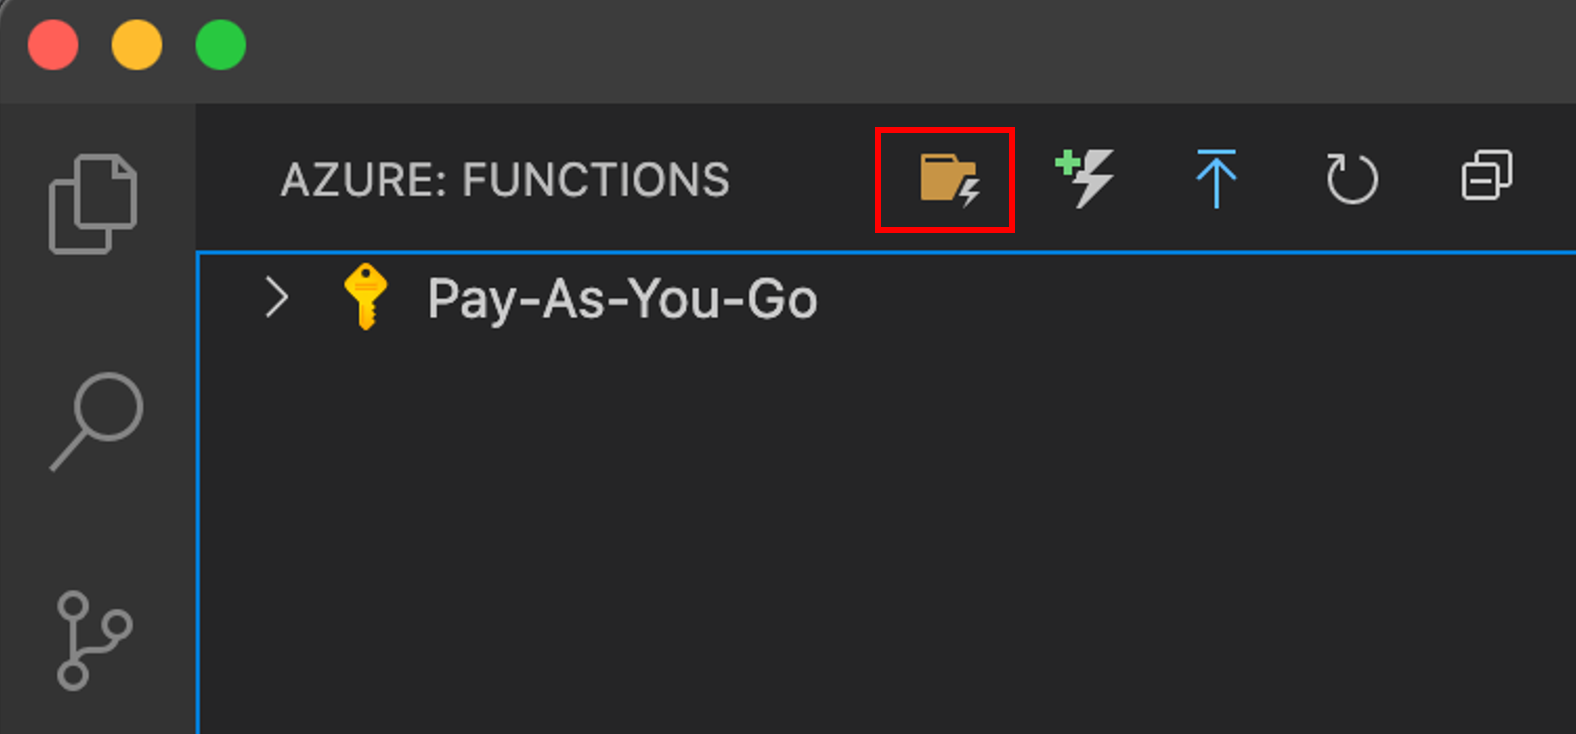
- Click the Azure icon in the left hand navigation bar.
- Click the Create New Project icon.
- Create a new folder.

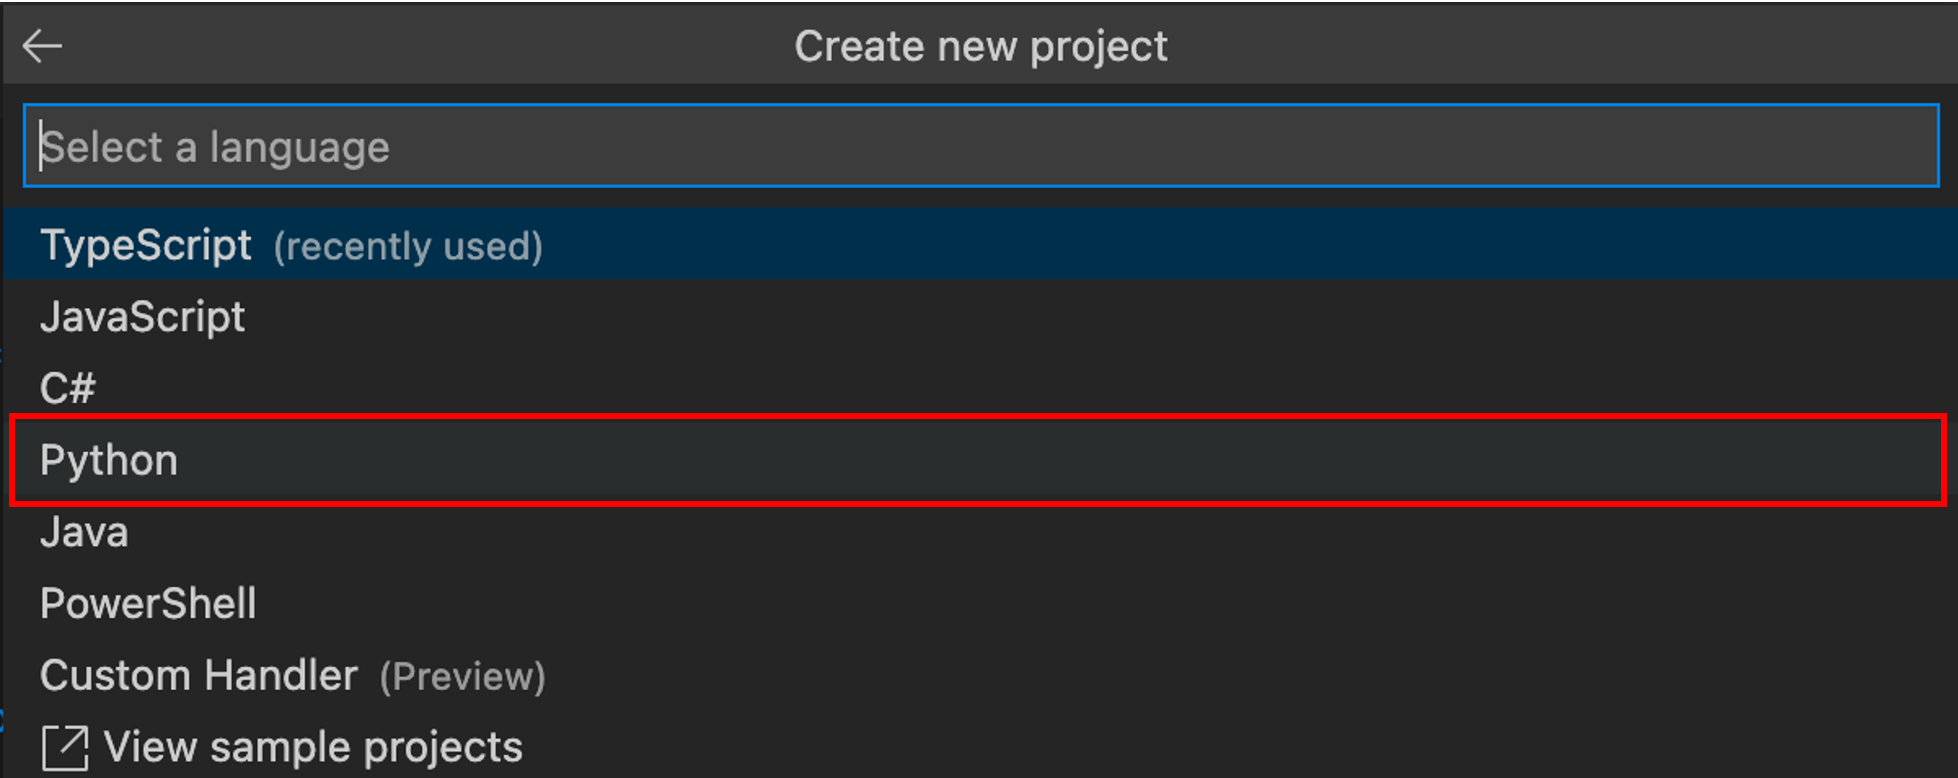
- Select Python from the the dropdown.
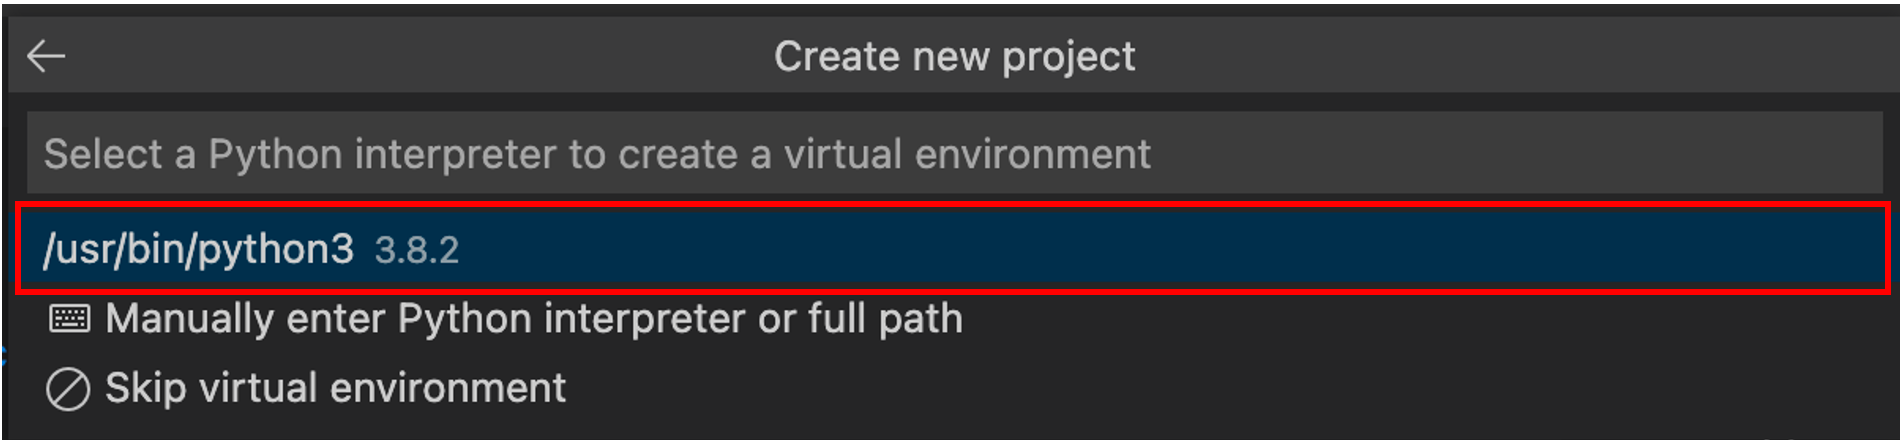
- Select the appropriate Python environment from the dropdown.
- Select HTTP trigger from the dropdown.
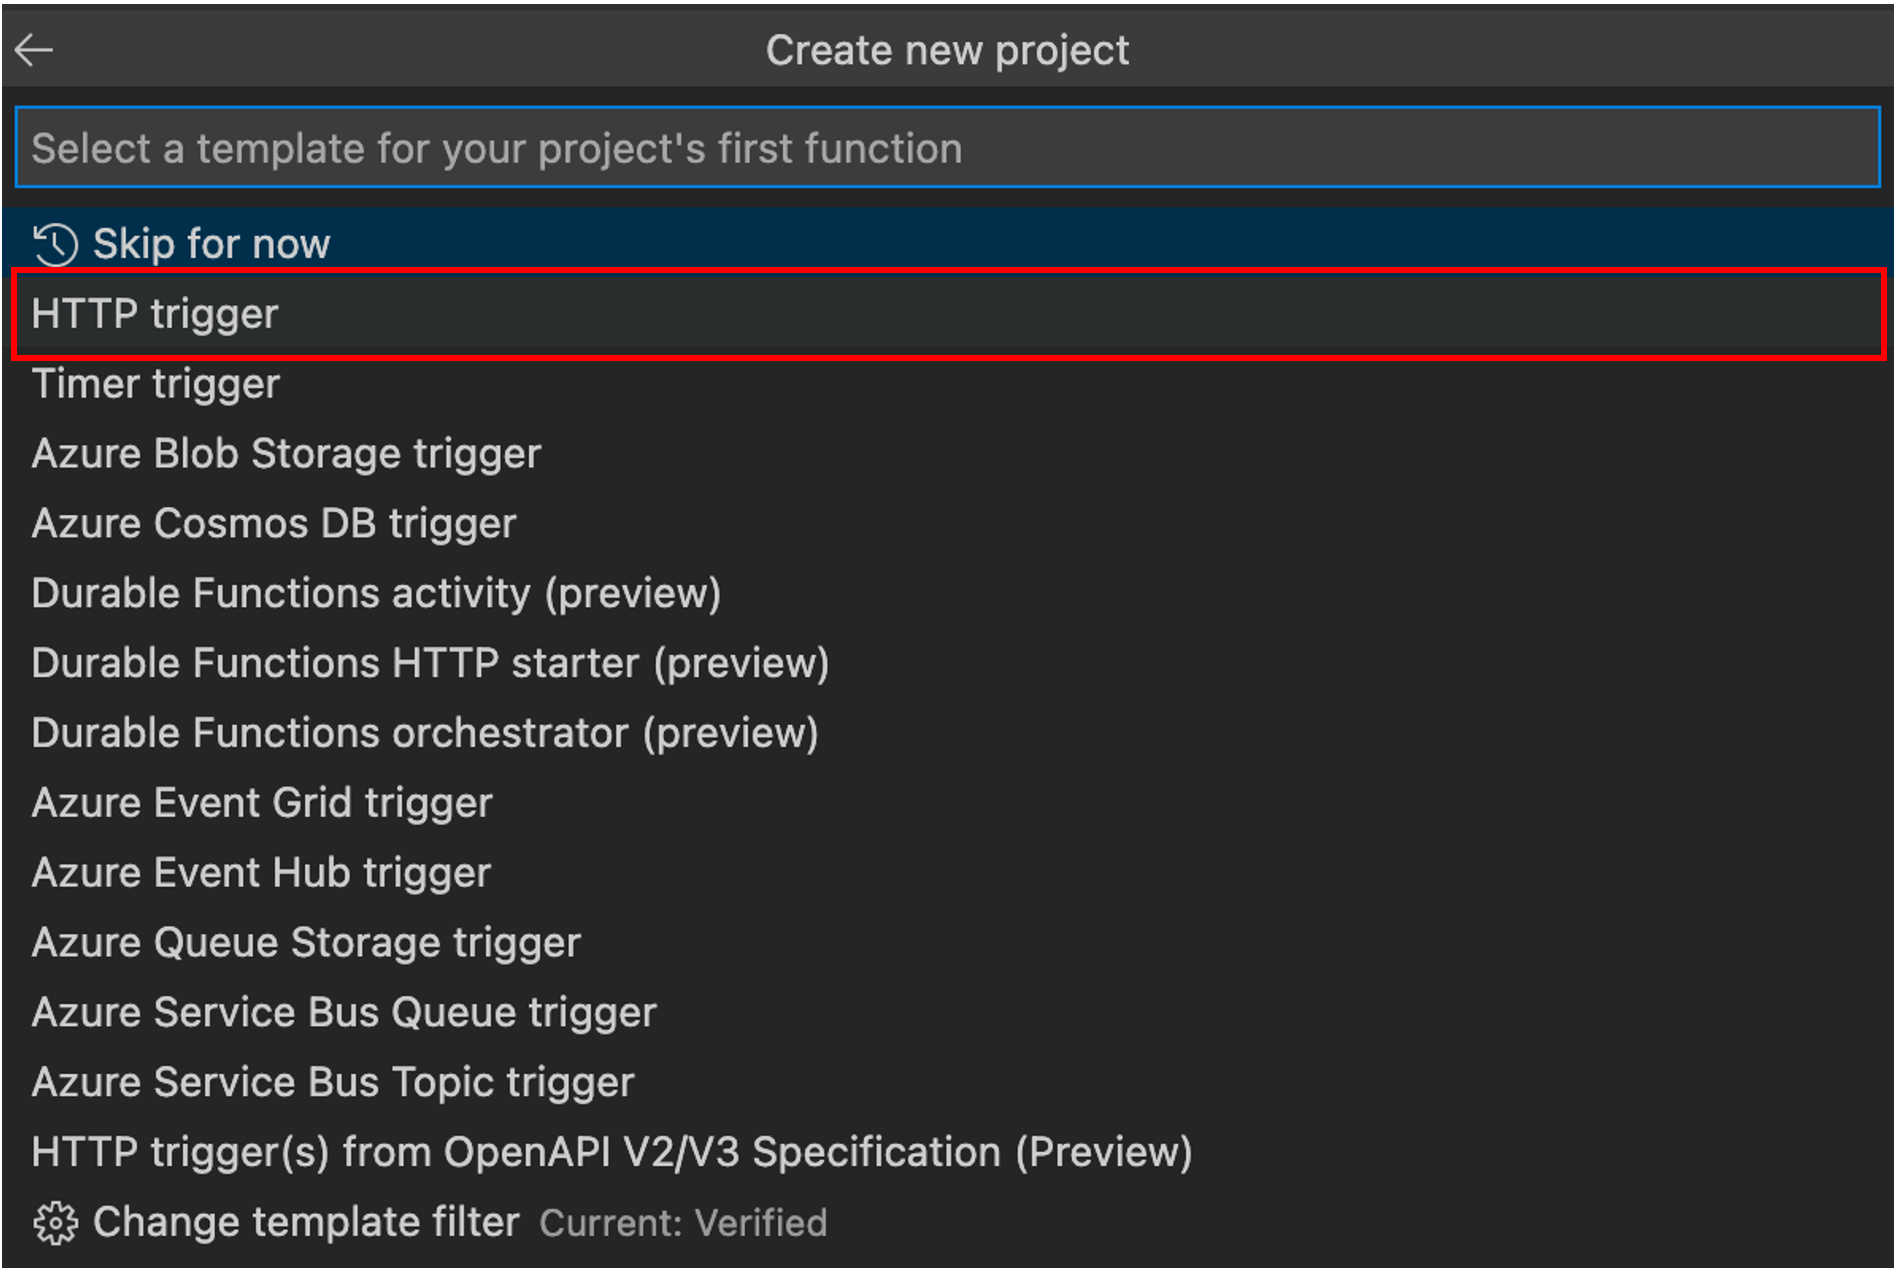
- Name the trigger or leave the default name.

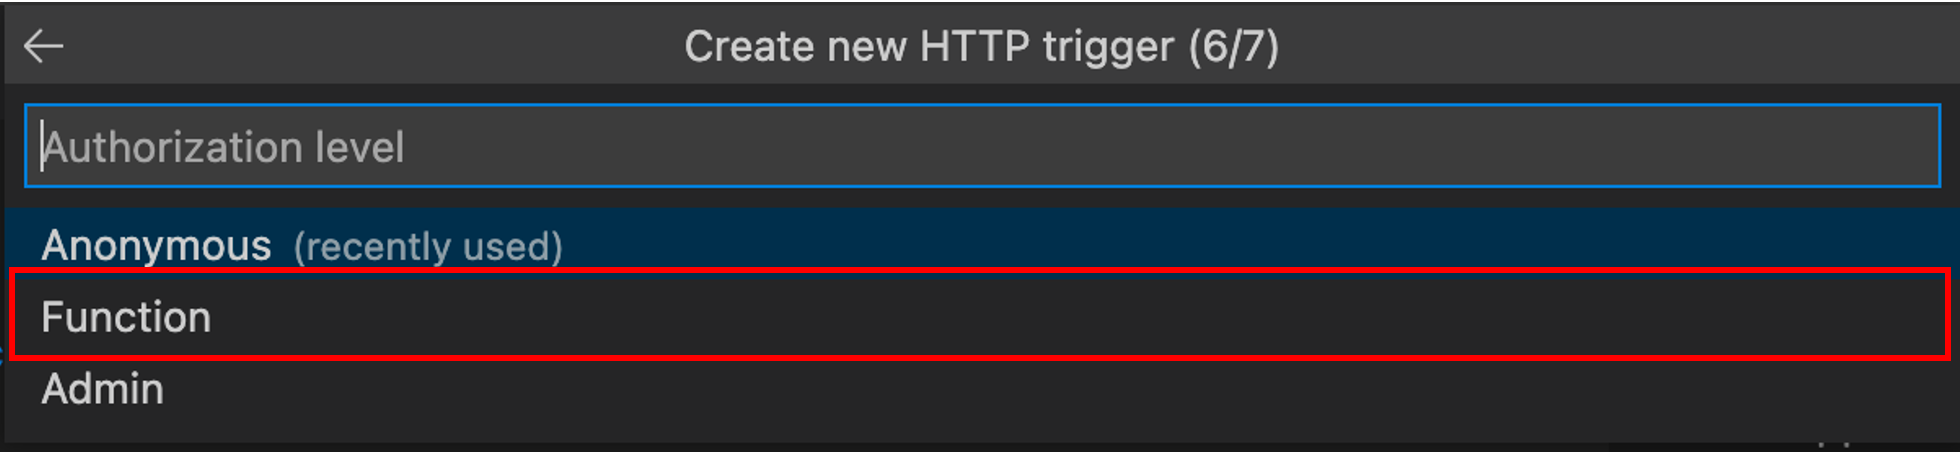
- Select Function from the dropdown.
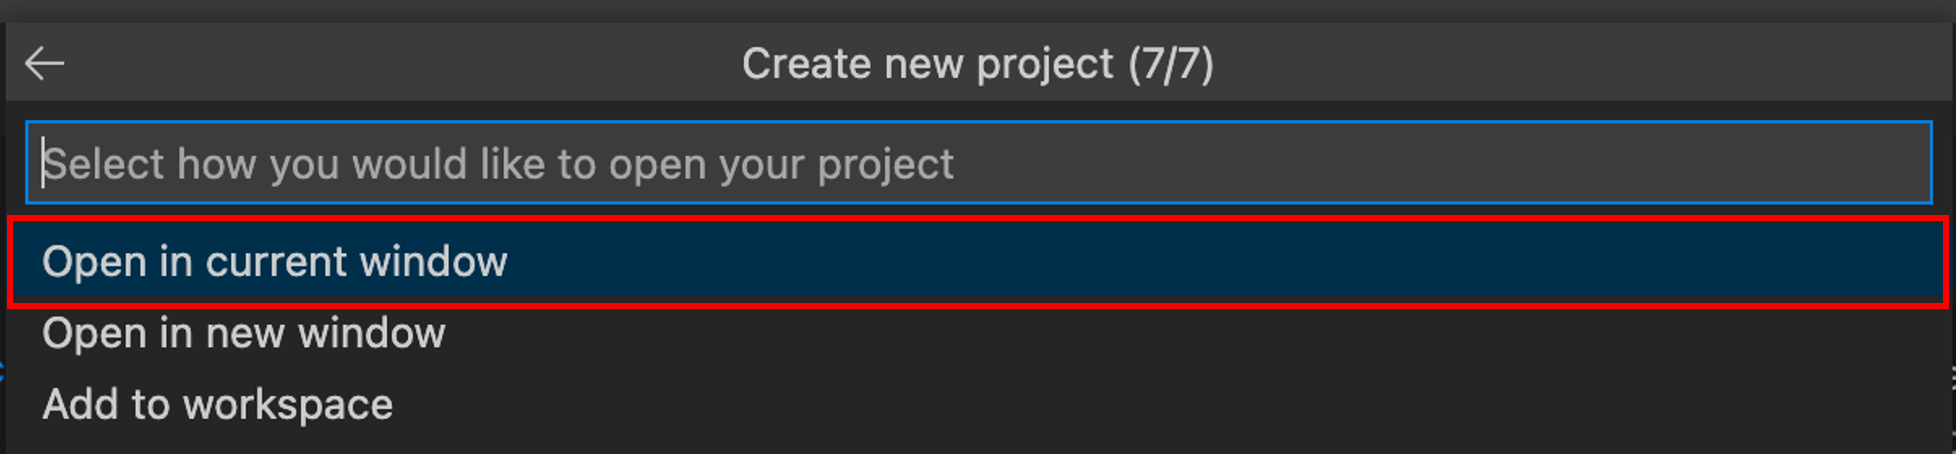
- Select Open in current window from the dropdown.
- Visual Studio code will scaffold your Azure Functions project (this may take a minute).
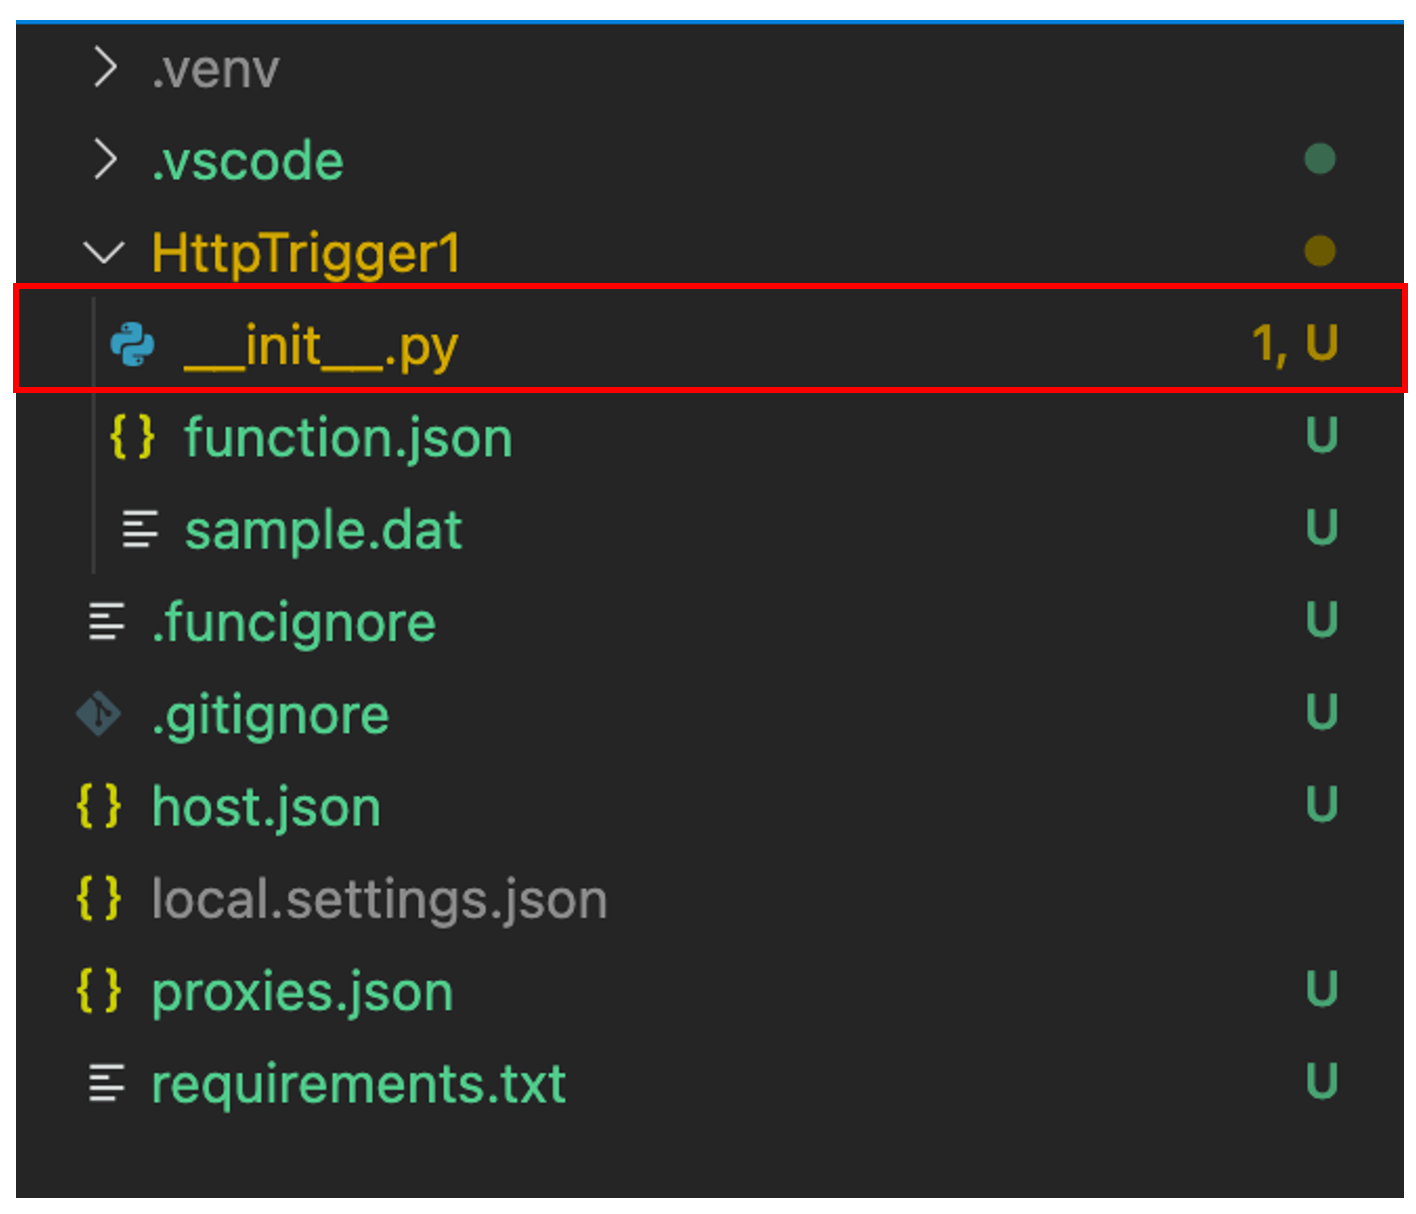
- In the Visual Studio code explorer, browse to and open the _init_.py file.
- The following code makes up your Azure Function.
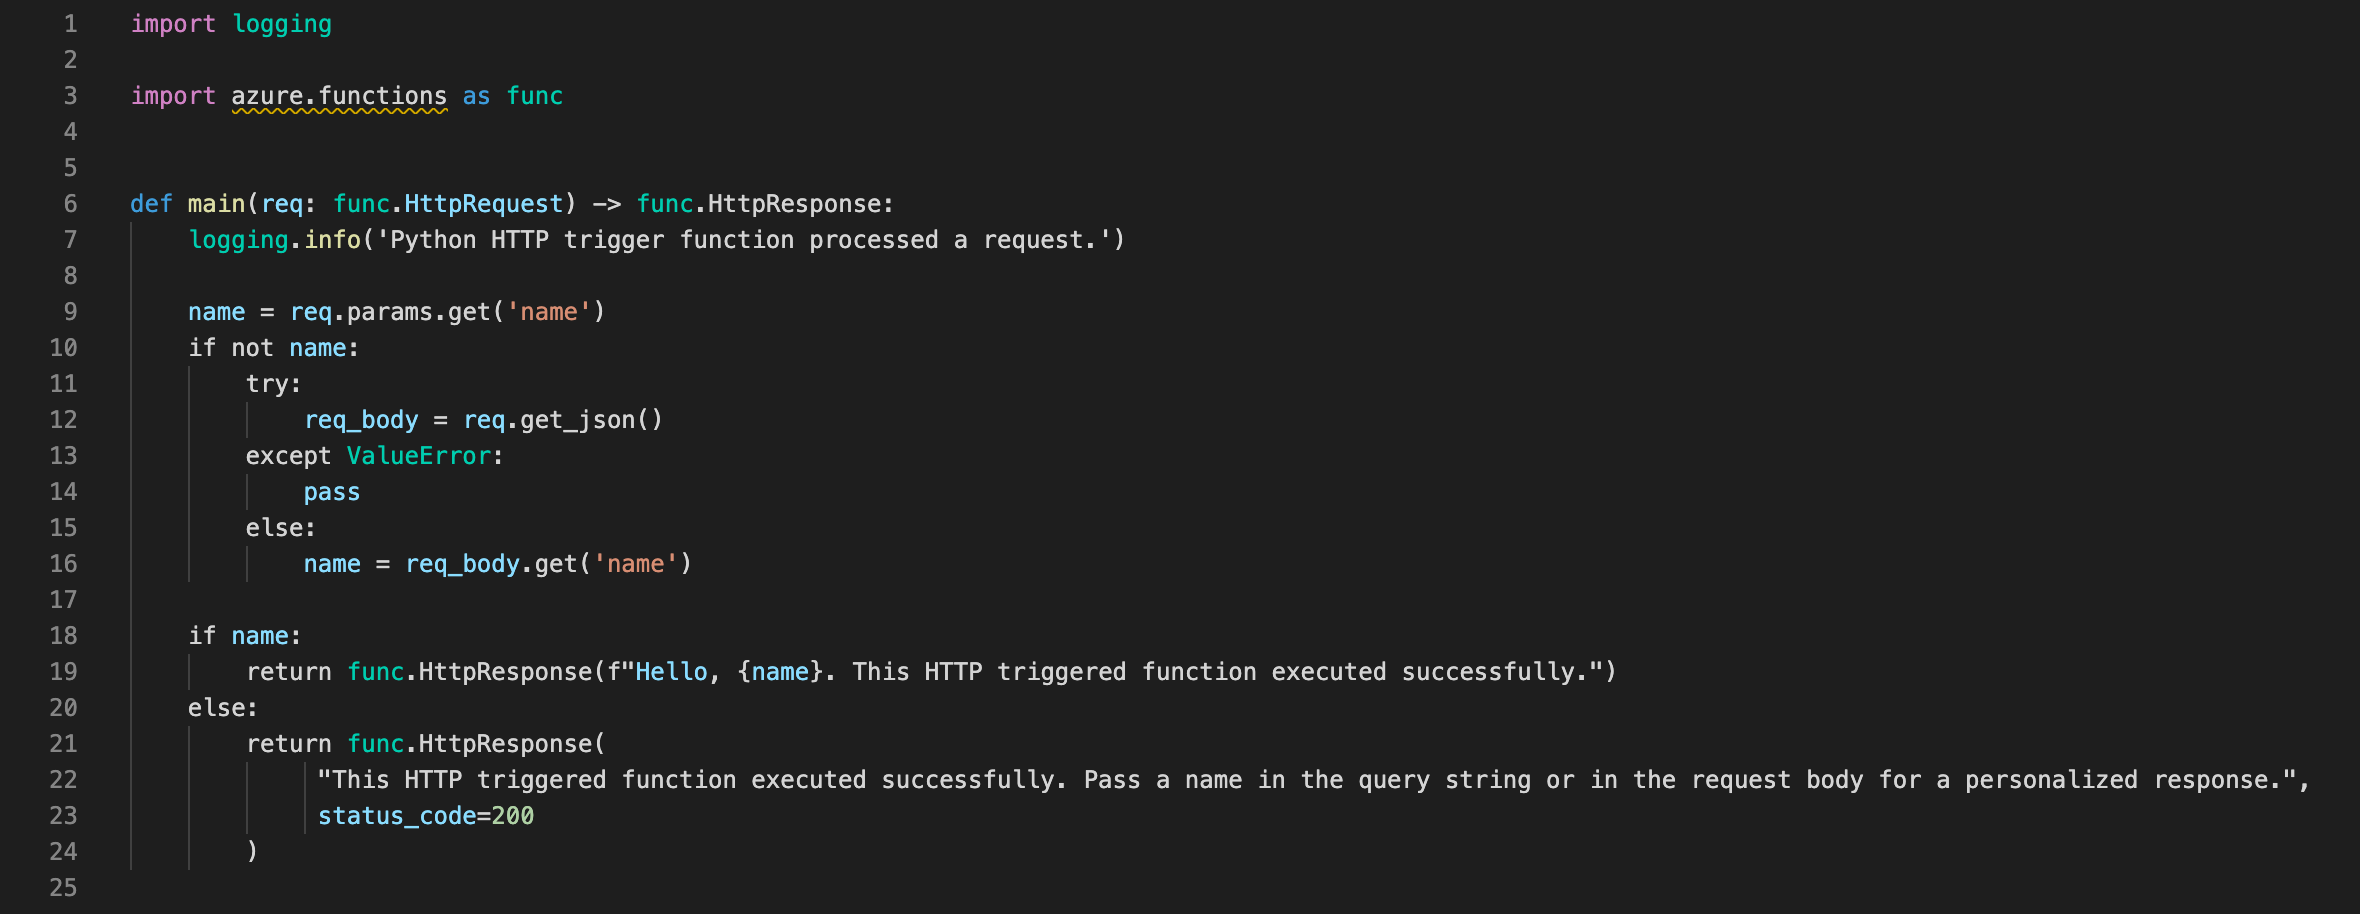
Let’s take a minute and look at what the code does:
Line 8: The Main function has a req parameter which provides the details of the HTTP request, including the request body.
Line 9: The name variable is defined and assigned a value based on the “name” query parameter from the HTTP request.
Line 10 – 16: These lines check if a value has not been assigned to the name variable and respond accordingly.
Line 18-24: These lines check if a value has been assigned to the name variable and update the browser accordingly. - To run your function locally, press F5 or click the Visual Studio code Run menu and select Start Debugging.
- Open a browser and browse to the URL provided in the Terminal window. (Alternatively you can cmd or ctrl + click the URL to open in a browser).
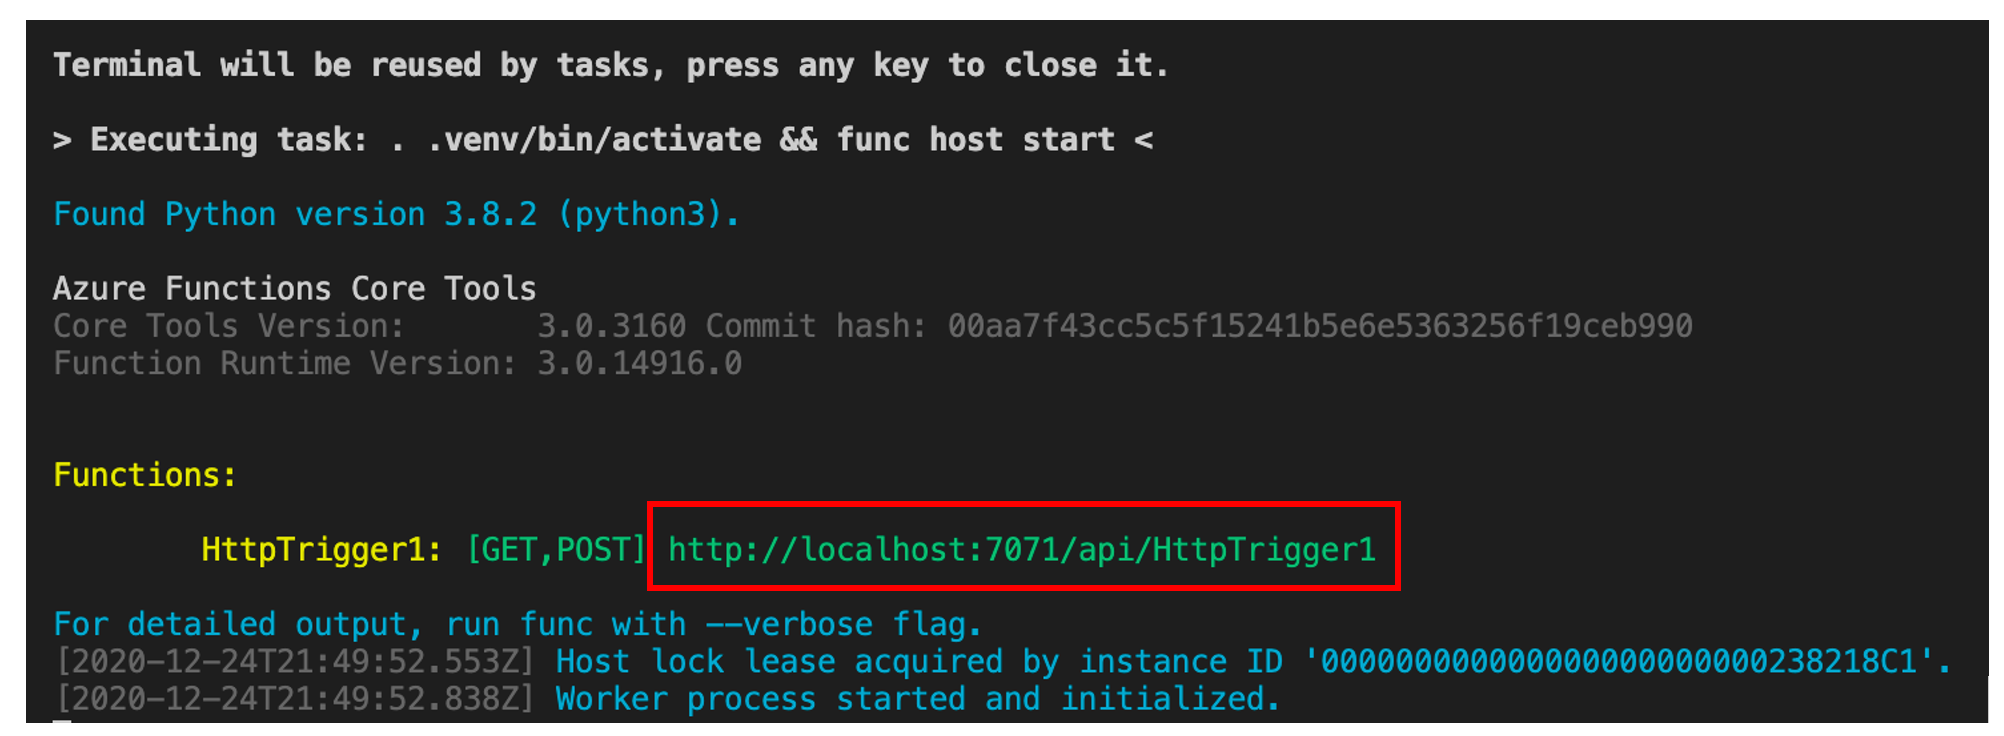

- To verify that your function is working correctly, you can append a question mark, the name parameter and your name to the URL as shown below:
http://localhost:7071/api/HttpTrigger1?name=Dave
After updating the URL, press the return key and your function will update the browser based on your input.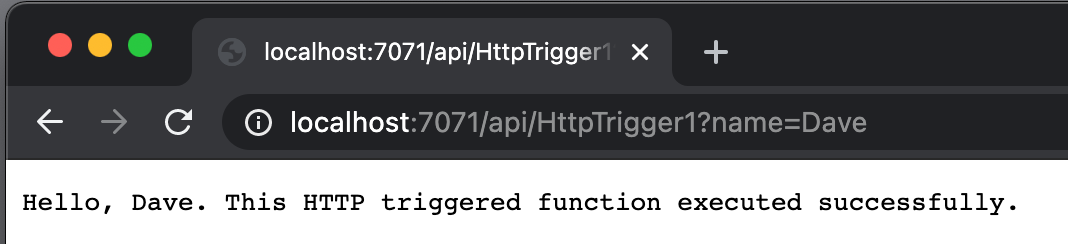
Deploy your function to Azure
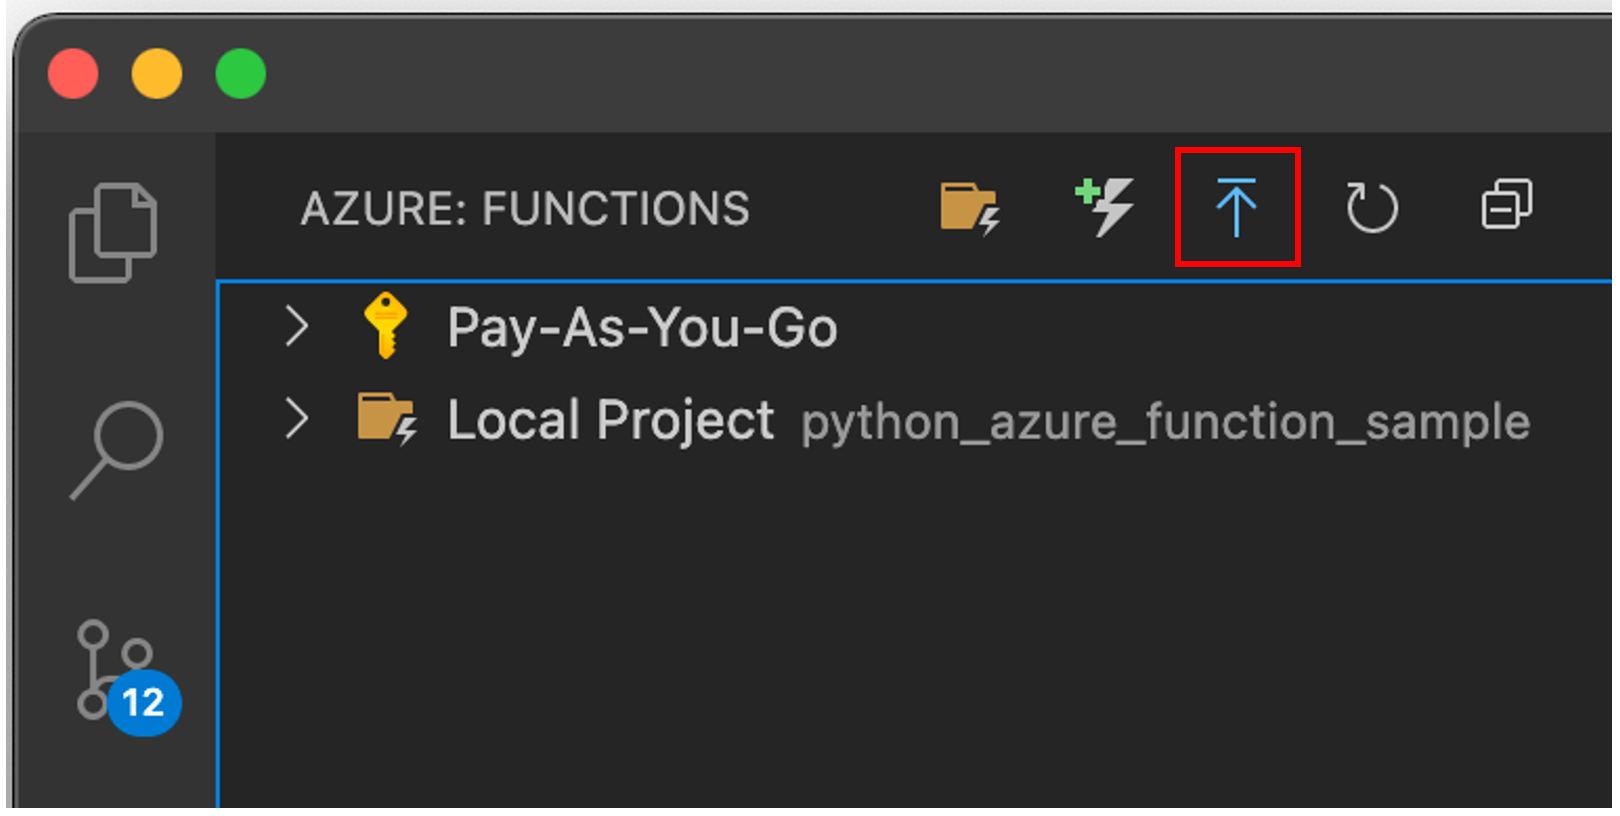
- Click the Azure icon in the left hand navigation bar in Visual Studio code.
- Click the Deploy to Function App icon.
- Click + Create new Function App in Azure…

- Enter a globally unique name for your function app.

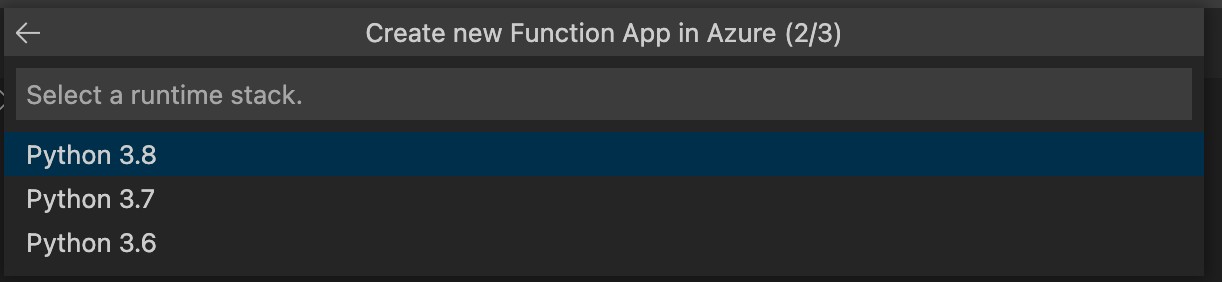
- Select your Runtime Stack (I’m using 3.8, but your Python version may be different).
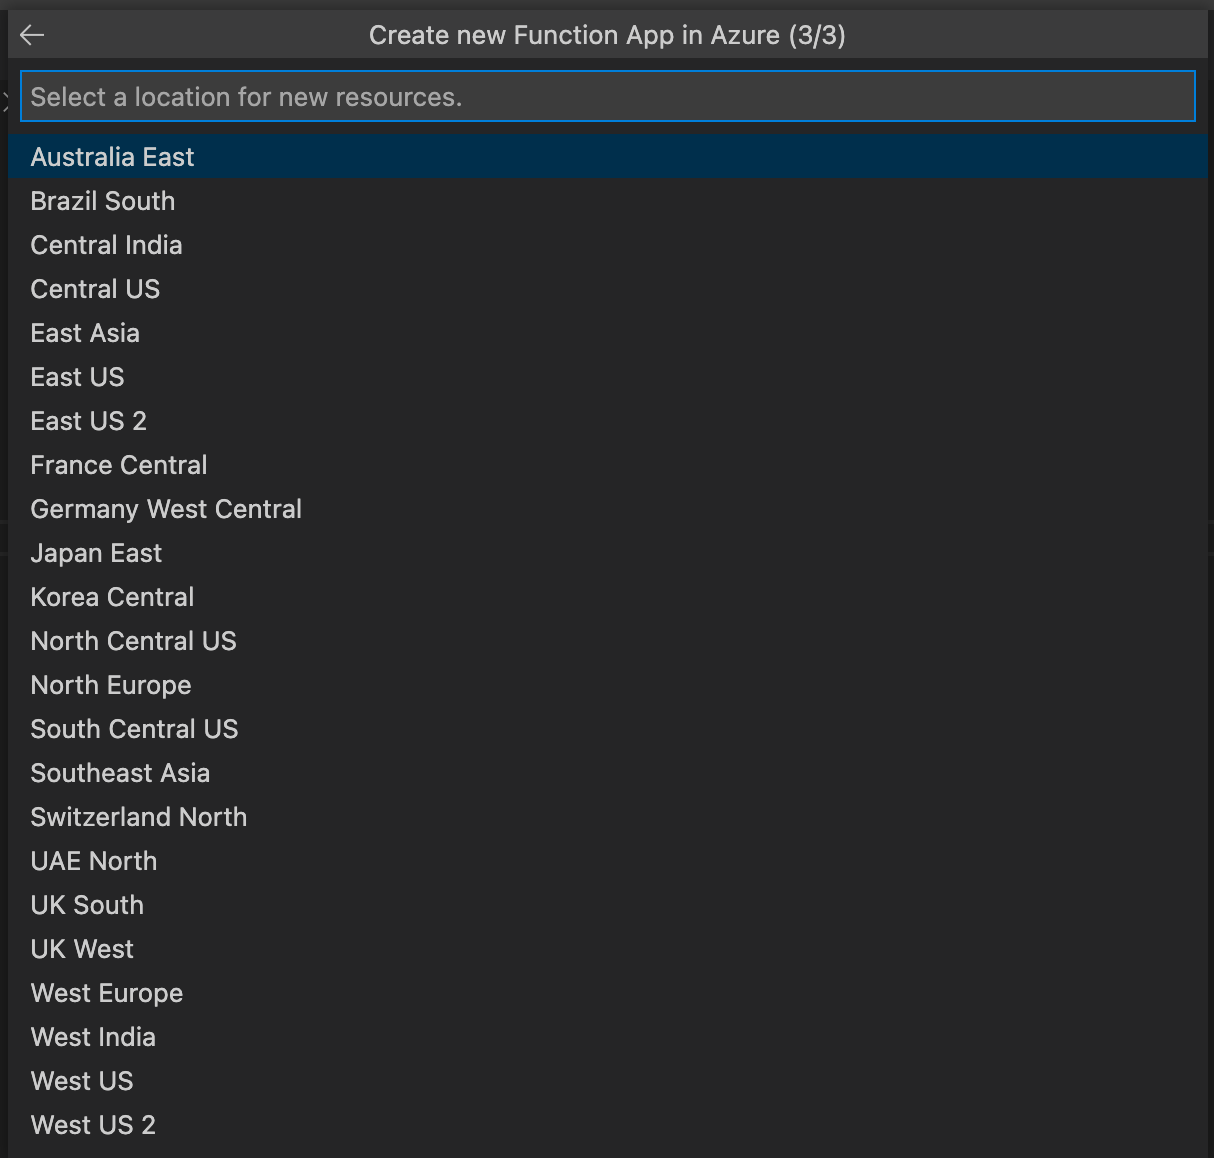
- Select a location for your function app resources.
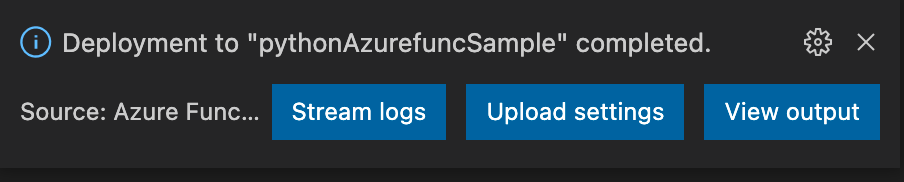
- The Azure Functions extension will create and deploy the necessary resources in Azure to support your function app. Once the deployment is complete, you will receive a notification in Visual Studio code.
- Login to the Azure Portal.
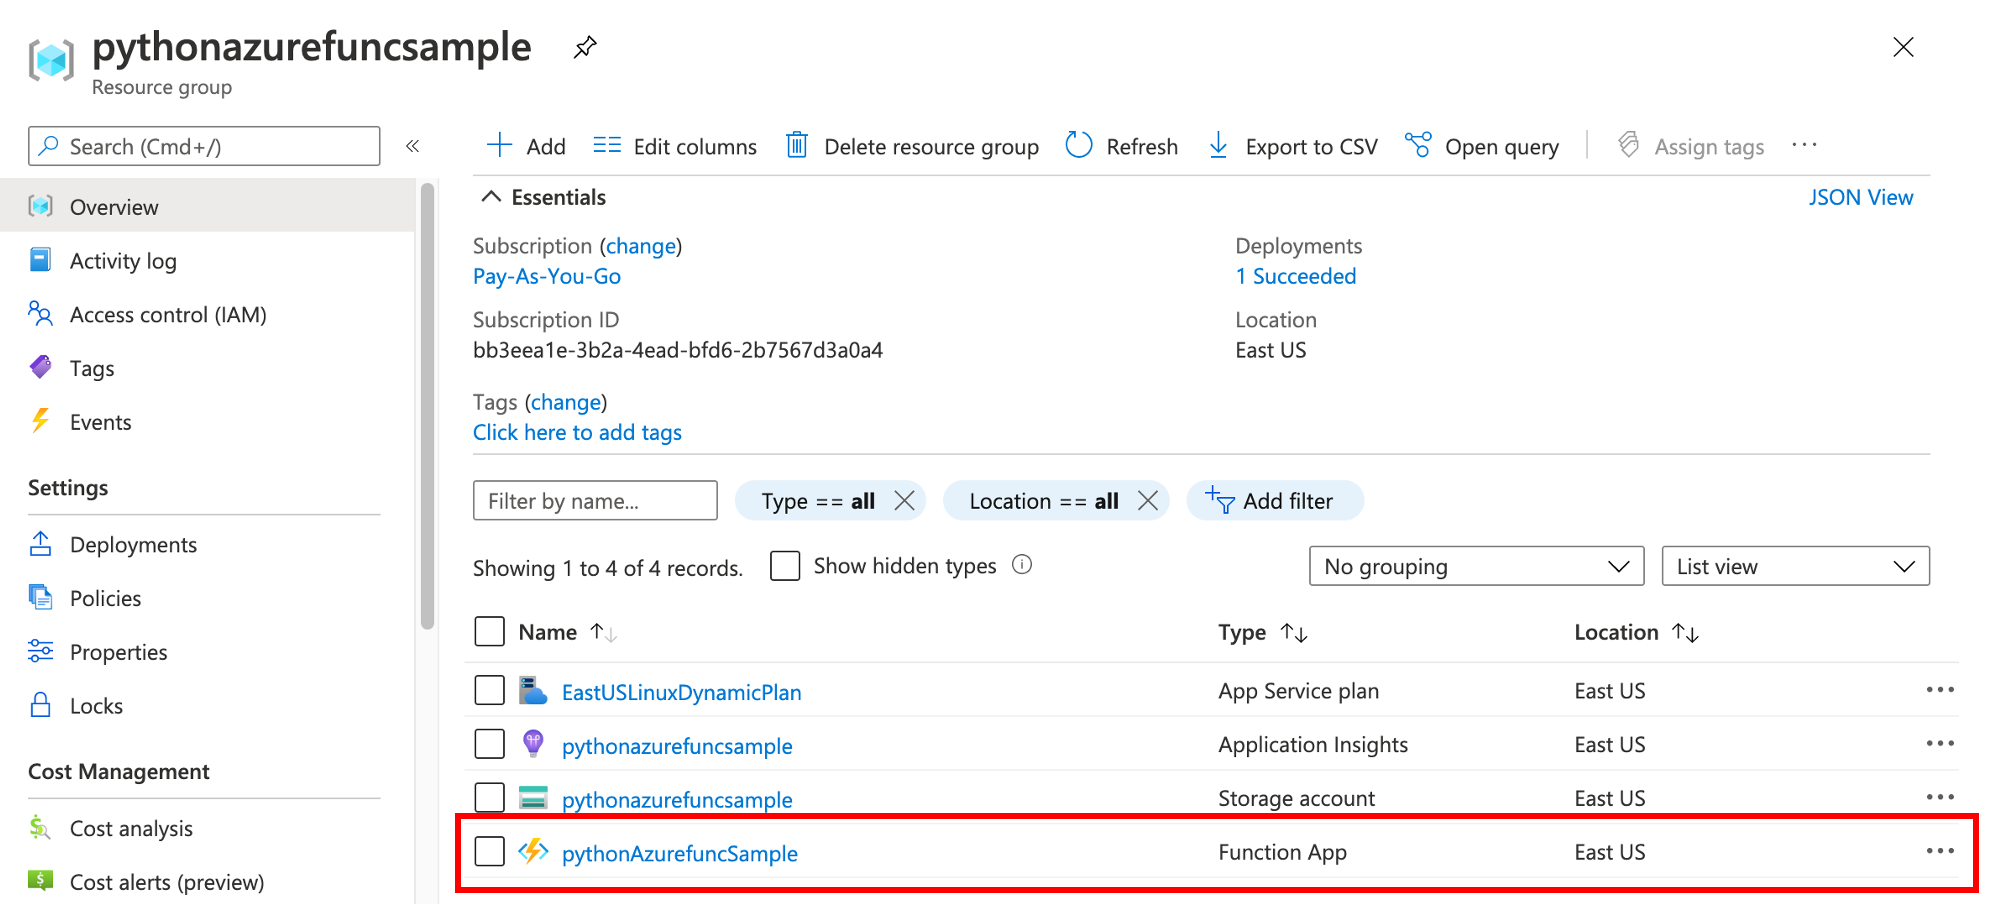
- Browse to your list of resource groups and find your newly deployed Azure Function resources.
- Click on the resource group and then the function app within the resource group.
- You will be redirected to the Overview page for your function app. Here you can access all the resources relating to your function app.
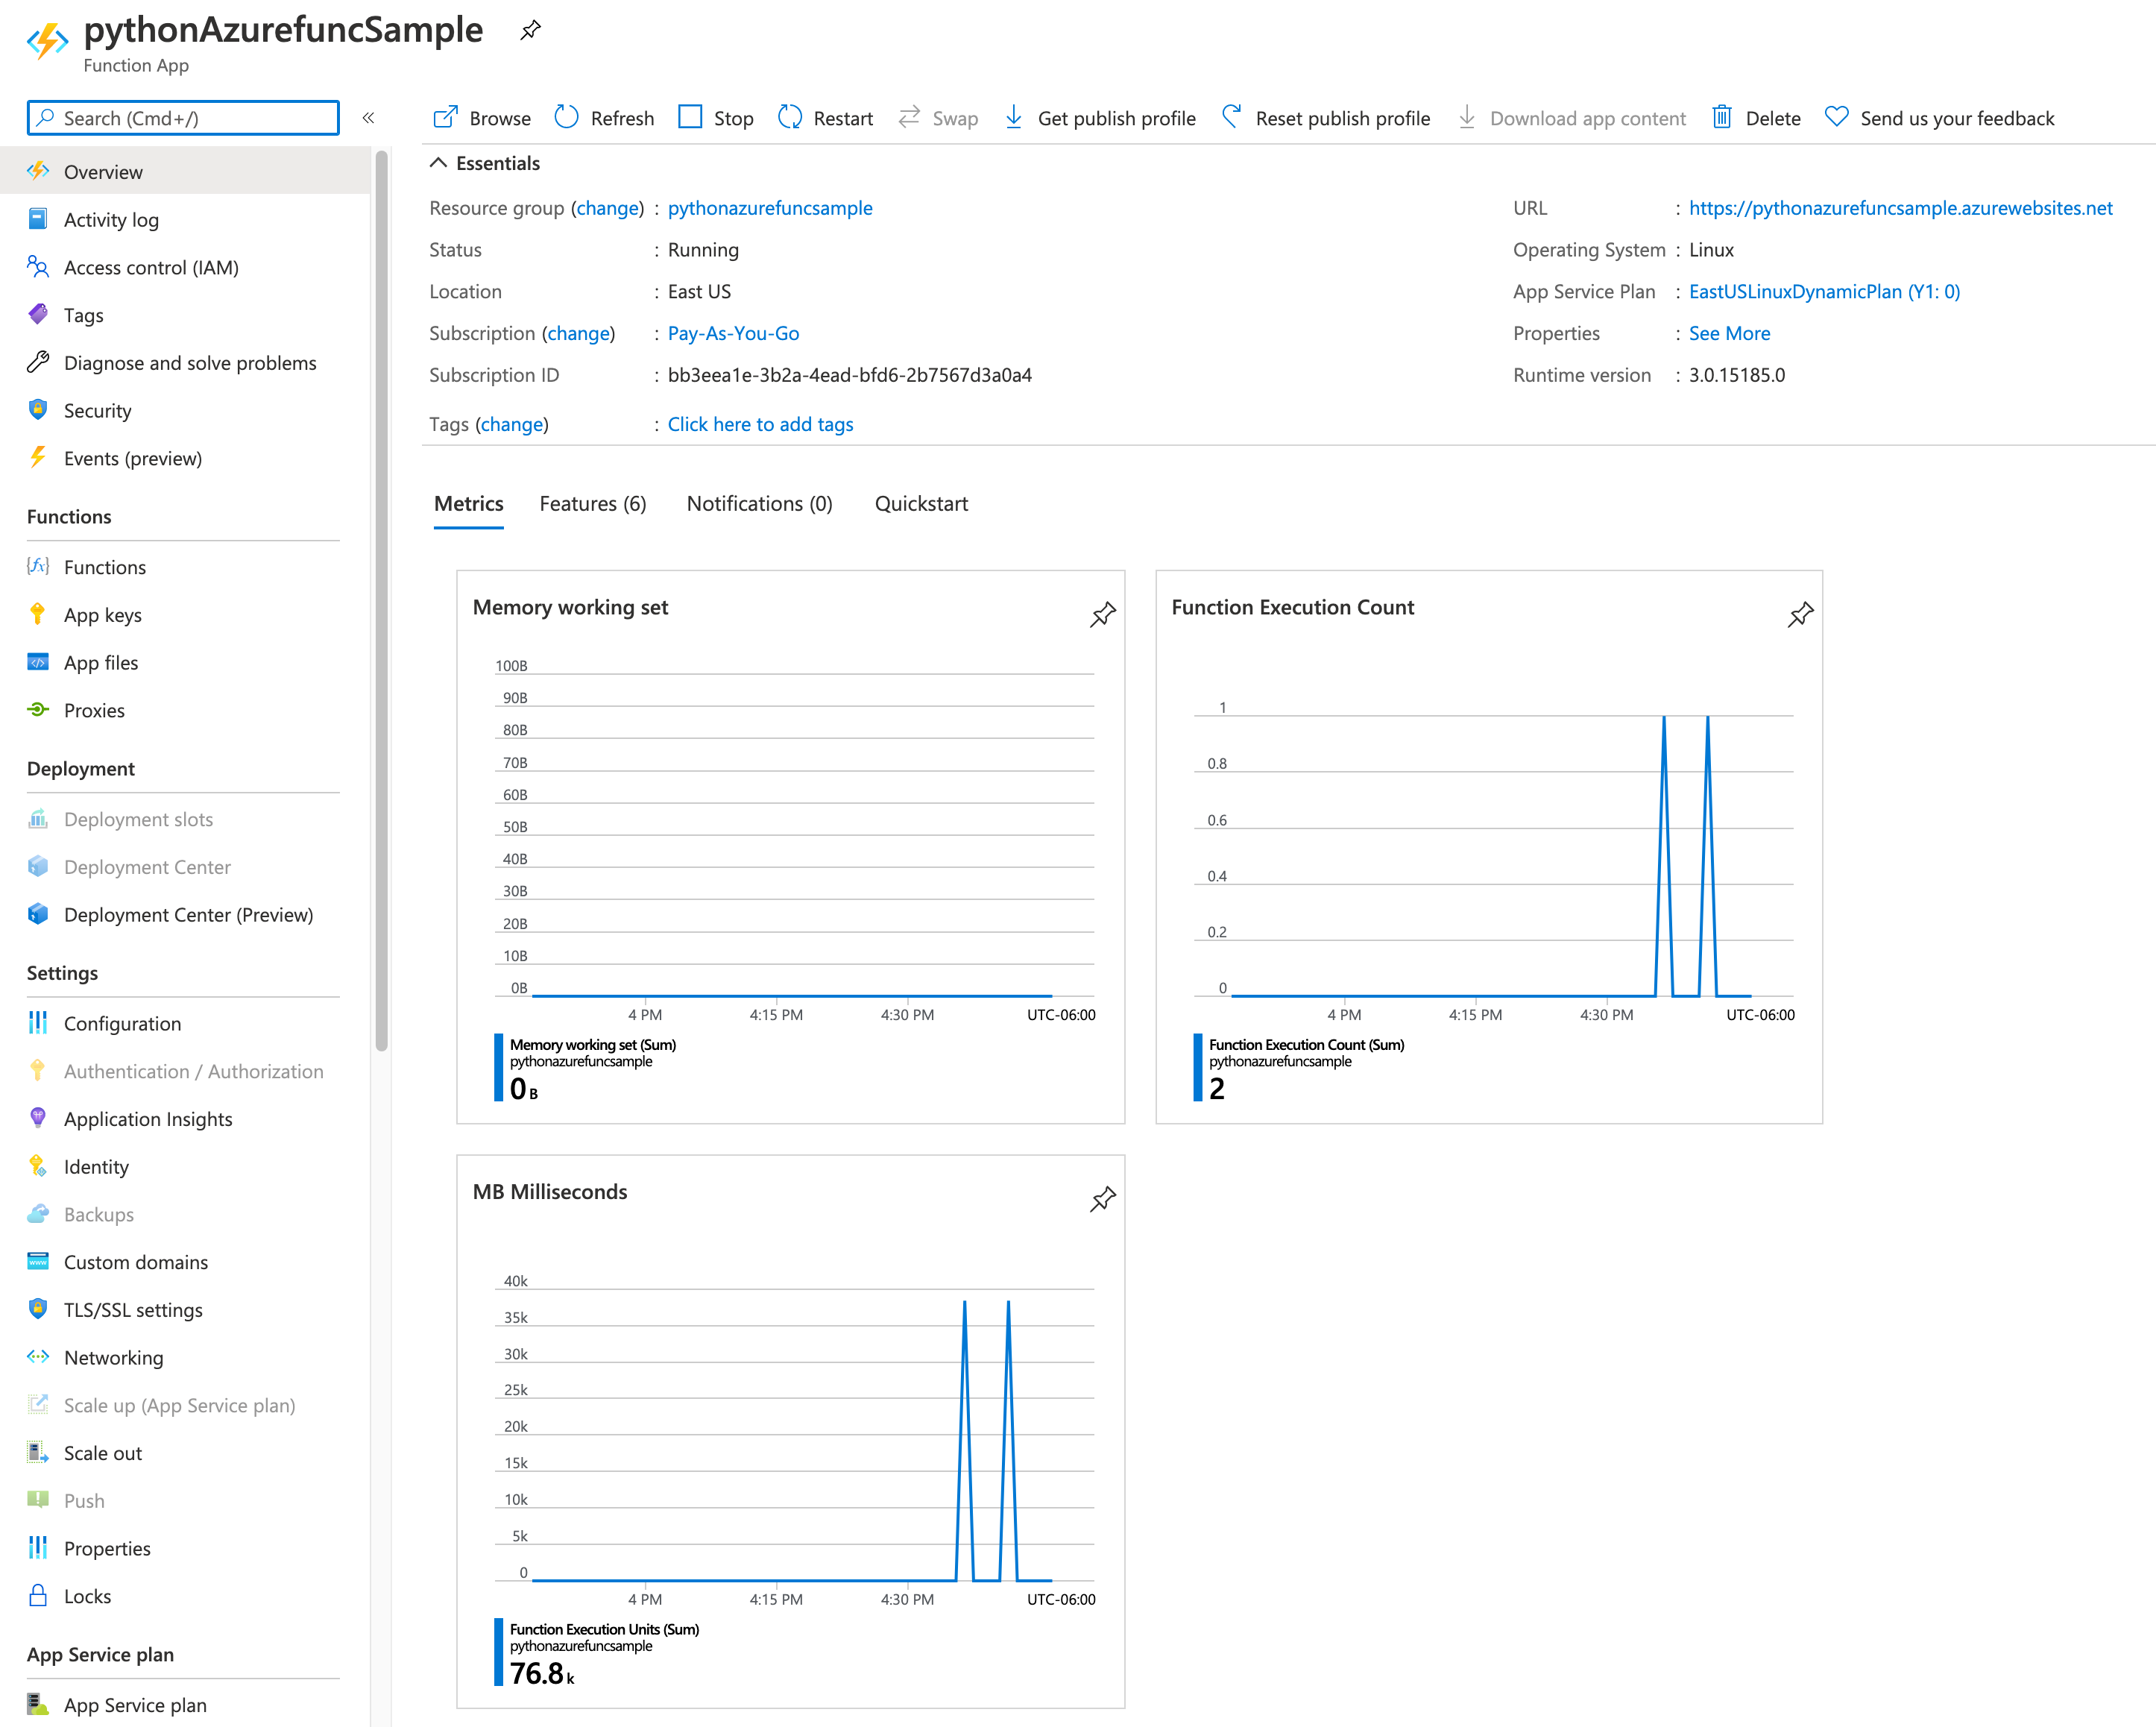
- Click Functions in the left hand navigation pane to view the functions you have deployed.

- Click the function you deployed in the previous section.

- Click Code + Test in the left hand navigation pane.
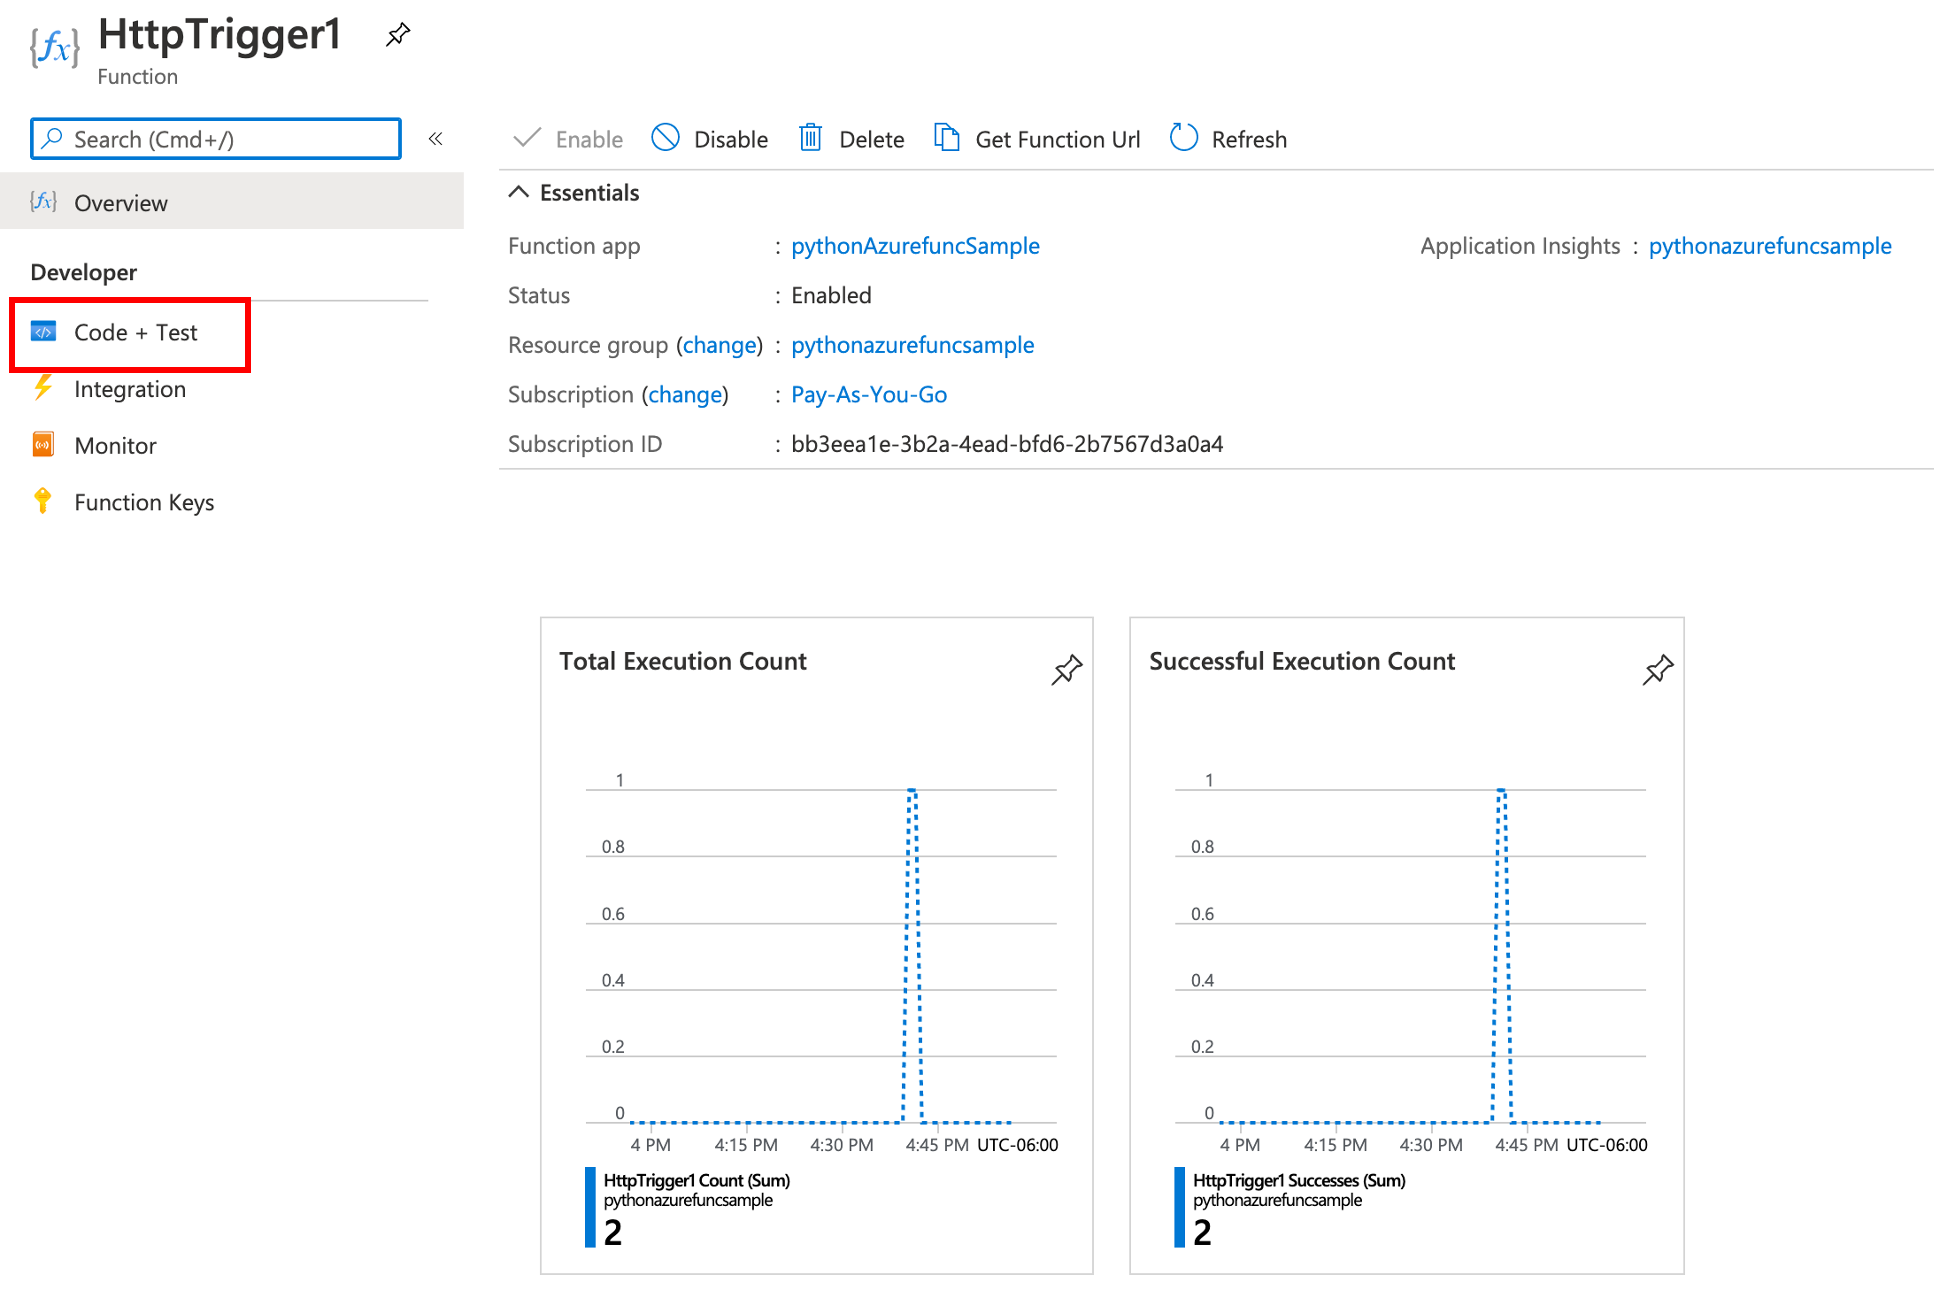
- This screen allows you view your function app code as well as test the function. To test the function:
Click Get Function URL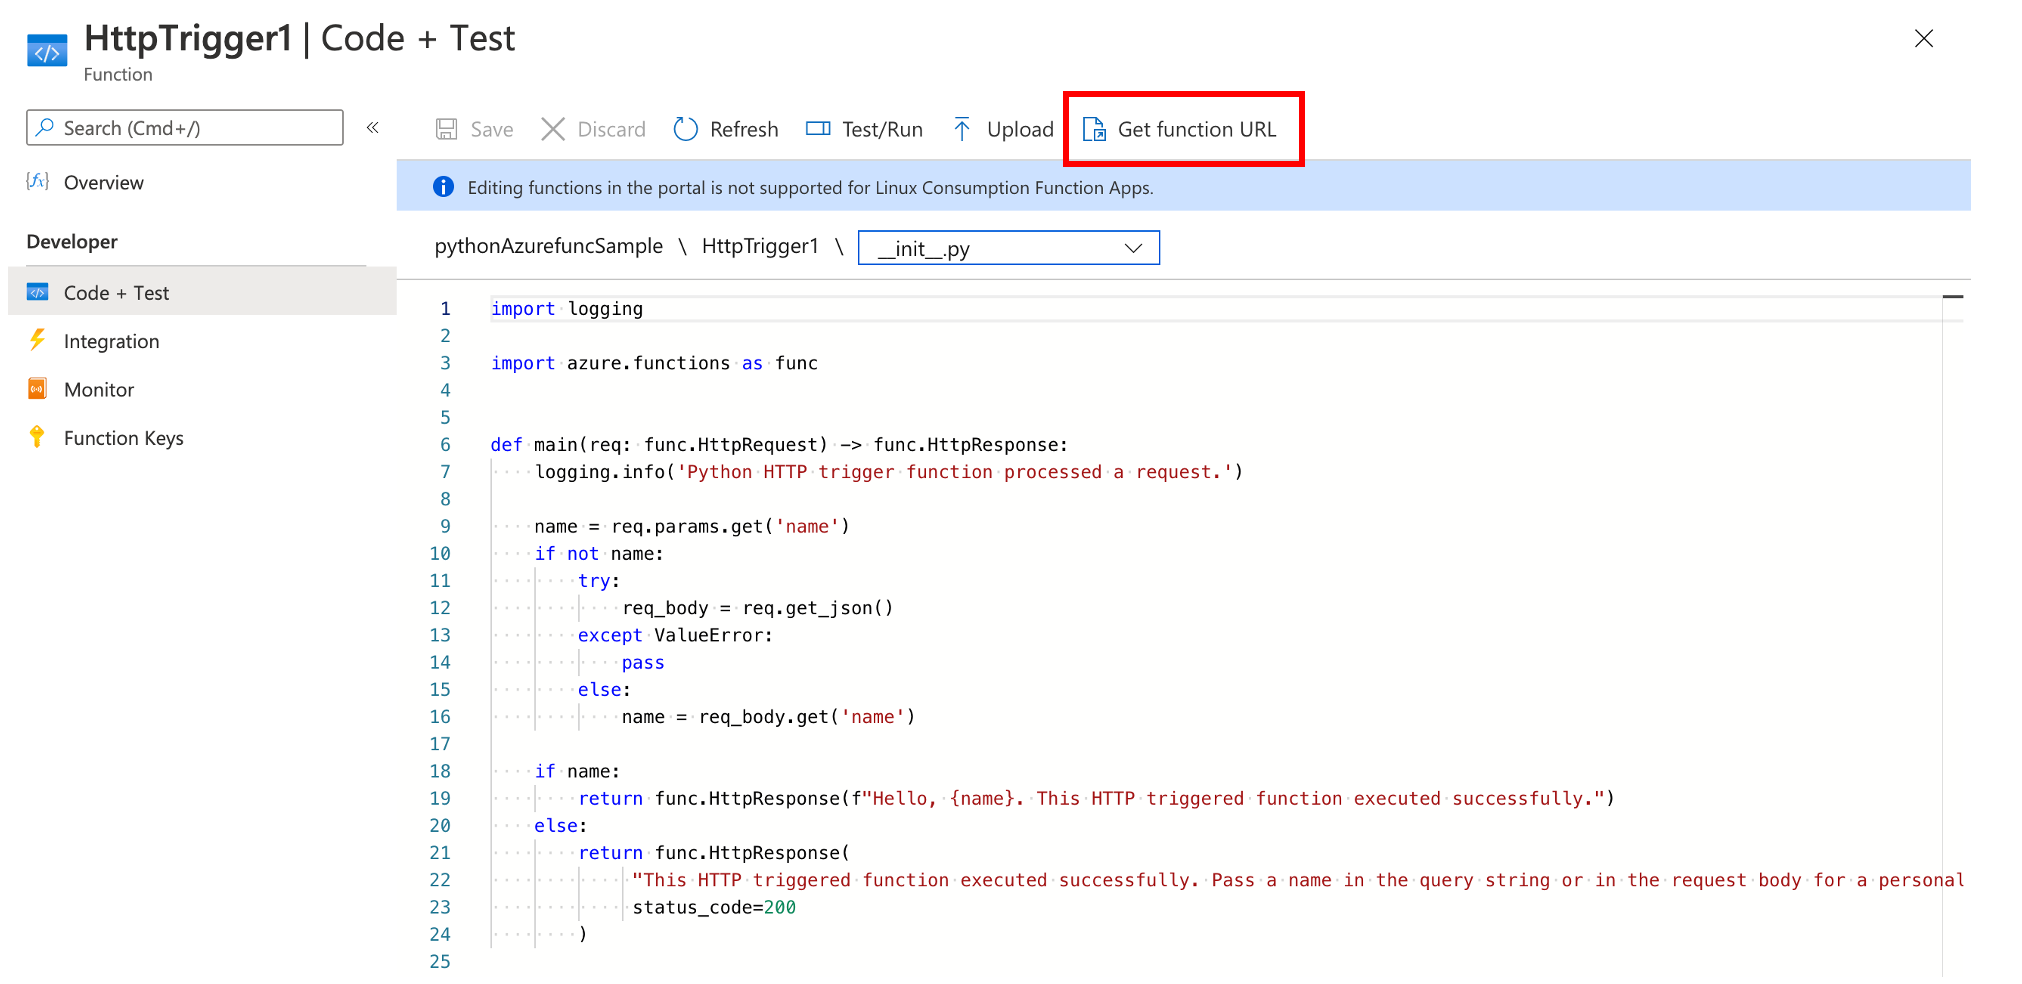
Copy the URL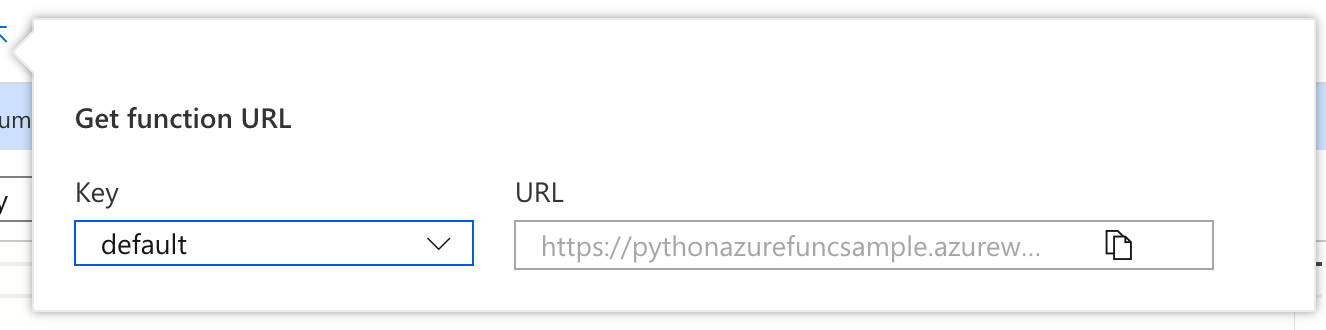
Paste it into a browser
- To verify your function is working correctly in Azure, you can append a ampersand, the name parameter and your name to the URL as shown below:
https://pythonazurefuncsample.azurewebsites.net/api/HttpTrigger1?code=b20kb9sWVa5IuqGw23Yf7yFbFEOMibEh65uiZRdYiANuezD6xXeDdw==&name=Dave
- It’s a good idea to clean up any resources related to your function app to avoid any unnecessary charges. You can do this by deleting the resource group created for this application either in the portal or by running the following command in Azure CLI.
az group delete -n <your-resource-group-name>
If you’re interested in learning more about using the Azure Functions, check out the Microsoft Documentation as well as Microsoft Learn for additional details and tutorials.
Summary
In this blog post we created an Azure Function using Python on our local machine, tested it and then deployed it to Azure.
Thank you for reading!
