Recently I needed to create a custom virtual machine (VM) image in Azure. The Azure Marketplace offers many different templates for operating system (OS) deployments, but sometimes there are situations where you may want to create your own custom image with specific changes to the OS or VM. In this blog post, I will demonstrate how to create a custom VM image.
- Create a VM in the Azure portal and configure (for demo purposes I’m using Windows Server 2019 Datacenter)
- Make any changes to customize the VM. In this specific instance I installed IIS and configured this VM to be a web server
- Once you’ve completed customizing the VM, open Windows File Explorer (or use the command line) and browse to:
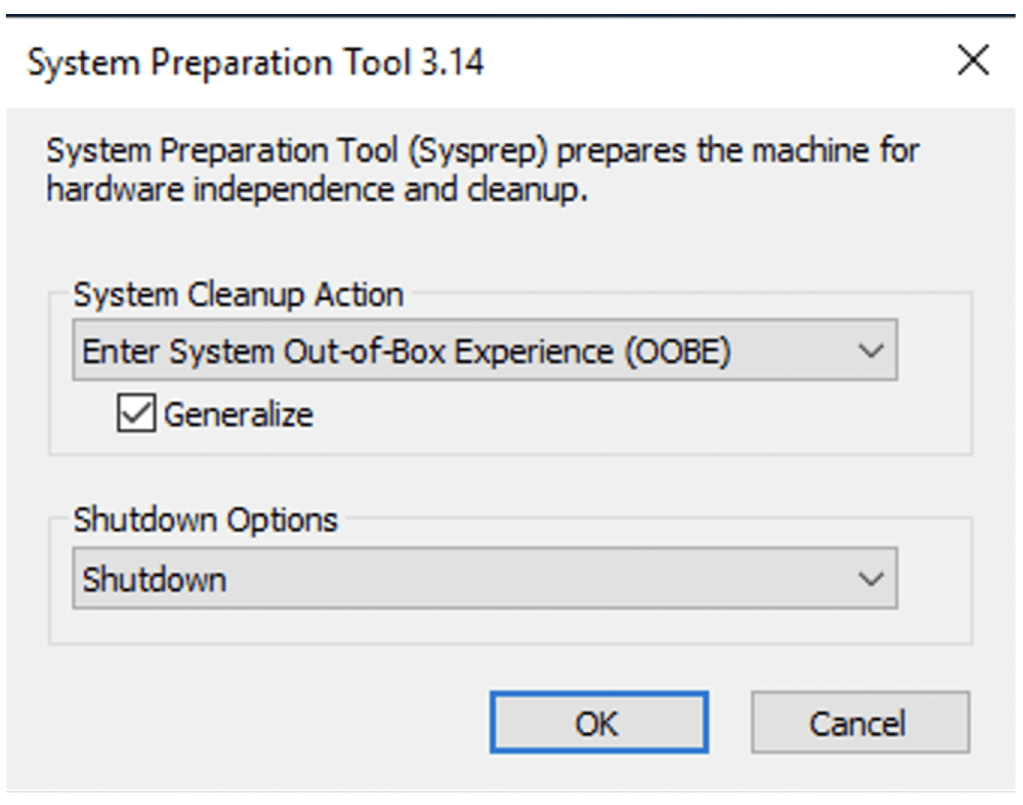
C:\Windows\System32\Sysprep - Run the sysprep application

- In the System Preparation Tool Window, select the following:
- Select ‘System Out-of-Box Experience (OOBE)’ from the System Cleanup Action dropdown
- Check the ‘Generalize’ checkbox
- Select ‘Shutdown’ from the Shutdown Options dropdown
- Click ‘OK’
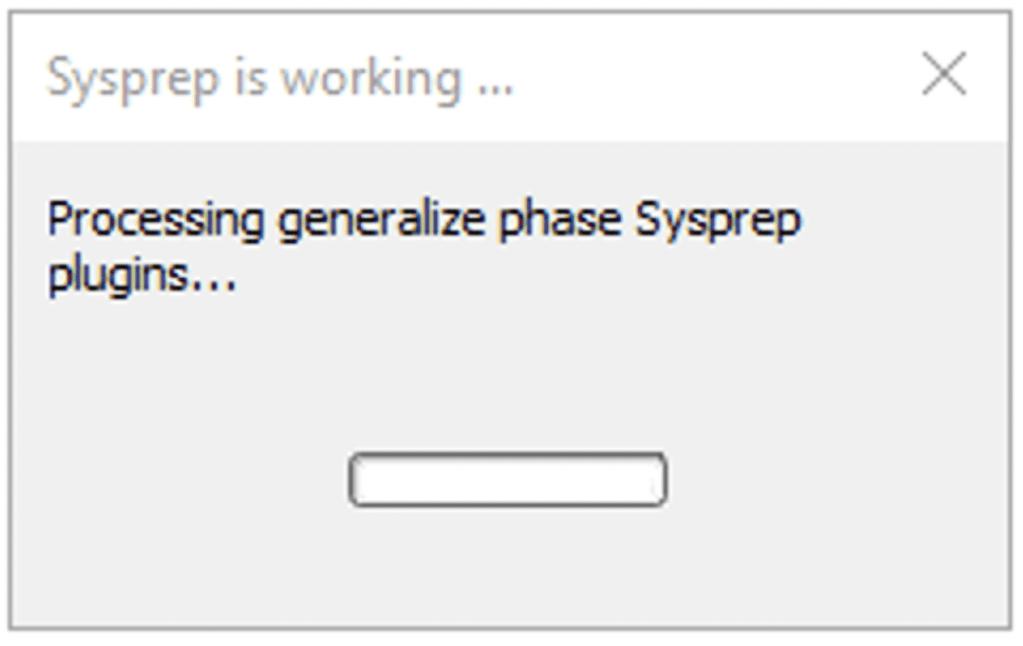
- Sysprep will process and shutdown the VM
- In the Azure portal, open the Azure CLI and enter the following command to stop the VM
az vm stop --resource-group resource-group-name --name vm-name
This can also be done with Azure Powershell.
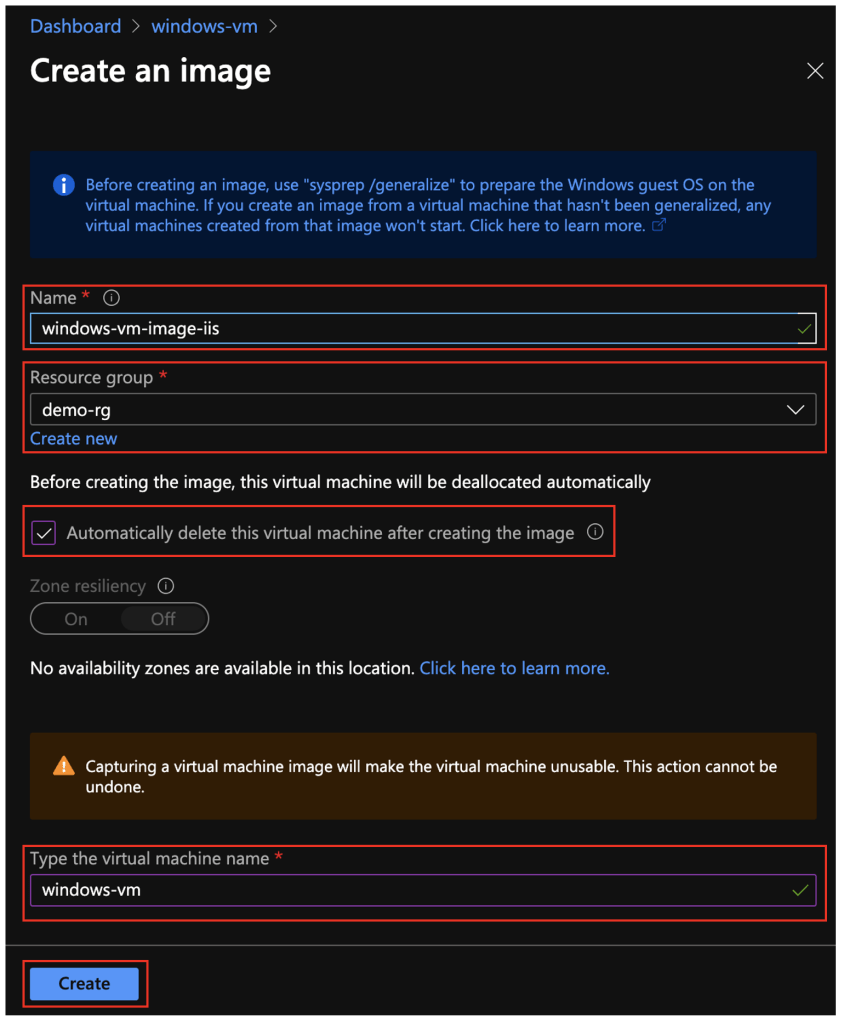
PS C:\> Stop-AzVM -ResourceGroupName "demo-rg" -Name "windows-vm"- On the VM properties page, click the ‘Capture’ button

- On the ‘Create an Image’ flyout, complete the following:
- Enter image name
- Select or create a new resource group to save VM image in
- Check ‘Automatically delete this virtual machine after creating the image’
- Enter VM Name
- Click ‘Create’ at the bottom of the screen
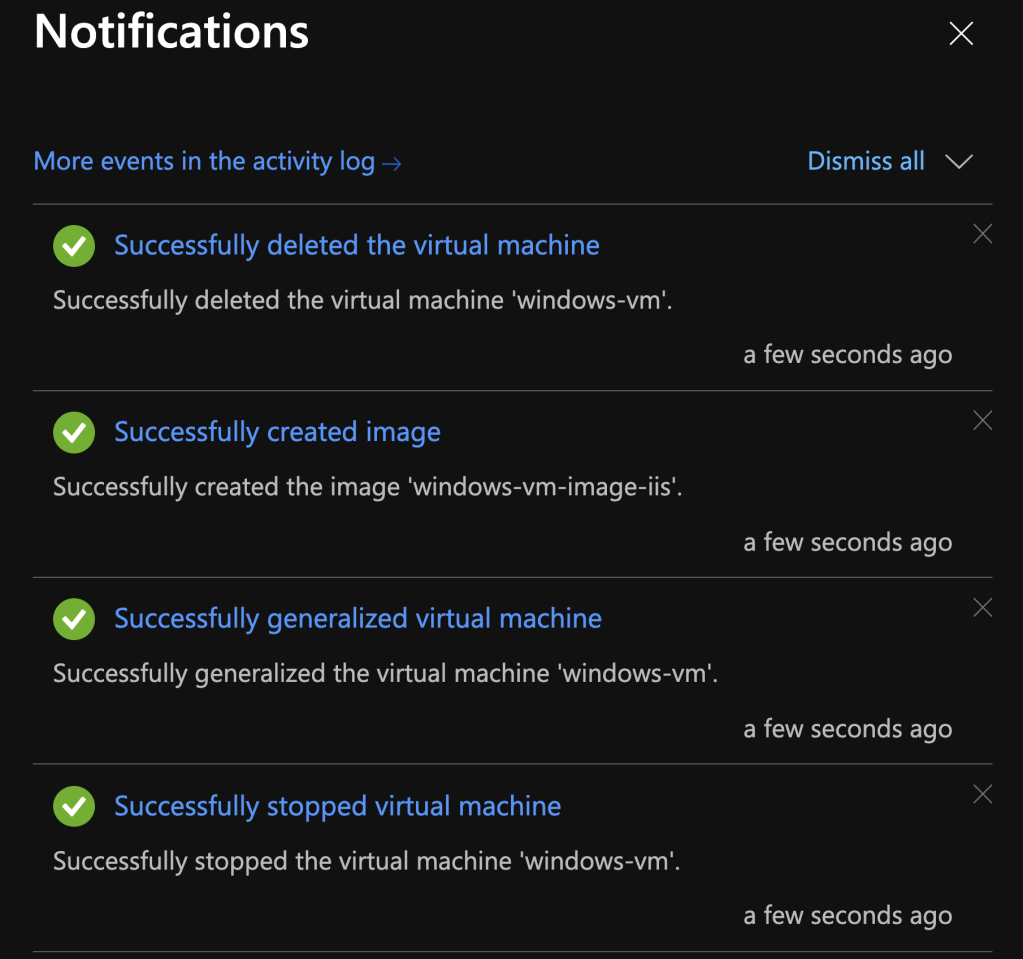
- When the image is created, notifications will appear letting you know the process is complete
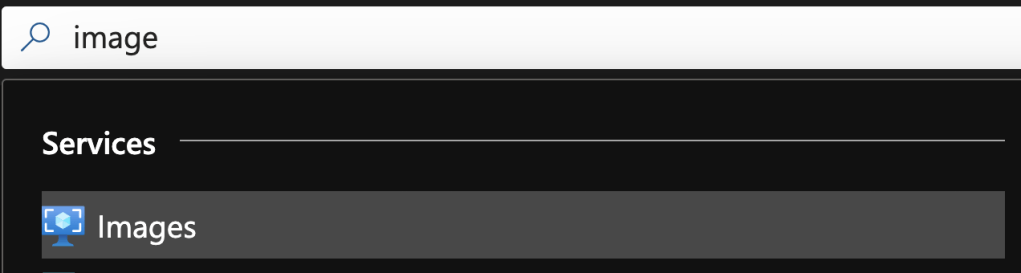
- Search for ‘Images’ in the search bar.
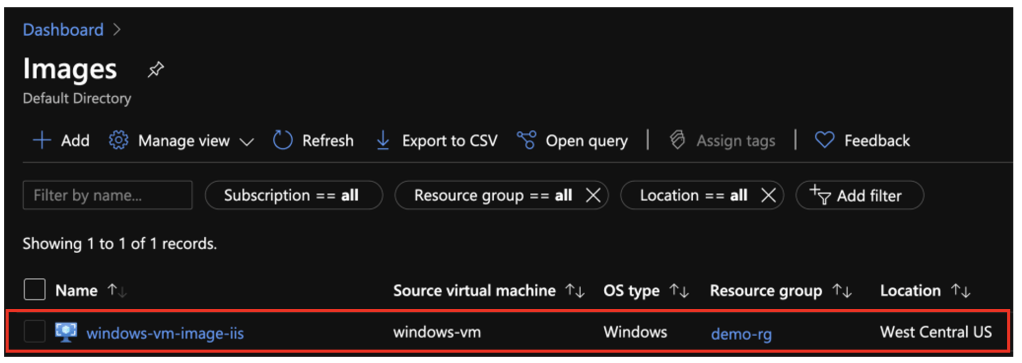
- The VM image will be listed in the Images directory. To create a new VM based on this image, click on the VM.
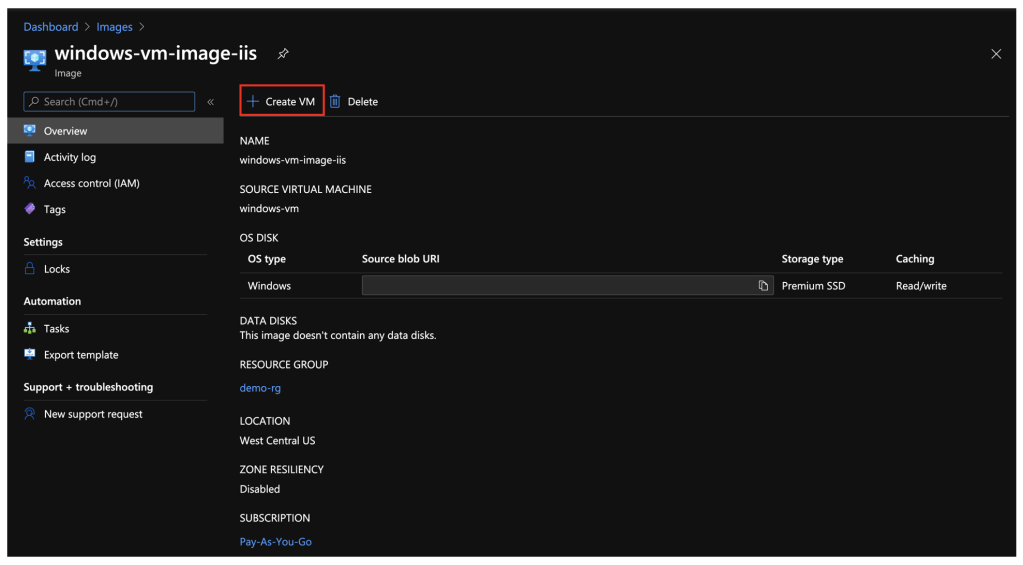
- Click ‘Create VM’
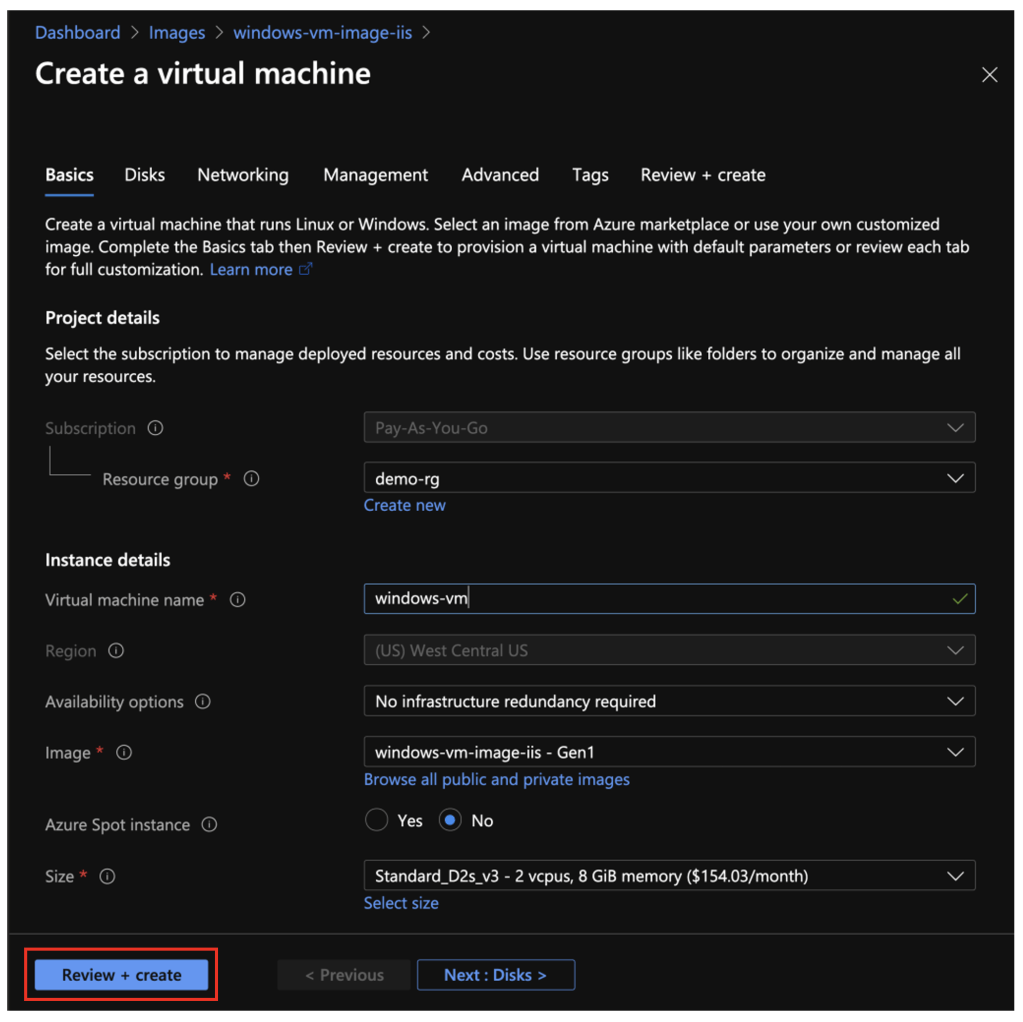
- Configure the VM for your specific needs and click ‘Review + create’
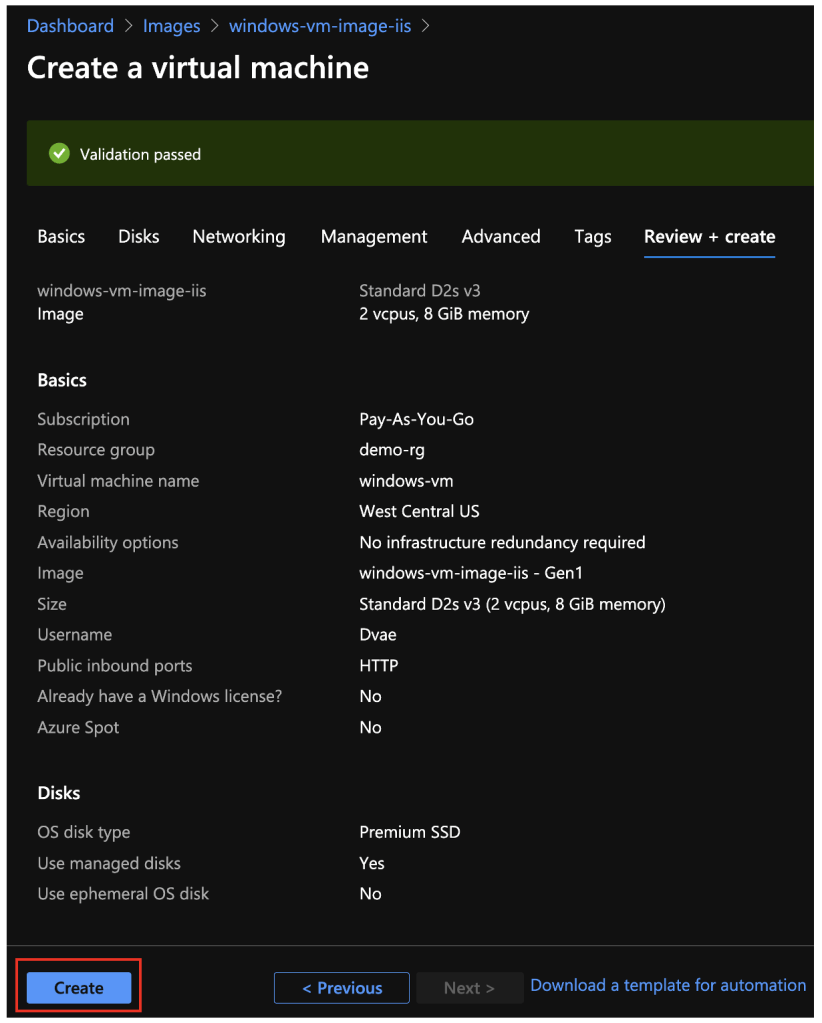
- Click ‘Create’ to deploy the VM image to Azure
Summary
In this blog post I discussed how to take an existing Azure VM and turn it into a custom image.
Thank you for reading!
