Security is critical for organizations of all sizes and being able to have visibility across all systems, devices and applications is becoming more important everyday. Azure Sentinel provides a single solution for threat detection, alerting, security analytics and response management across devices, applications and other cloud providers.
How Does Azure Sentinel work?
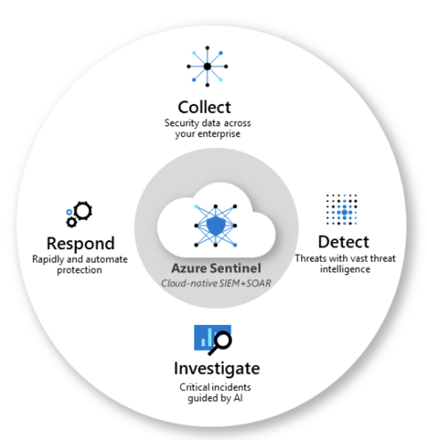
- Azure Sentinel collects data across all users, devices, applications, and infrastructure including on-premises and other cloud providers.
- Azure Sentinel uses machine learning to detect threats and identify suspicious activities.
- When Azure Sentinel detects unusual behavior or suspicious activity it will analyze the data and alert the appropriate team members.
- Using built-in orchestration and task automation, Azure Sentinel can respond to common threats without human intervention.
SIEM and SOAR
Microsoft describes Azure Sentinel as a ‘scalable, cloud-native, security information event management (SIEM) and security orchestration automated response (SOAR) solution’, but what is a SEIM and SOAR?
Security information event management (SIEM) solutions collect log data created by sources such as servers, applications, network appliances, IoT devices etc. and bring it together in a centralized platform. The data is then processed and correlated into relevant categories such as successful/failed logins, system policy changes, malware activities, etc. The SIEM then applies analytics to the data to visualize and detect threats, discover trends and generate alerts based on rules that indicate a security event.
Security orchestration automated response (SOAR) solutions allow organizations to automate security operations based on the alerts raised by the SIEM. This is done by a combination of machine learning and human interaction to identify and prioritize incident response activities. Workflows are created that define incident response procedures for activities such as quarantining phishing emails, case and ticket management and automating vulnerability management.
Configuring Azure Sentinel
Prerequisites
- Active Azure Subscription
Setup
- Login to the Azure Portal
- Search for ‘Sentinel’ in the Search Bar
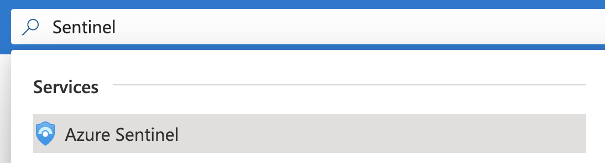
- Select Azure Sentinel
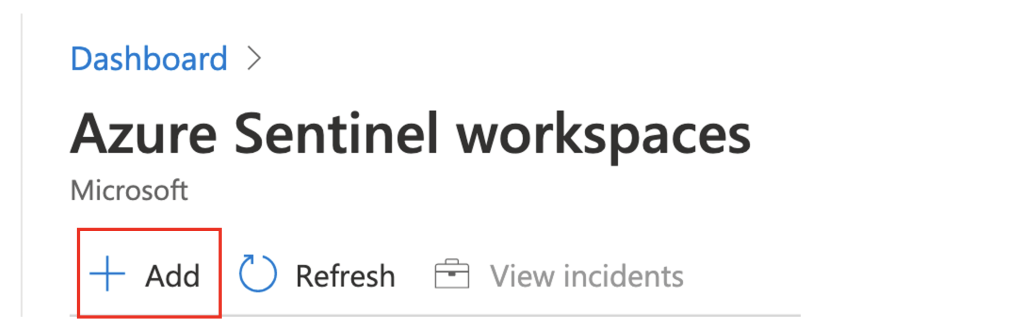
- Click ‘Add’ on the Azure Sentinel workspaces blade.
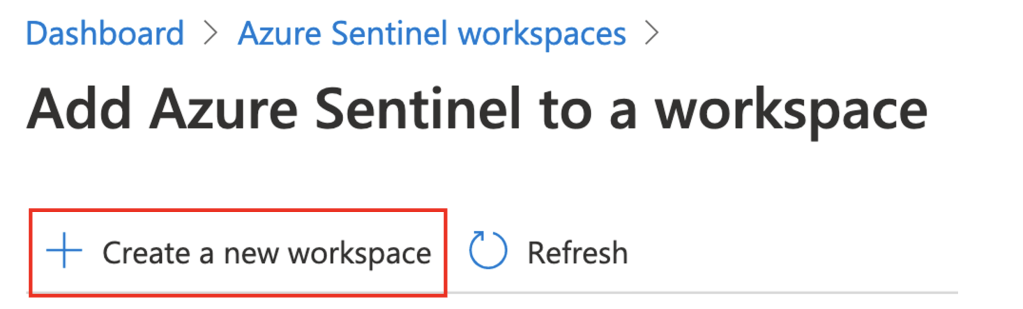
- Click ‘Create a new workspace’.
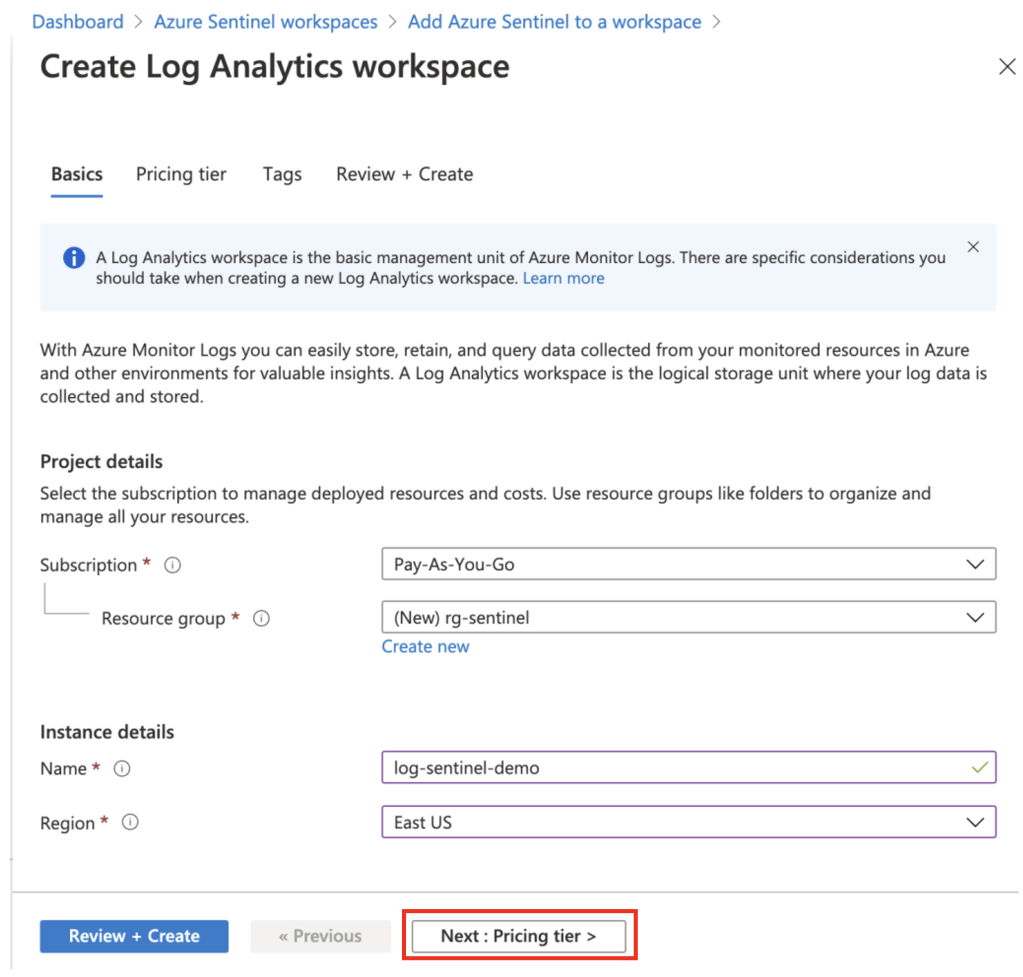
- Fill out Project details and Instance details sections on the Create Log Analytics workspace blade.
- Click the Next : Pricing Tier > button.
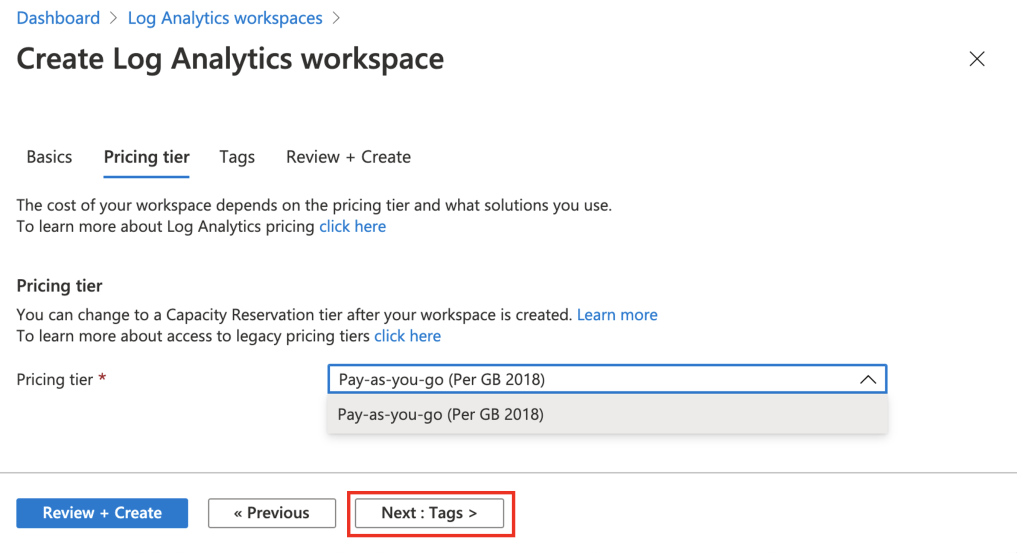
- Only one pricing tier is currently available. This can be changed after the workspace is created.
- Click the Next : Tags > button
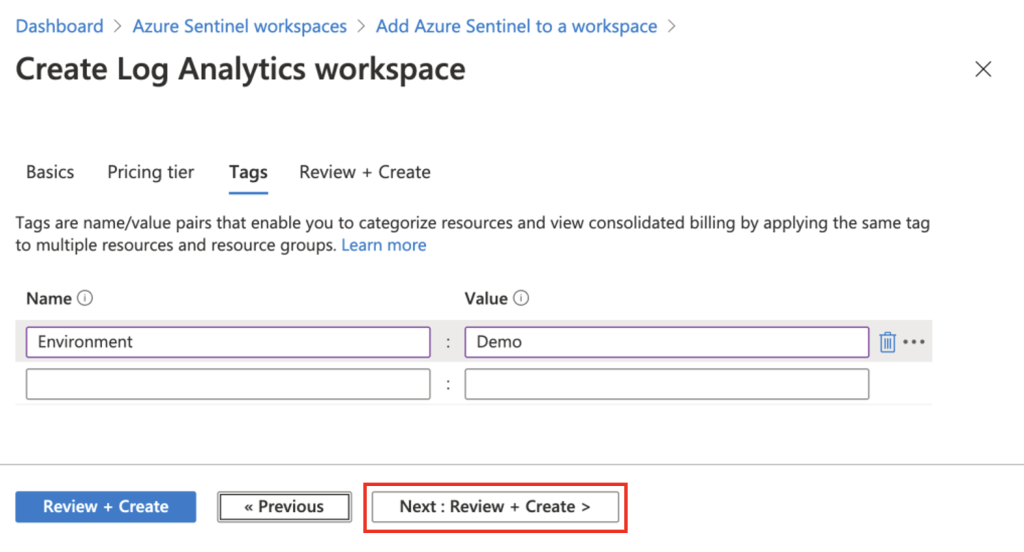
- Add any relevant tags and click the Next : Review + Create > button
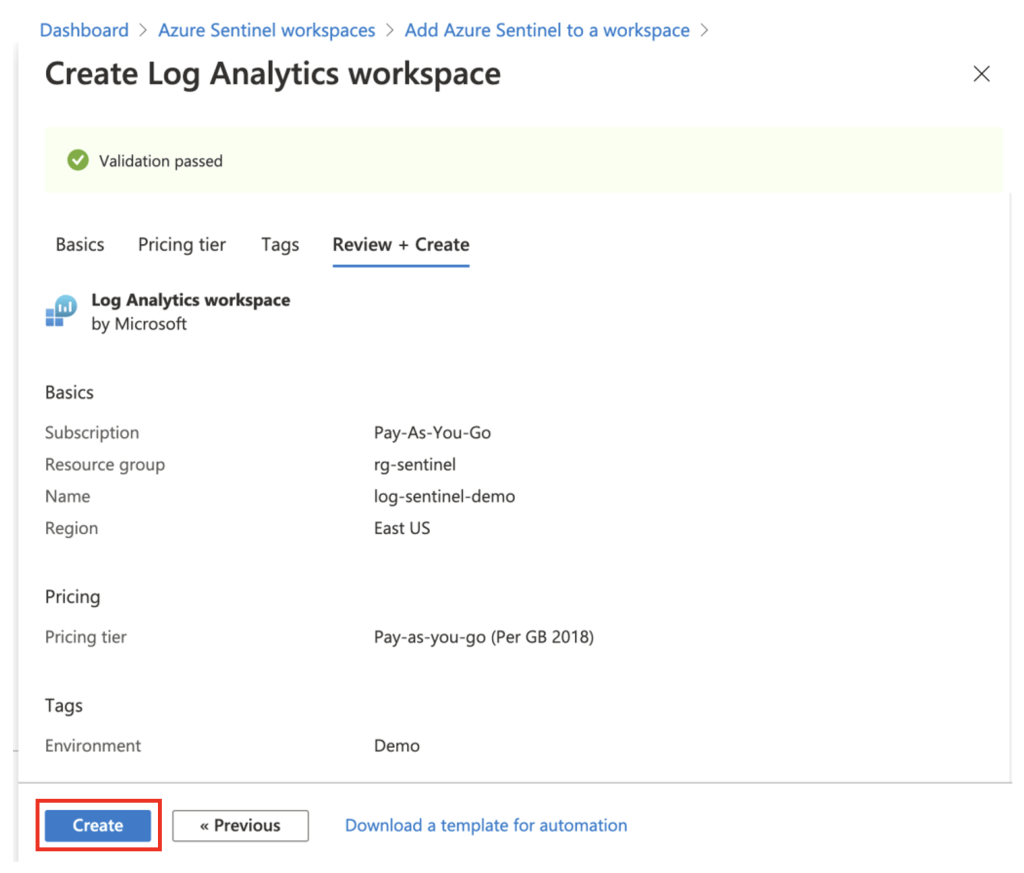
- Click the Create button
- When the Log Analytics workspace is created, add Azure Sentinel by clicking the Add button.

- Azure Sentinel will be added to the Log Analytics workspace.
Connecting a Data Source
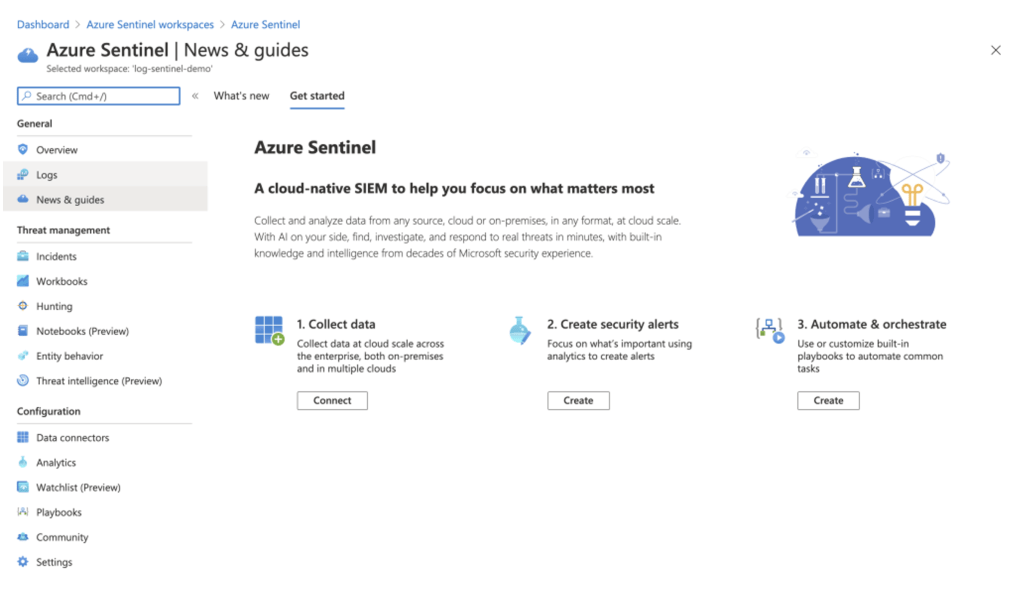
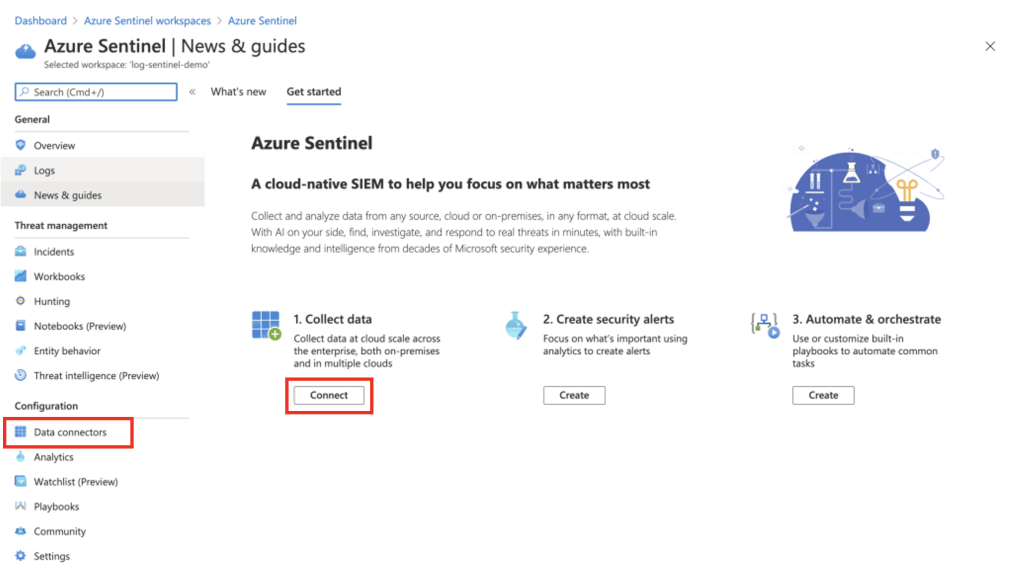
- To get started connecting data sources, click the Connect button. Alternatively, Data connectors can be accessed under the Configuration subheading.
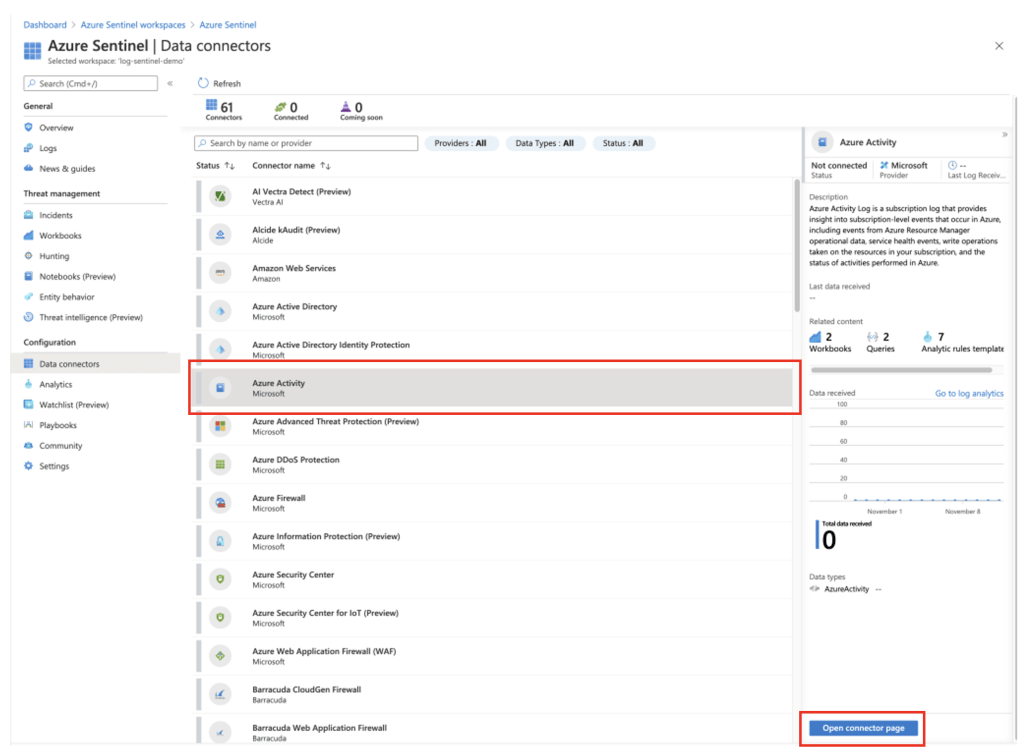
- To start collecting data from a data source, click the specific data connector to configure. For this example, I’ll select Azure Activity. Azure activity will log any subscription level events across your Azure subscription. Once the data source has been selected, click the Open connector page button.
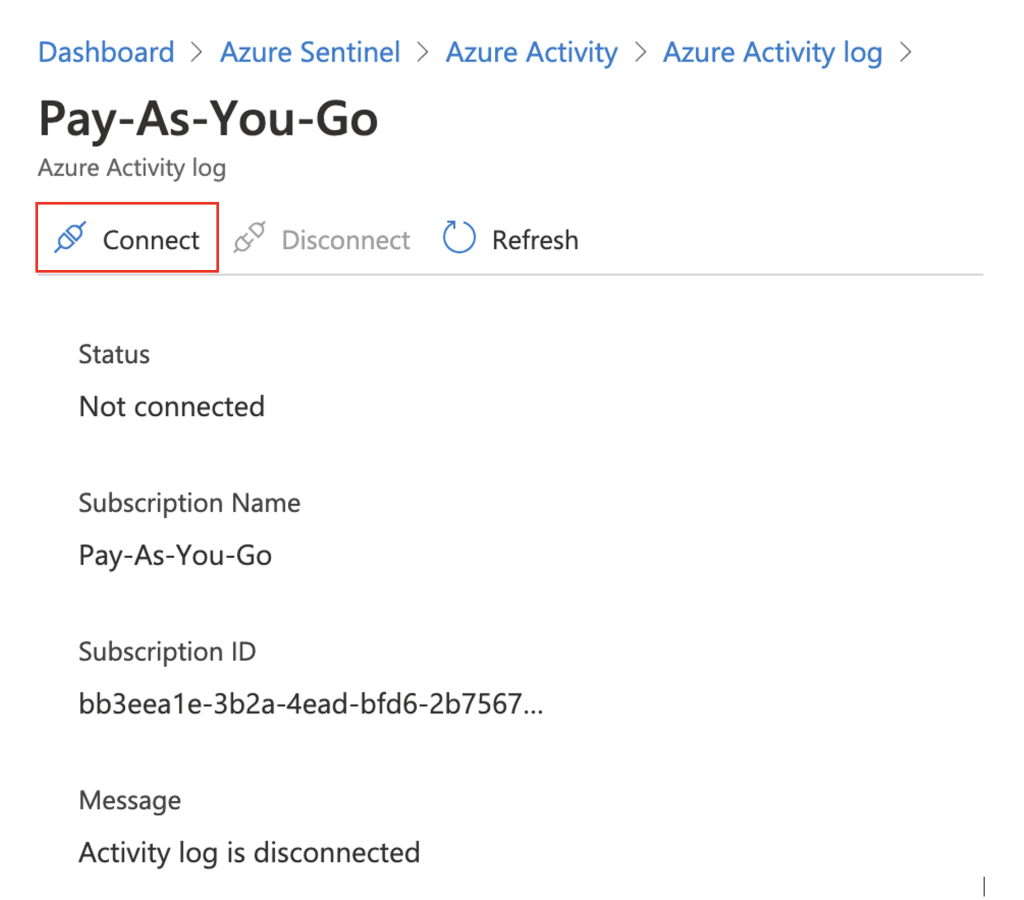
- Connect the Azure subscription to Azure Sentinel by clicking the Configure Azure Activity logs link in the Configuration section.

- Select the subscription to connect to Azure Sentinel.
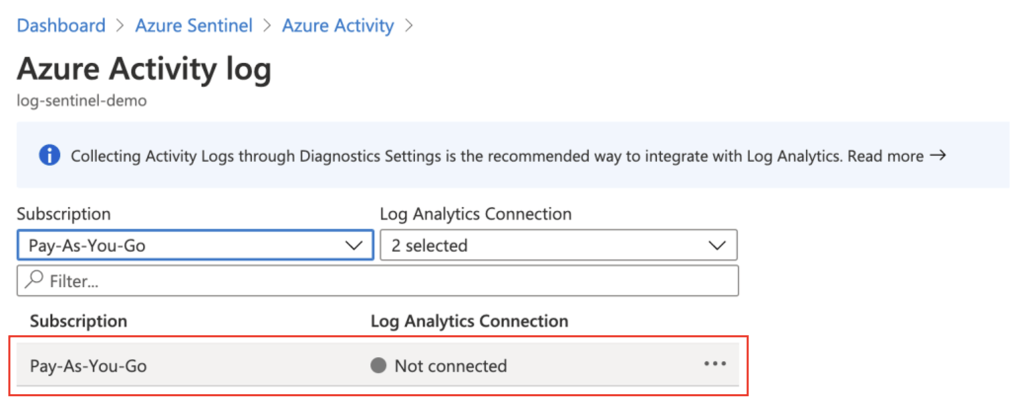
- Click Connect.
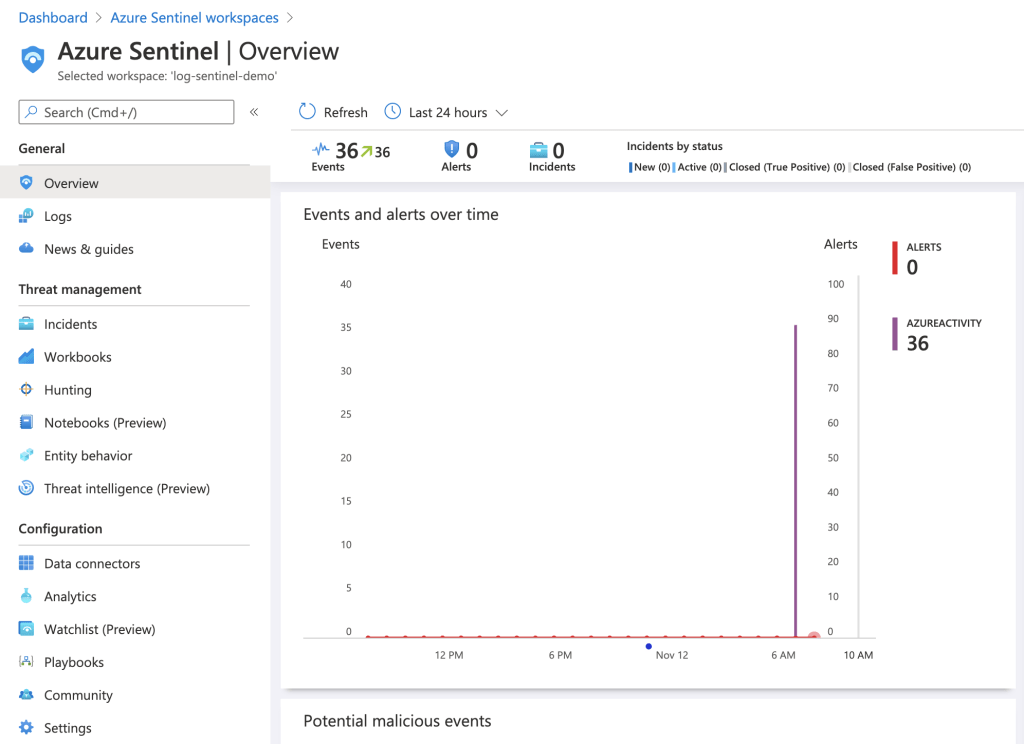
- After a period of time, events will begin appearing in the Overview blade
Summary
In this blog post I discussed what Azure Sentinel is and demonstrated how to setup and configure it. In my next post, I’ll look at the Kusto Query Language (KQL), workbooks and playbooks.
Thank you for reading!
