Traditionally, threat hunting has been a manual process in which security team members proactively search and analyze various data sources to detect and isolate potential threats. Azure Sentinel provides powerful search and query tools to proactively hunt for security threats across an organization’s data sources, helping you look for new anomalies that weren’t detected by your security apps. Azure Sentinel’s built-in hunting queries guide you into asking the right questions to find issues in the data you already have on your network.
Let’s get started hunting
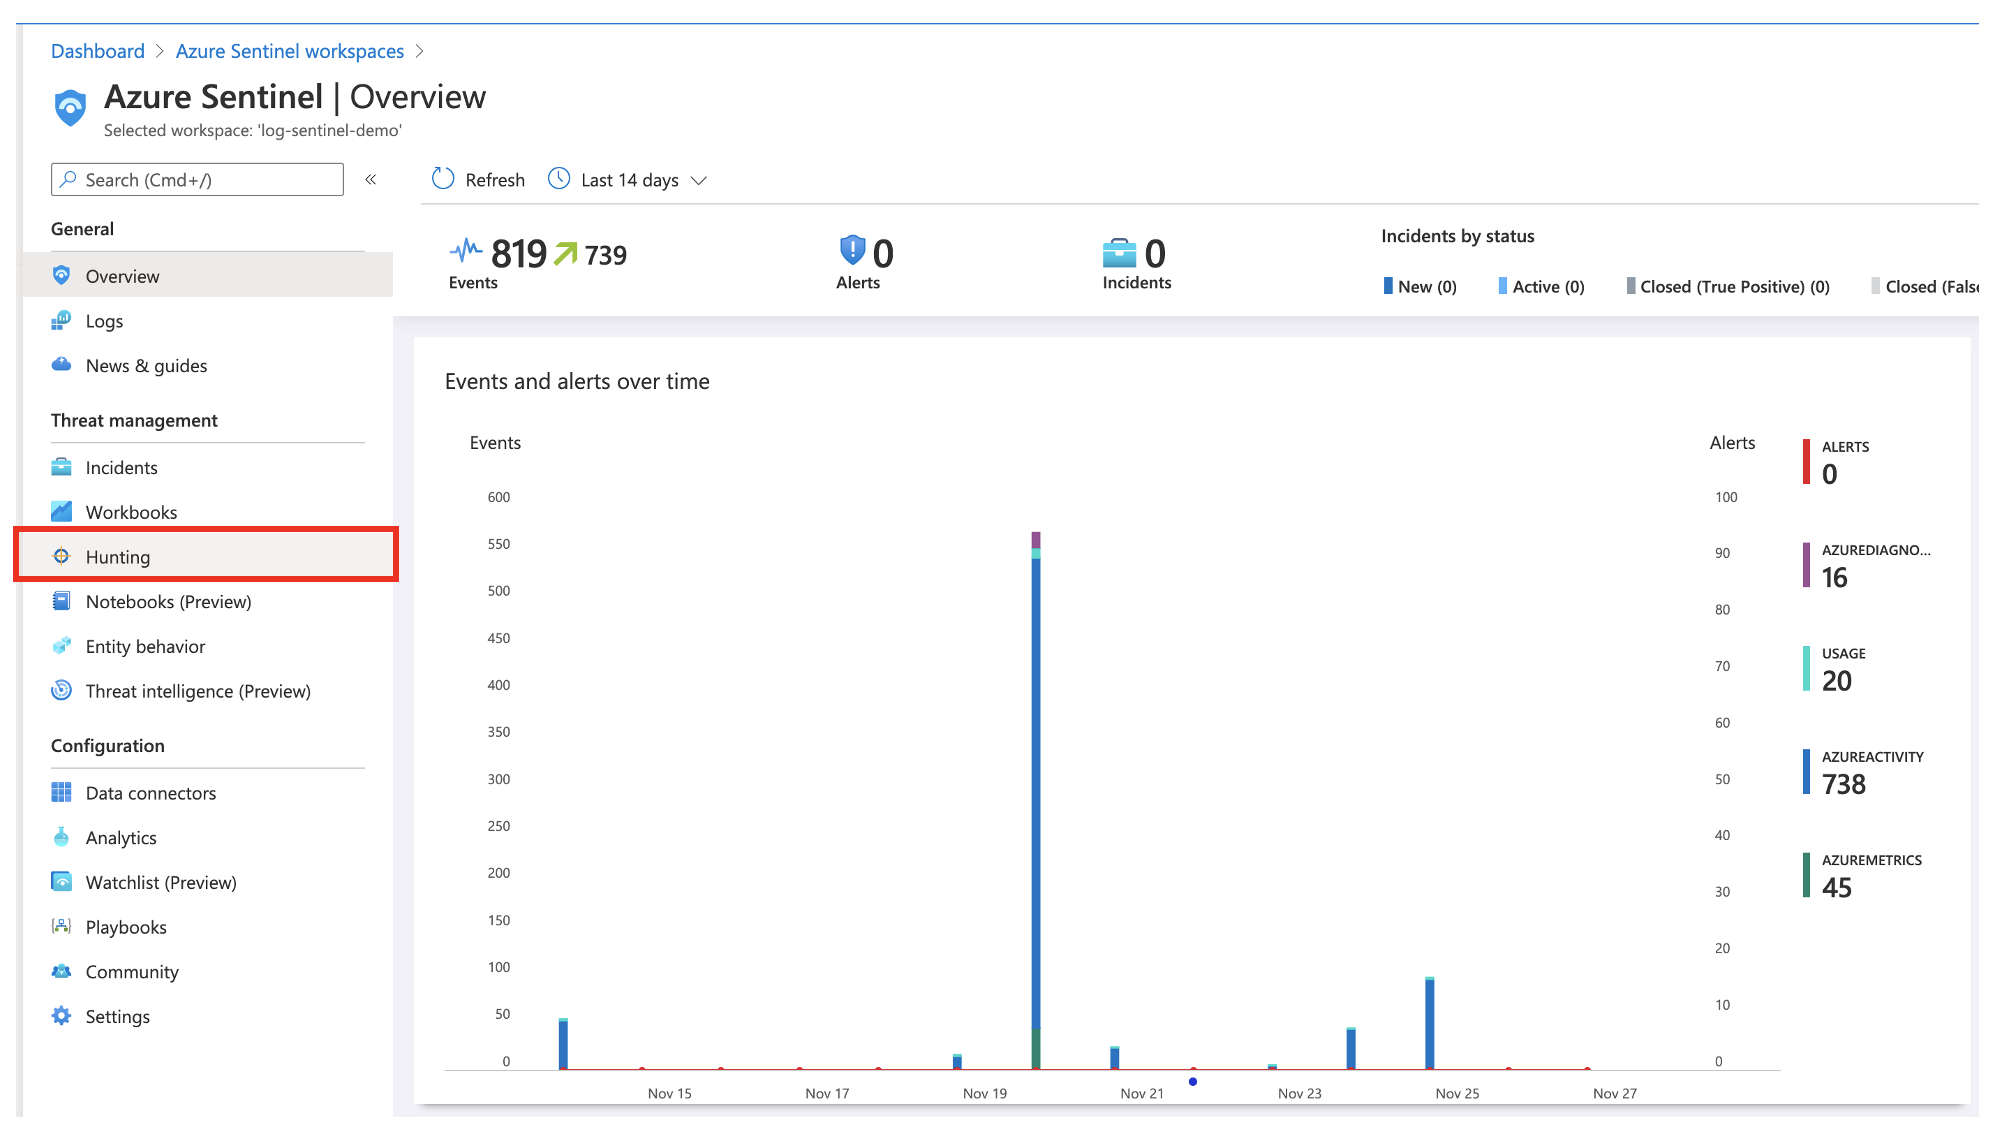
- Browse to the Azure Sentinel Portal and click Hunting.
- The Azure Sentinel Hunting page displays all the hunting queries written by Microsoft or any custom queries you have created or modified. Queries can be filtered by Favorites, Provider, Data Sources and Tactics.
Favorites are any queries you have starred.
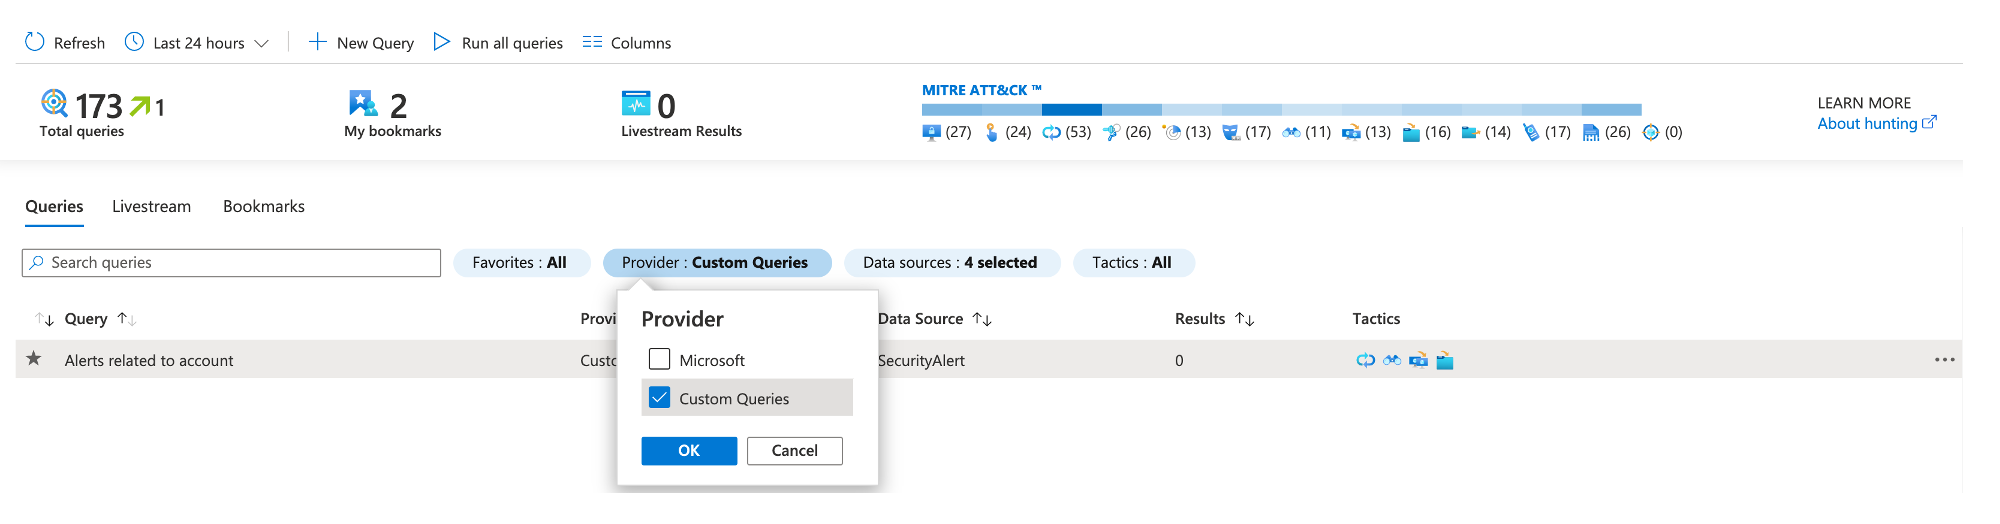
Provider allows you to filter by either a Microsoft query or a custom query.
Data Sources allows you to filter on a specific data source.
Tactics allows you to filter based on a tactic.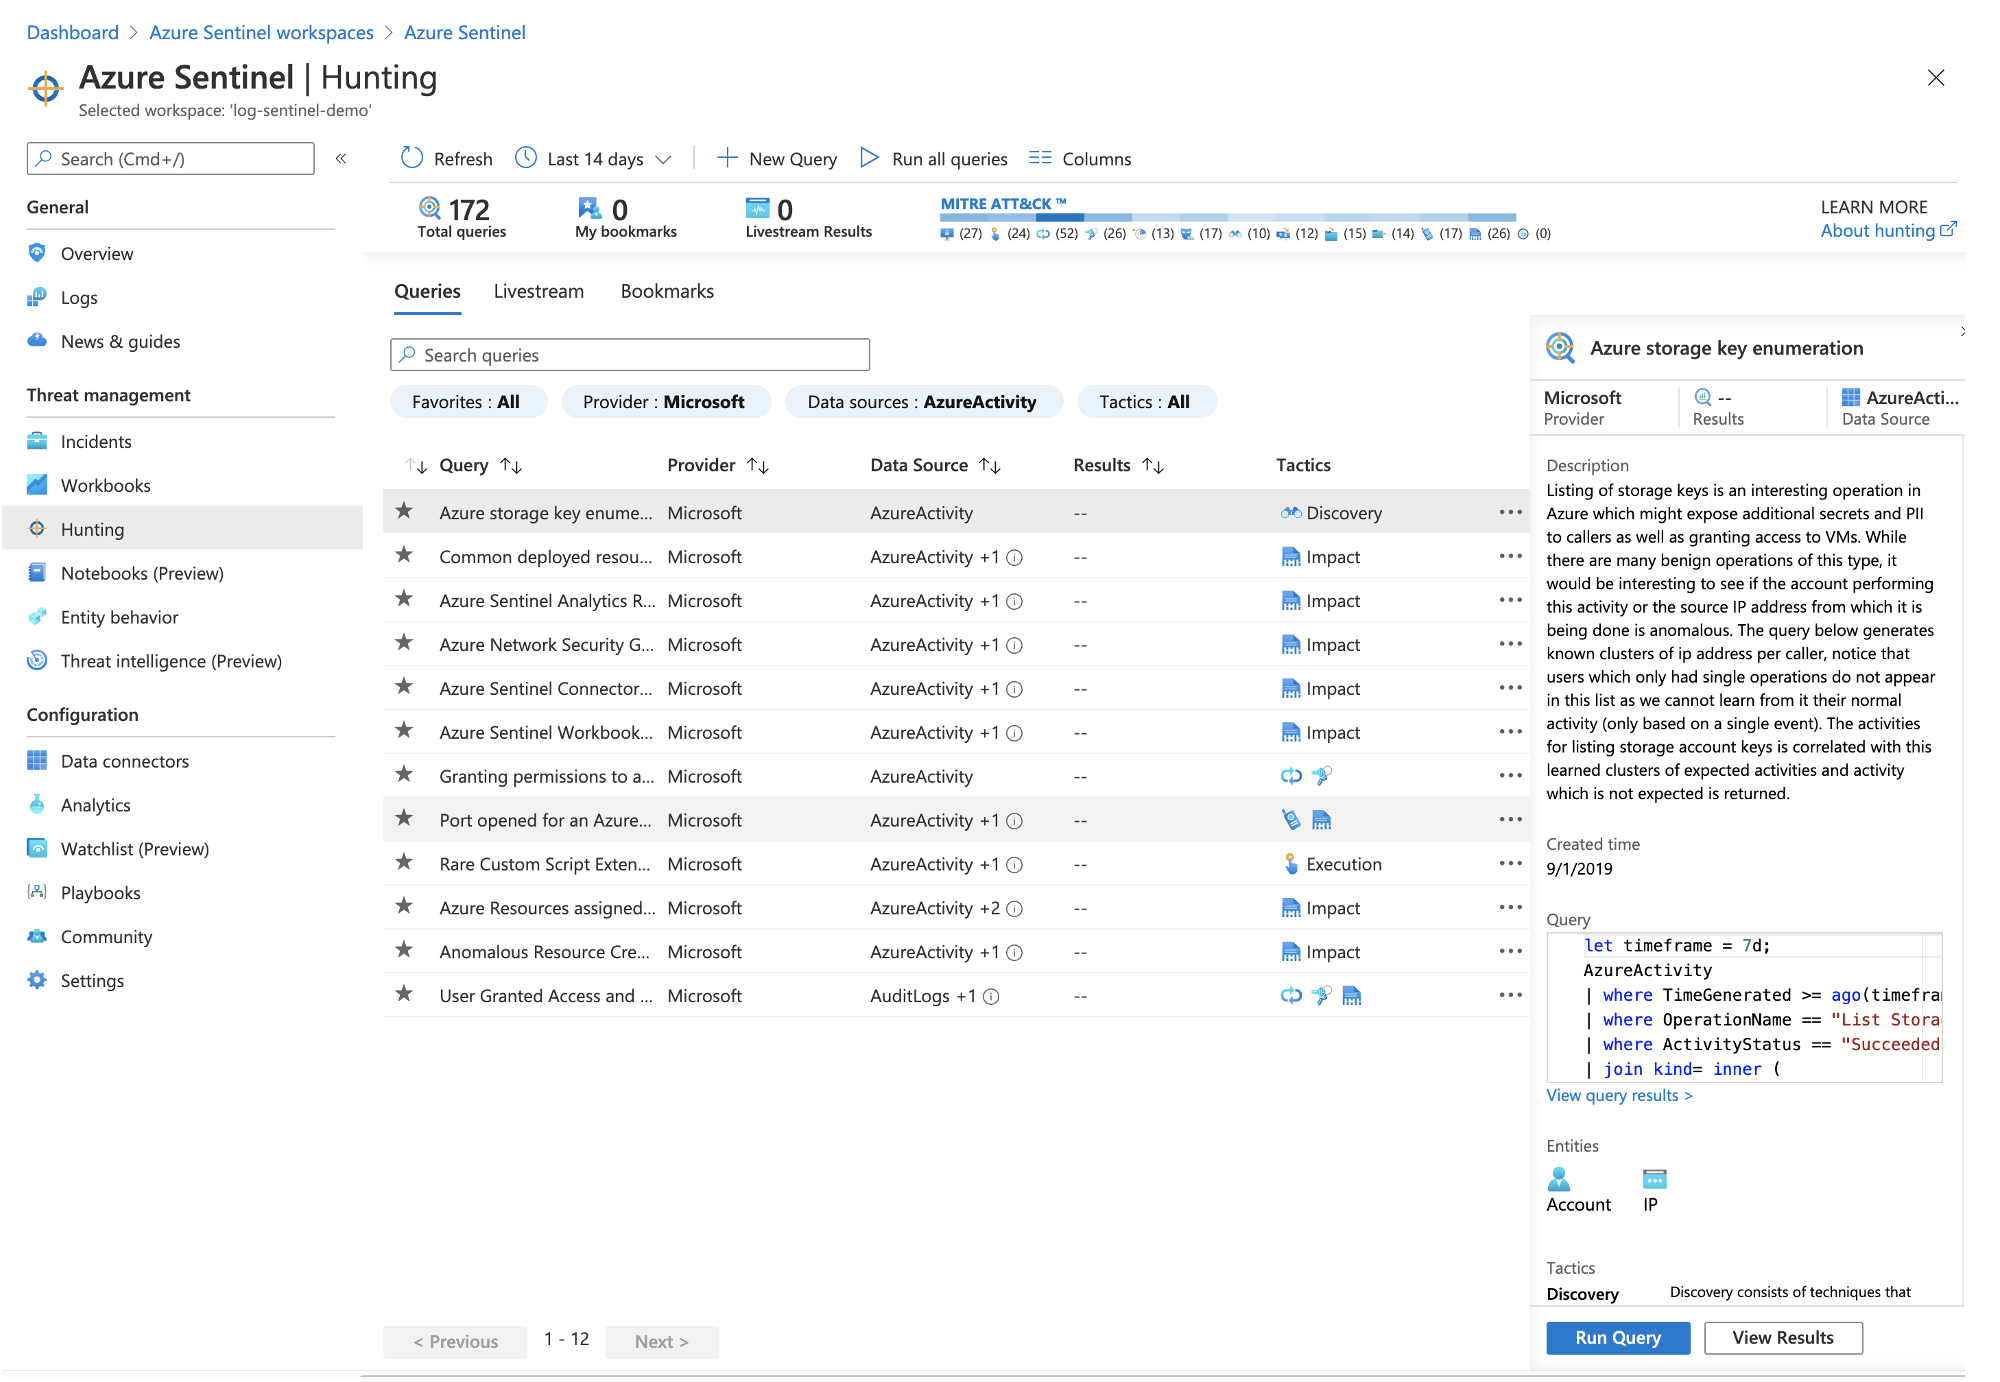
- For this example, I am going to filter on Data Sources: AzureActivity:
Select AzureActivity from the Data Sources filter option
Select the query you want to run
Click Run Query
Click View Results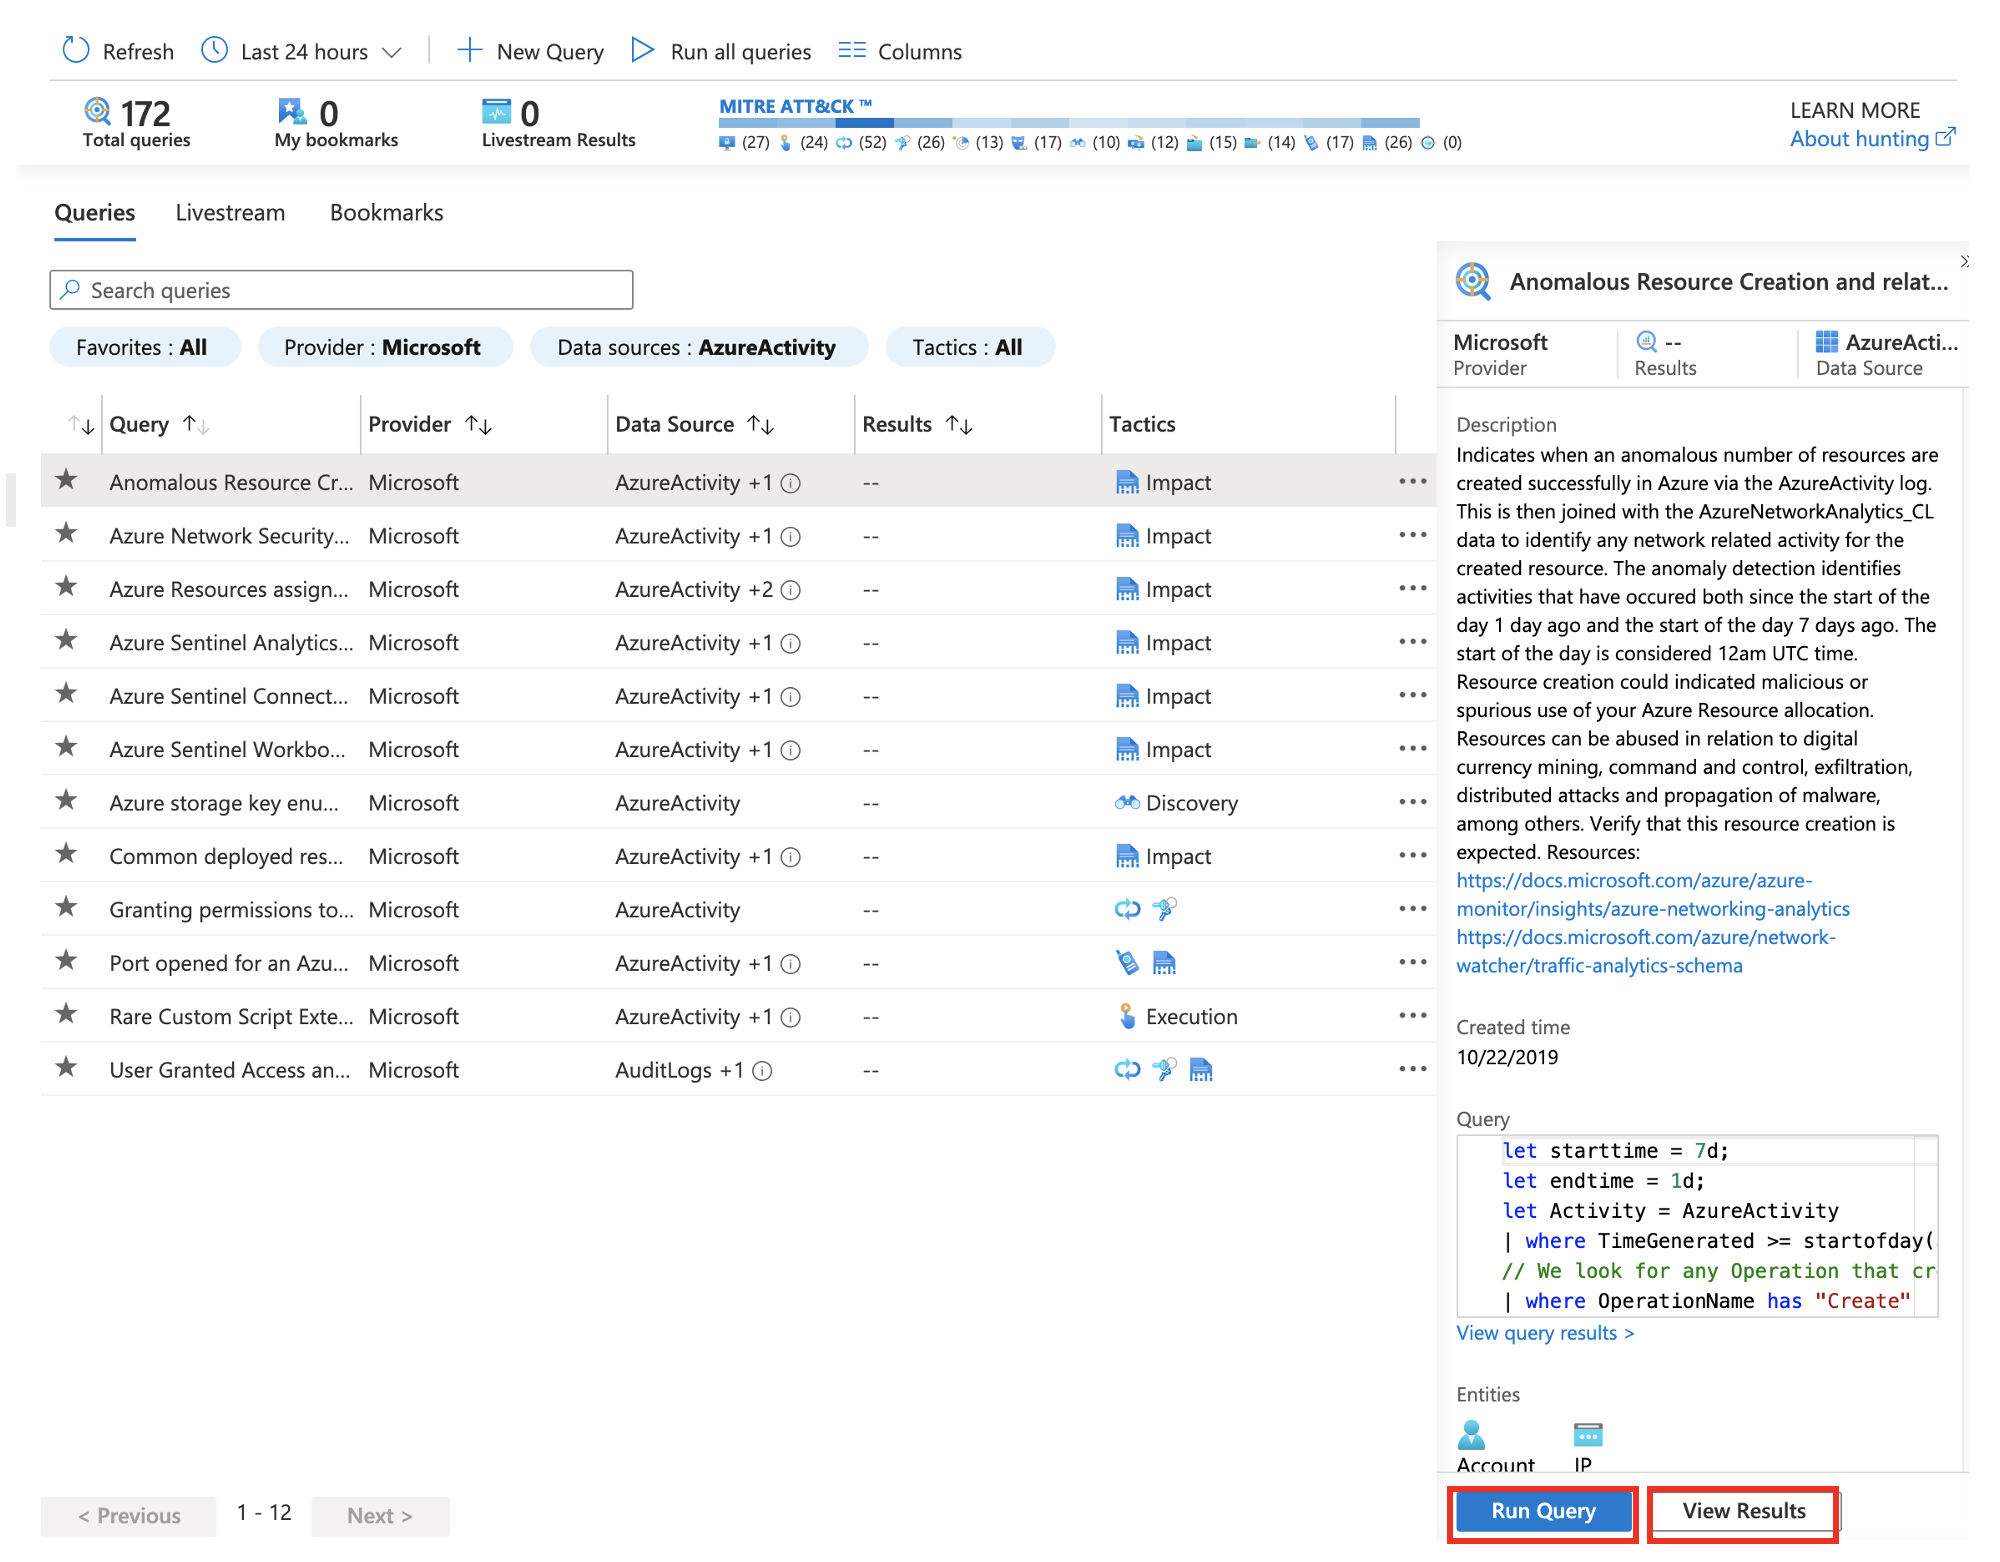
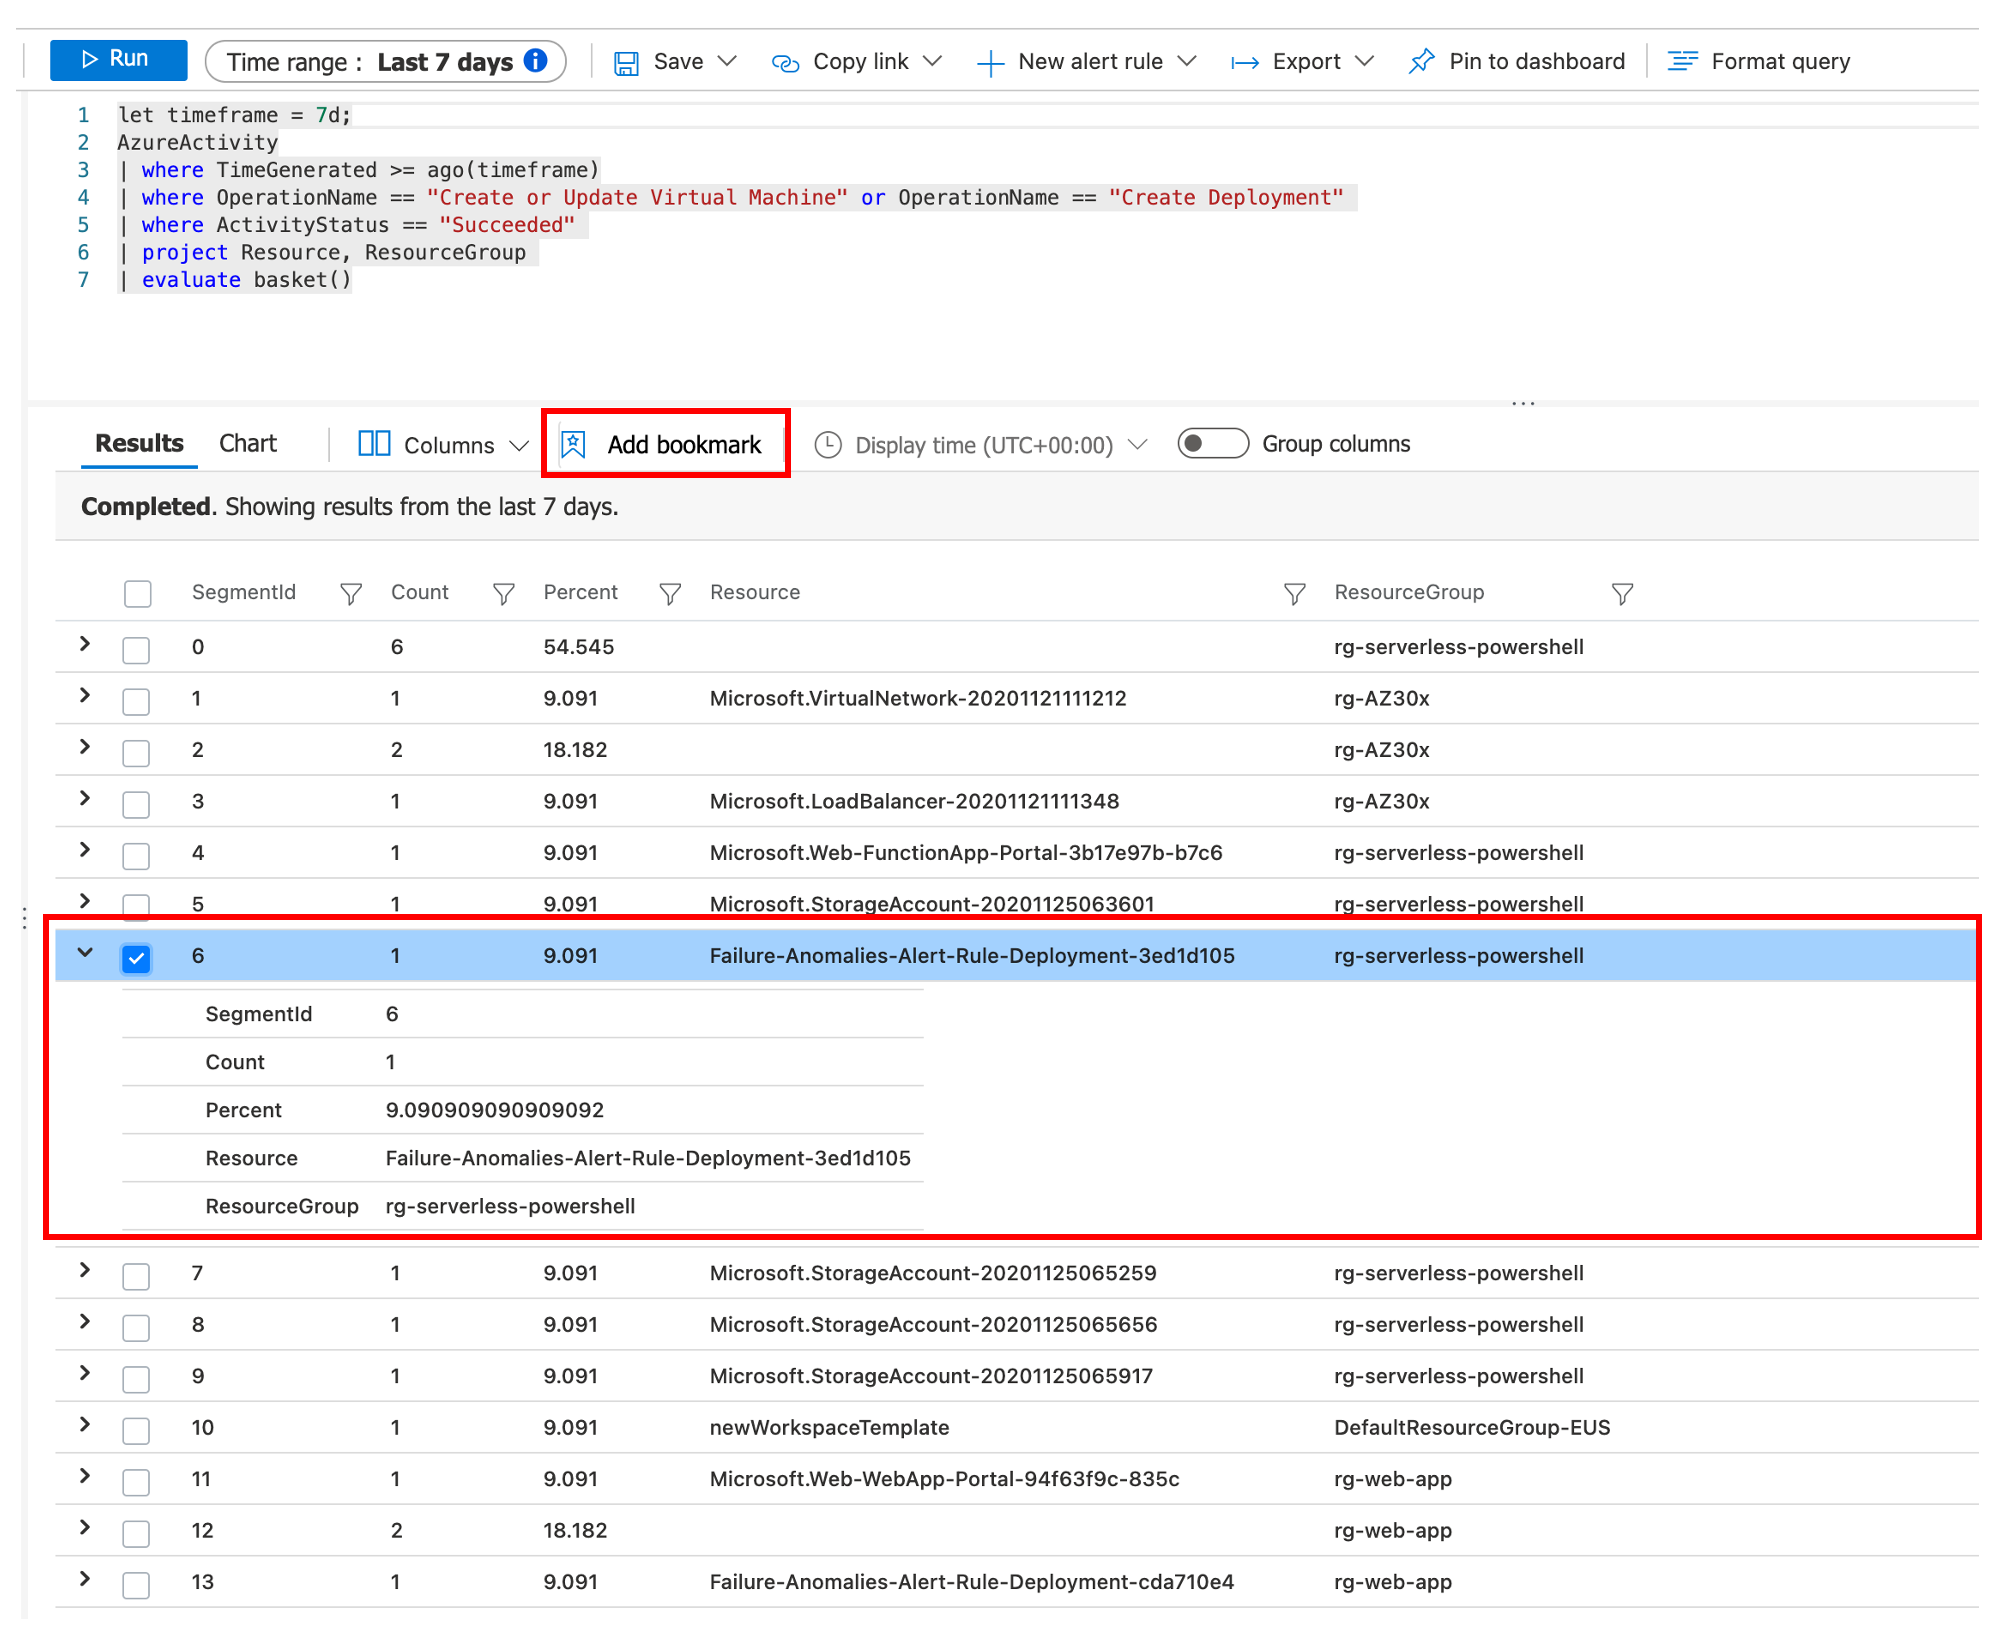
Alternatively, you can click Run all queries to view results for all queries. - Adjust the time range if necessary and click the Run button. You will see a list of all events that met the selected query.
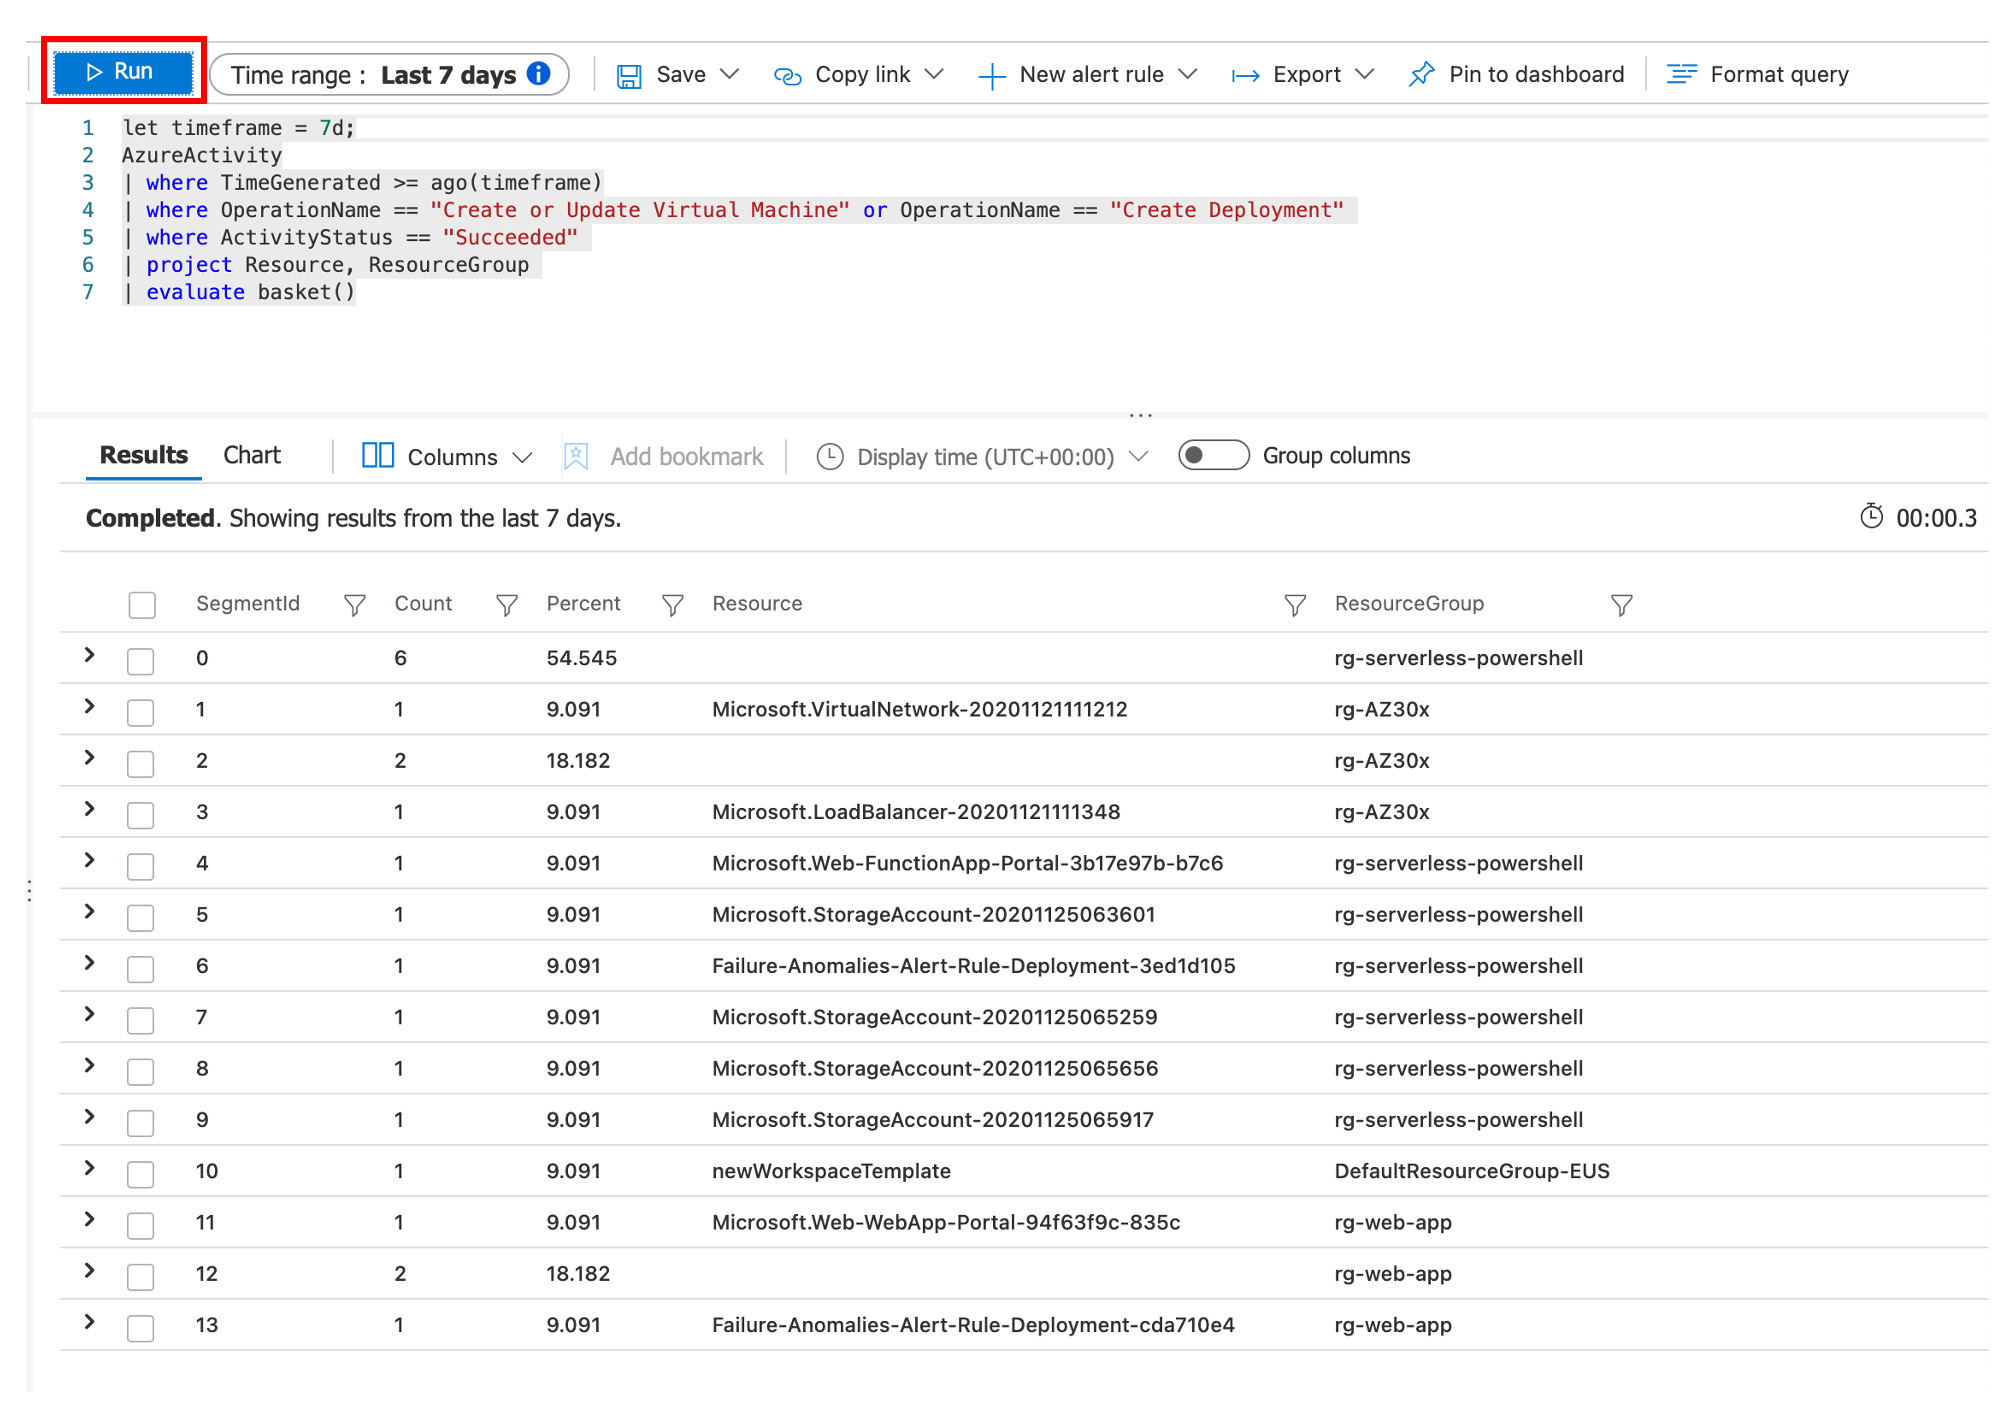
- To view additional details for a specific event, click the chevron icon to expand the event details. To save, tag, share or annotate a specific event, click the Add Bookmark button.
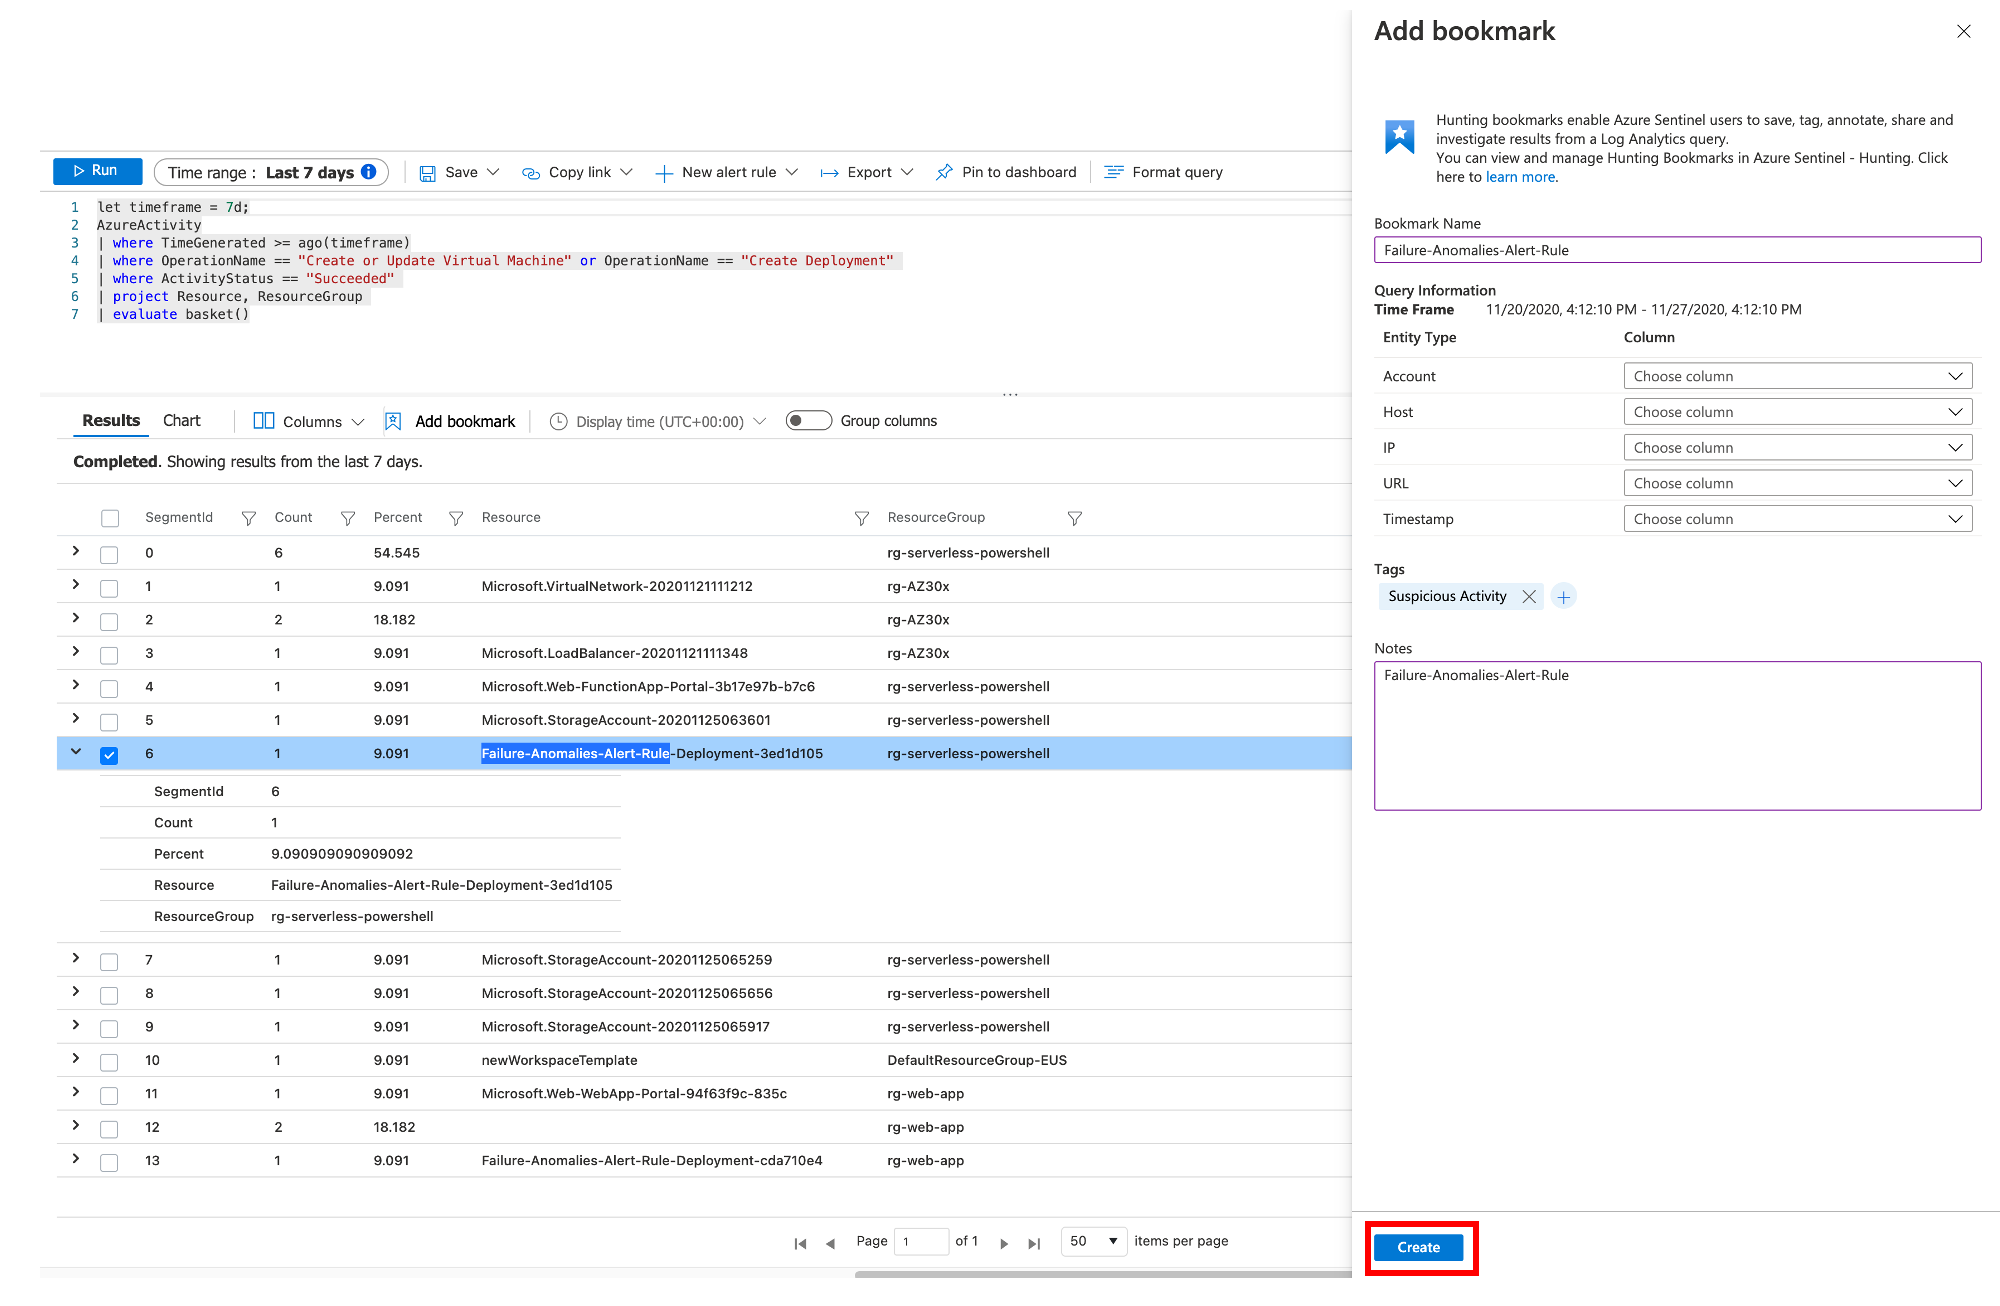
- Fill out any necessary fields and add specific tags or notes. Click the Create button.
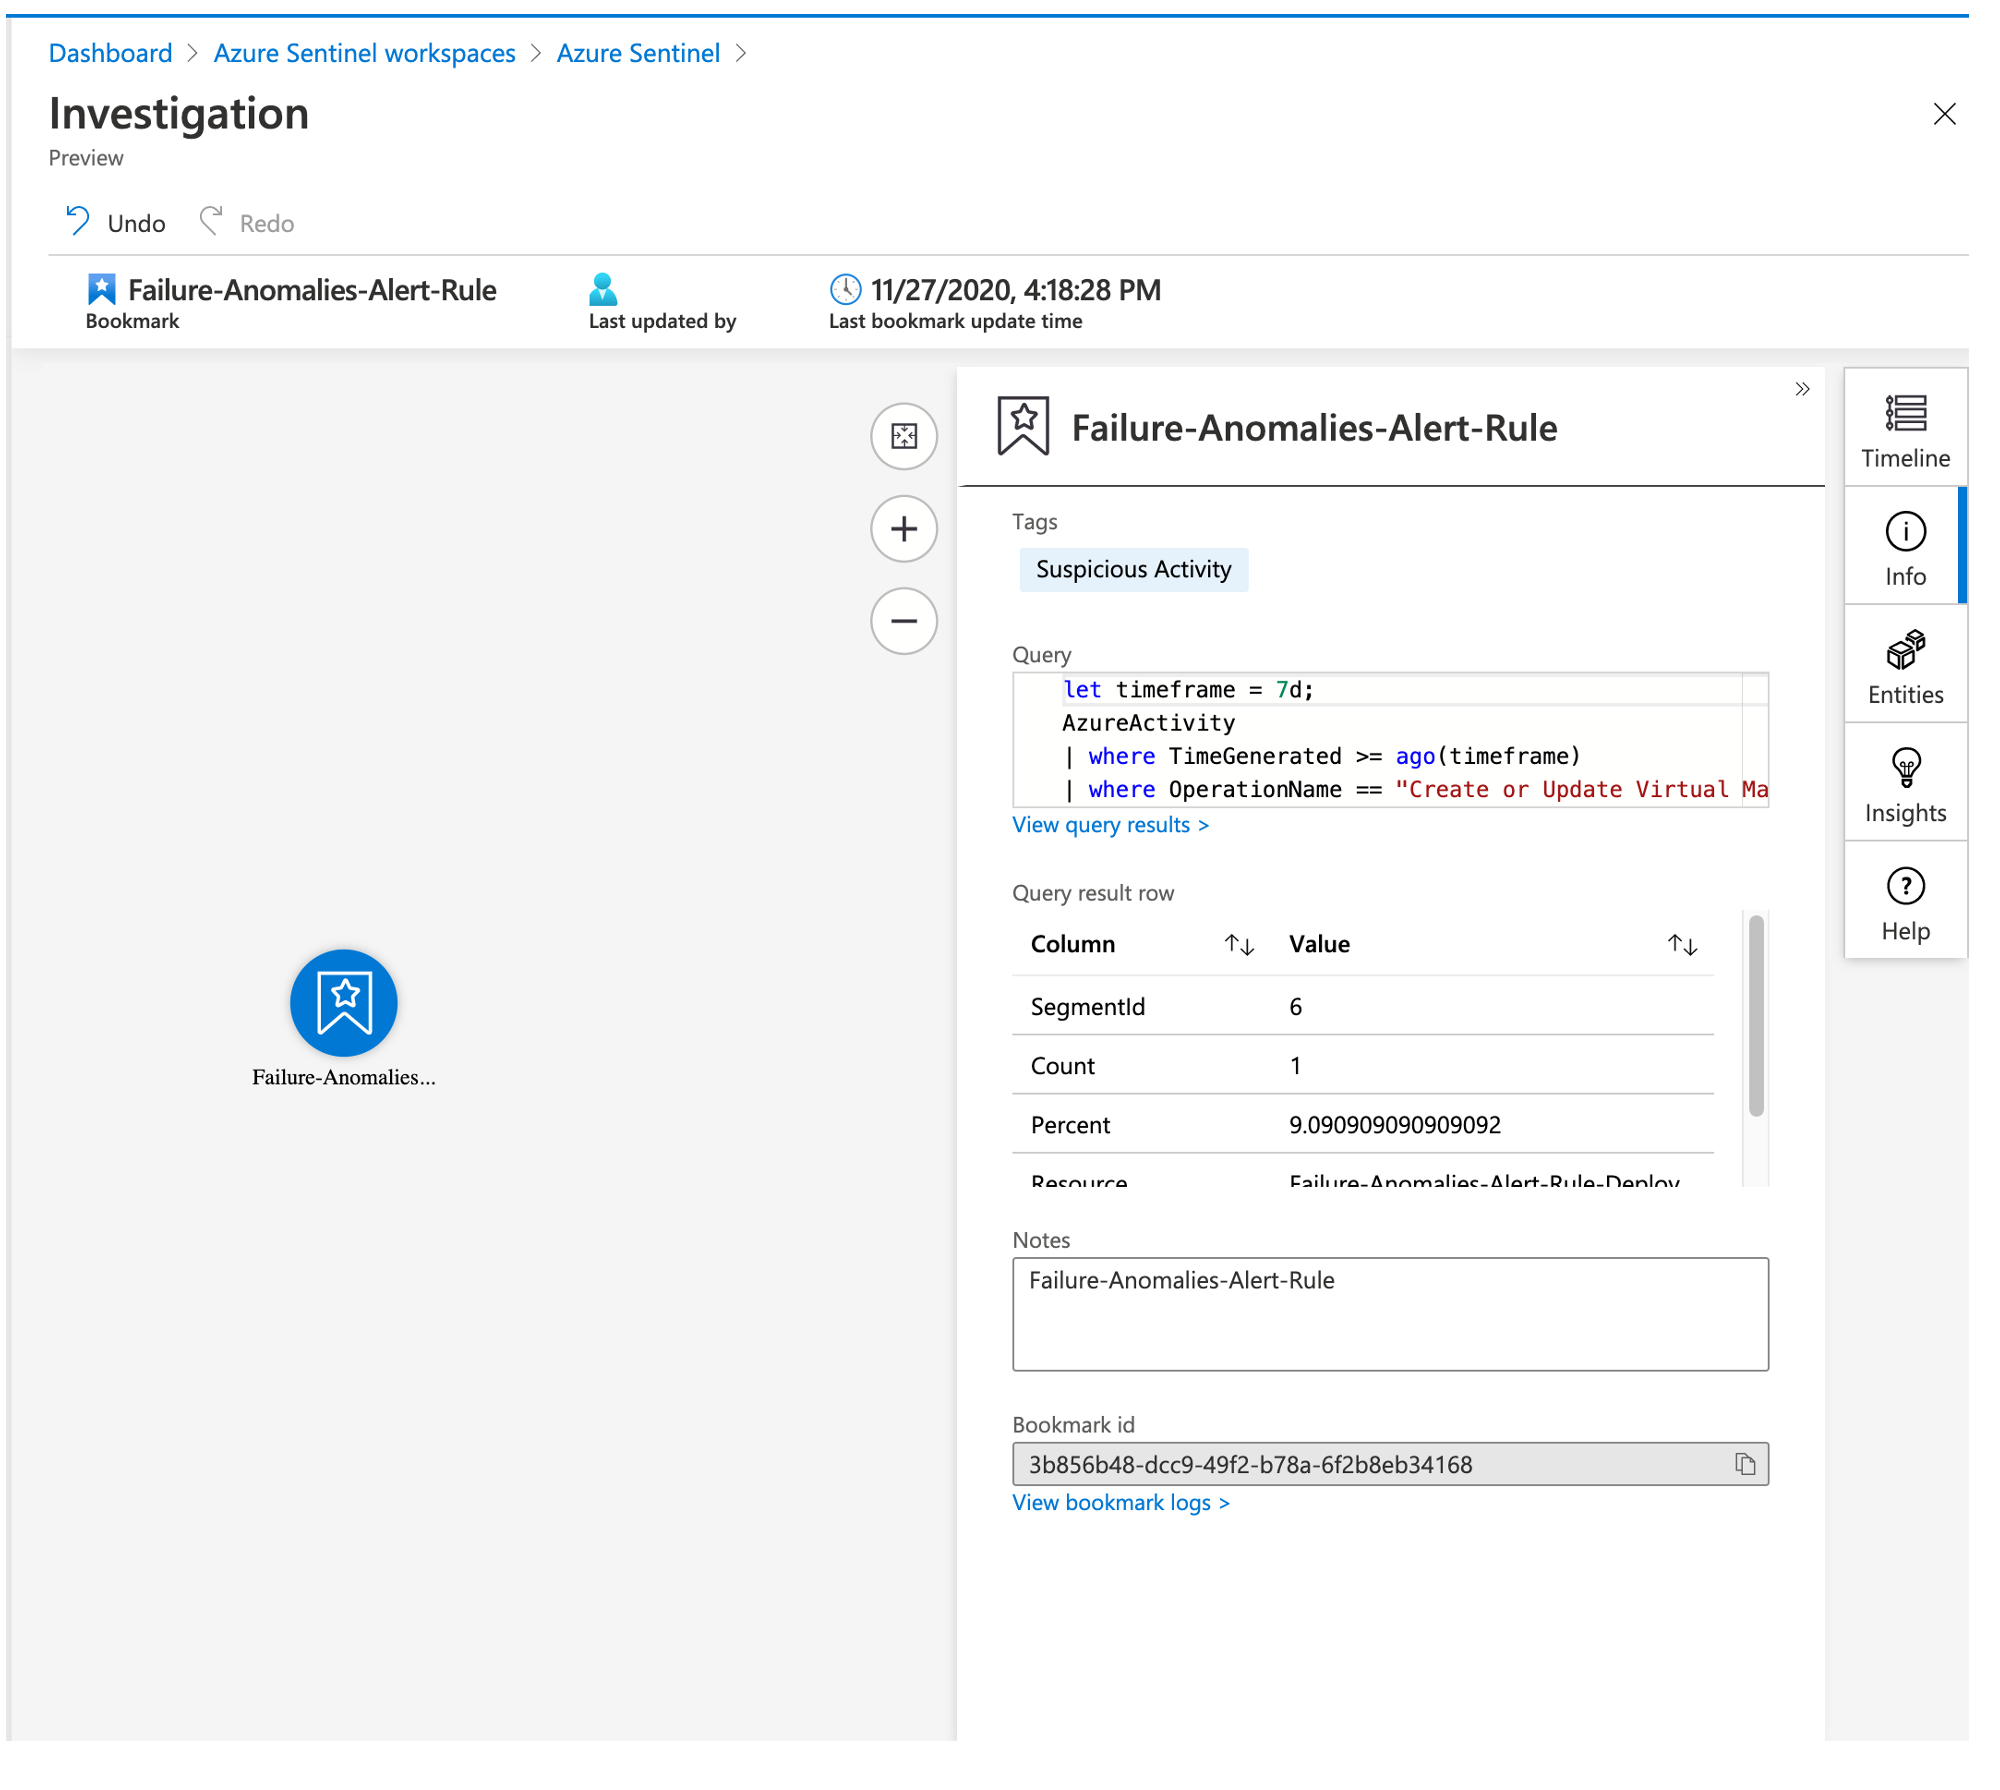
- On the Azure Sentinel Hunting page, click Bookmarks. The event bookmarked in step 6 will appear in this list. Select the event and click the Investigate button.

- The Investigation screen will provide you the ability to correlate more data to this event including Timelines, Insights, Information and the various entities involved.
Creating a Custom Query
Azure Sentinel’s Threat Hunting functionality supports custom queries as well as Microsoft’s built-in queries. To demonstrate this, lets add a custom query.
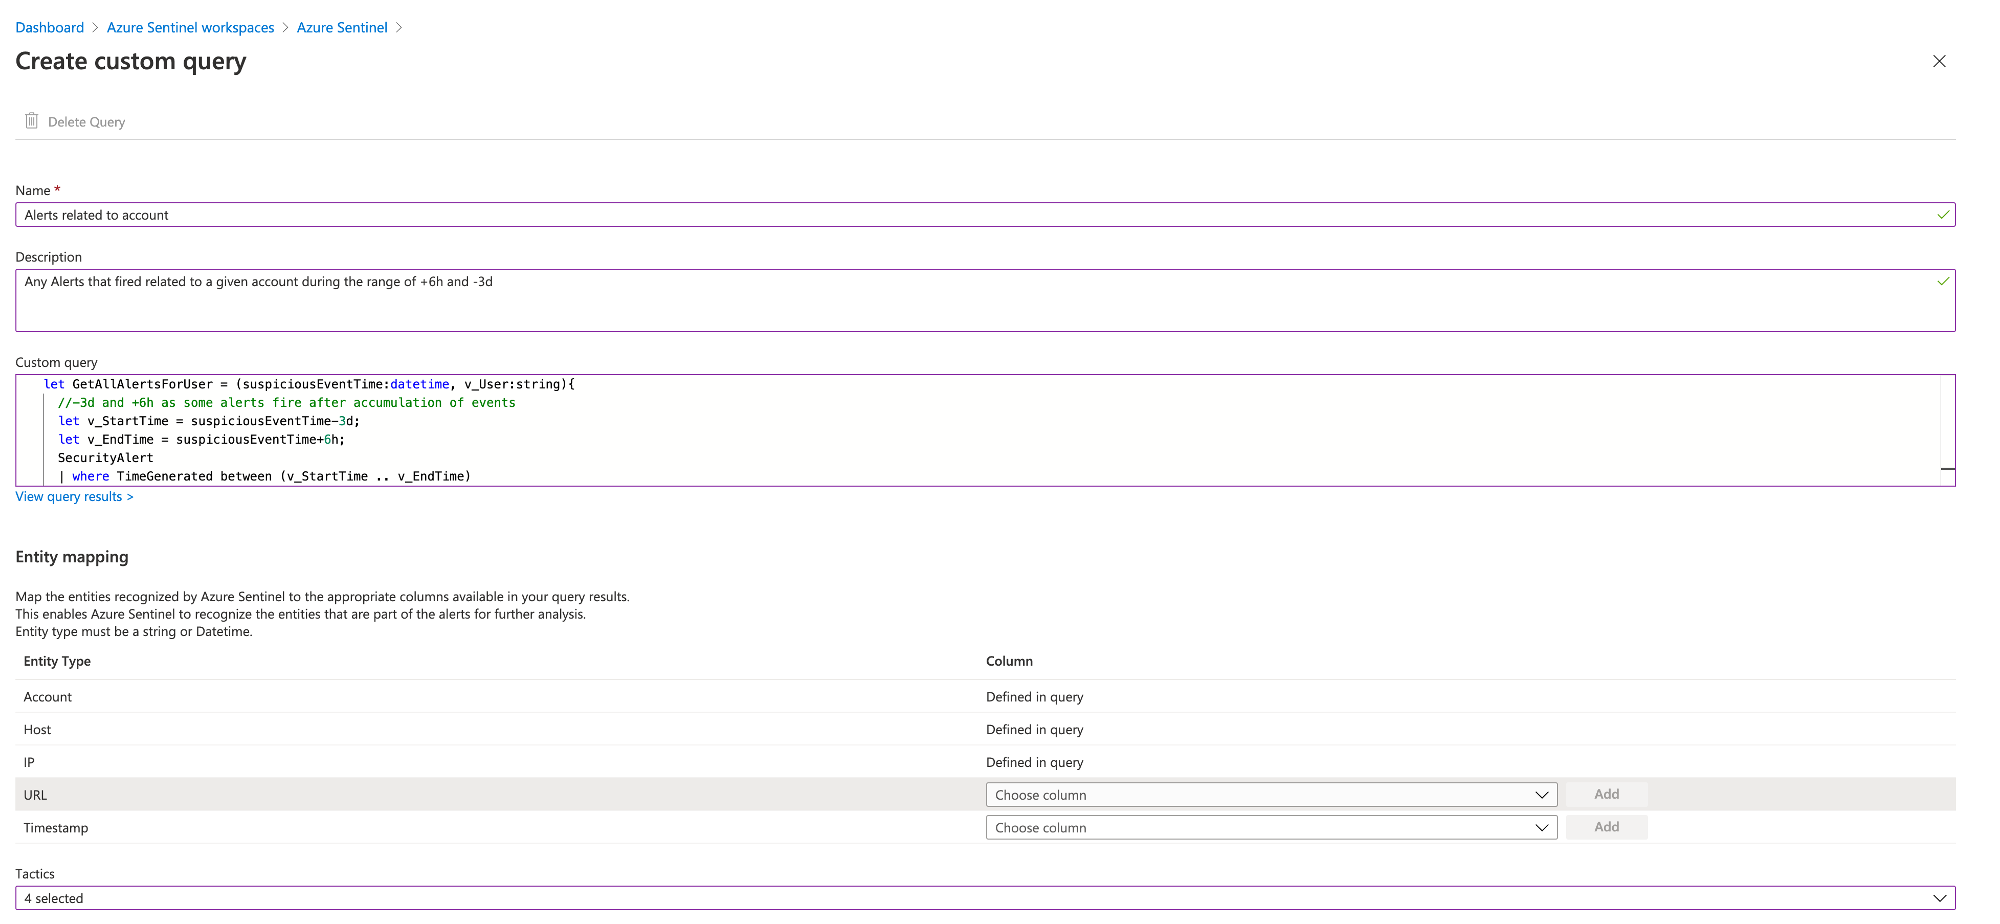
- On the Azure Sentinel Hunting page, click New Query.

- Fill out the Name, Description and Custom query. In the Entity mapping section You can map entities recognized by Azure Sentinel to the columns in your query results. Click Create.
Similar to Playbooks, Microsoft provides several hunting queries in the Azure Sentinel GitHub repository. - To access the custom query, on the Azure Sentinel Hunting page filter the Provider and select Custom Queries and click Ok.
In this blog post I discussed threat hunting with Azure Sentinel. If you’re interested in learning more about Azure Sentinel. Be sure to check out Microsoft’s Azure Sentinel Ninja course! You can find it here.
Thank you for reading!
