Azure App Service is one of my favorite Azure Services! It enables you to host web applications, mobile back ends, and RESTful APIs using the programming language of your choice without managing the infrastructure behind it. It provides auto-scaling and high availability, supports Windows and Linux, and enables automated deployments from any Git repo or Azure DevOps. In this blog post I want to demonstrate how to configure Azure App services and deploy a basic Python Flask application. Let’s get started!
Prerequisites
- Azure Subscription
- GitHub Account (you can sign up here if you don’t have one)
Fork the sample application
- Fork and clone the sample application from my GitHub repository. You can find it here.

Configure the App Service
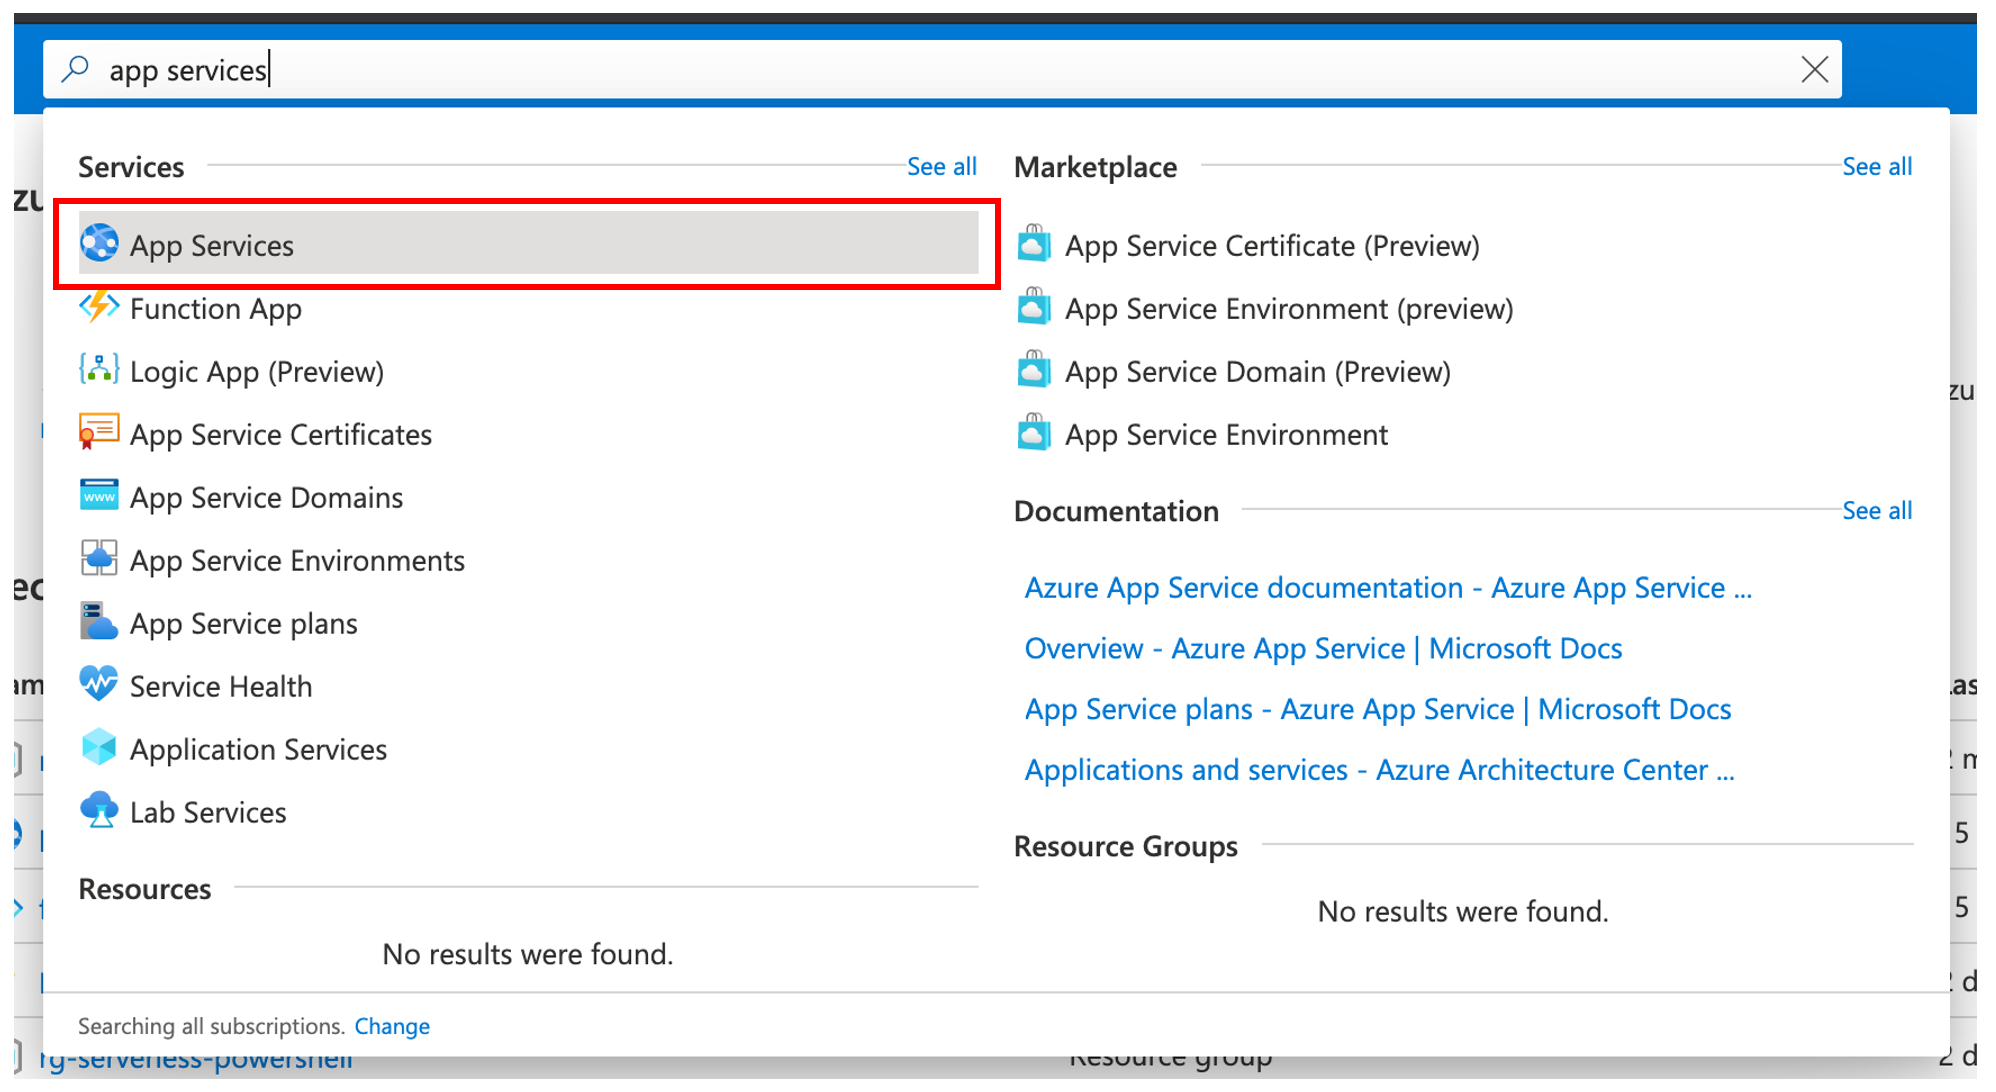
- Browse to the Azure portal and search for App Services. Click on App Services.
- On the App Services page, Click + Add.

- Fill out the following fields on the Create Web App blade:
Project Details
Create a new resource group
Instance Details
Enter the name of your application
The publish radio button should be set to Code
The runtime Stack should be set to Python 3.8
Select a Region
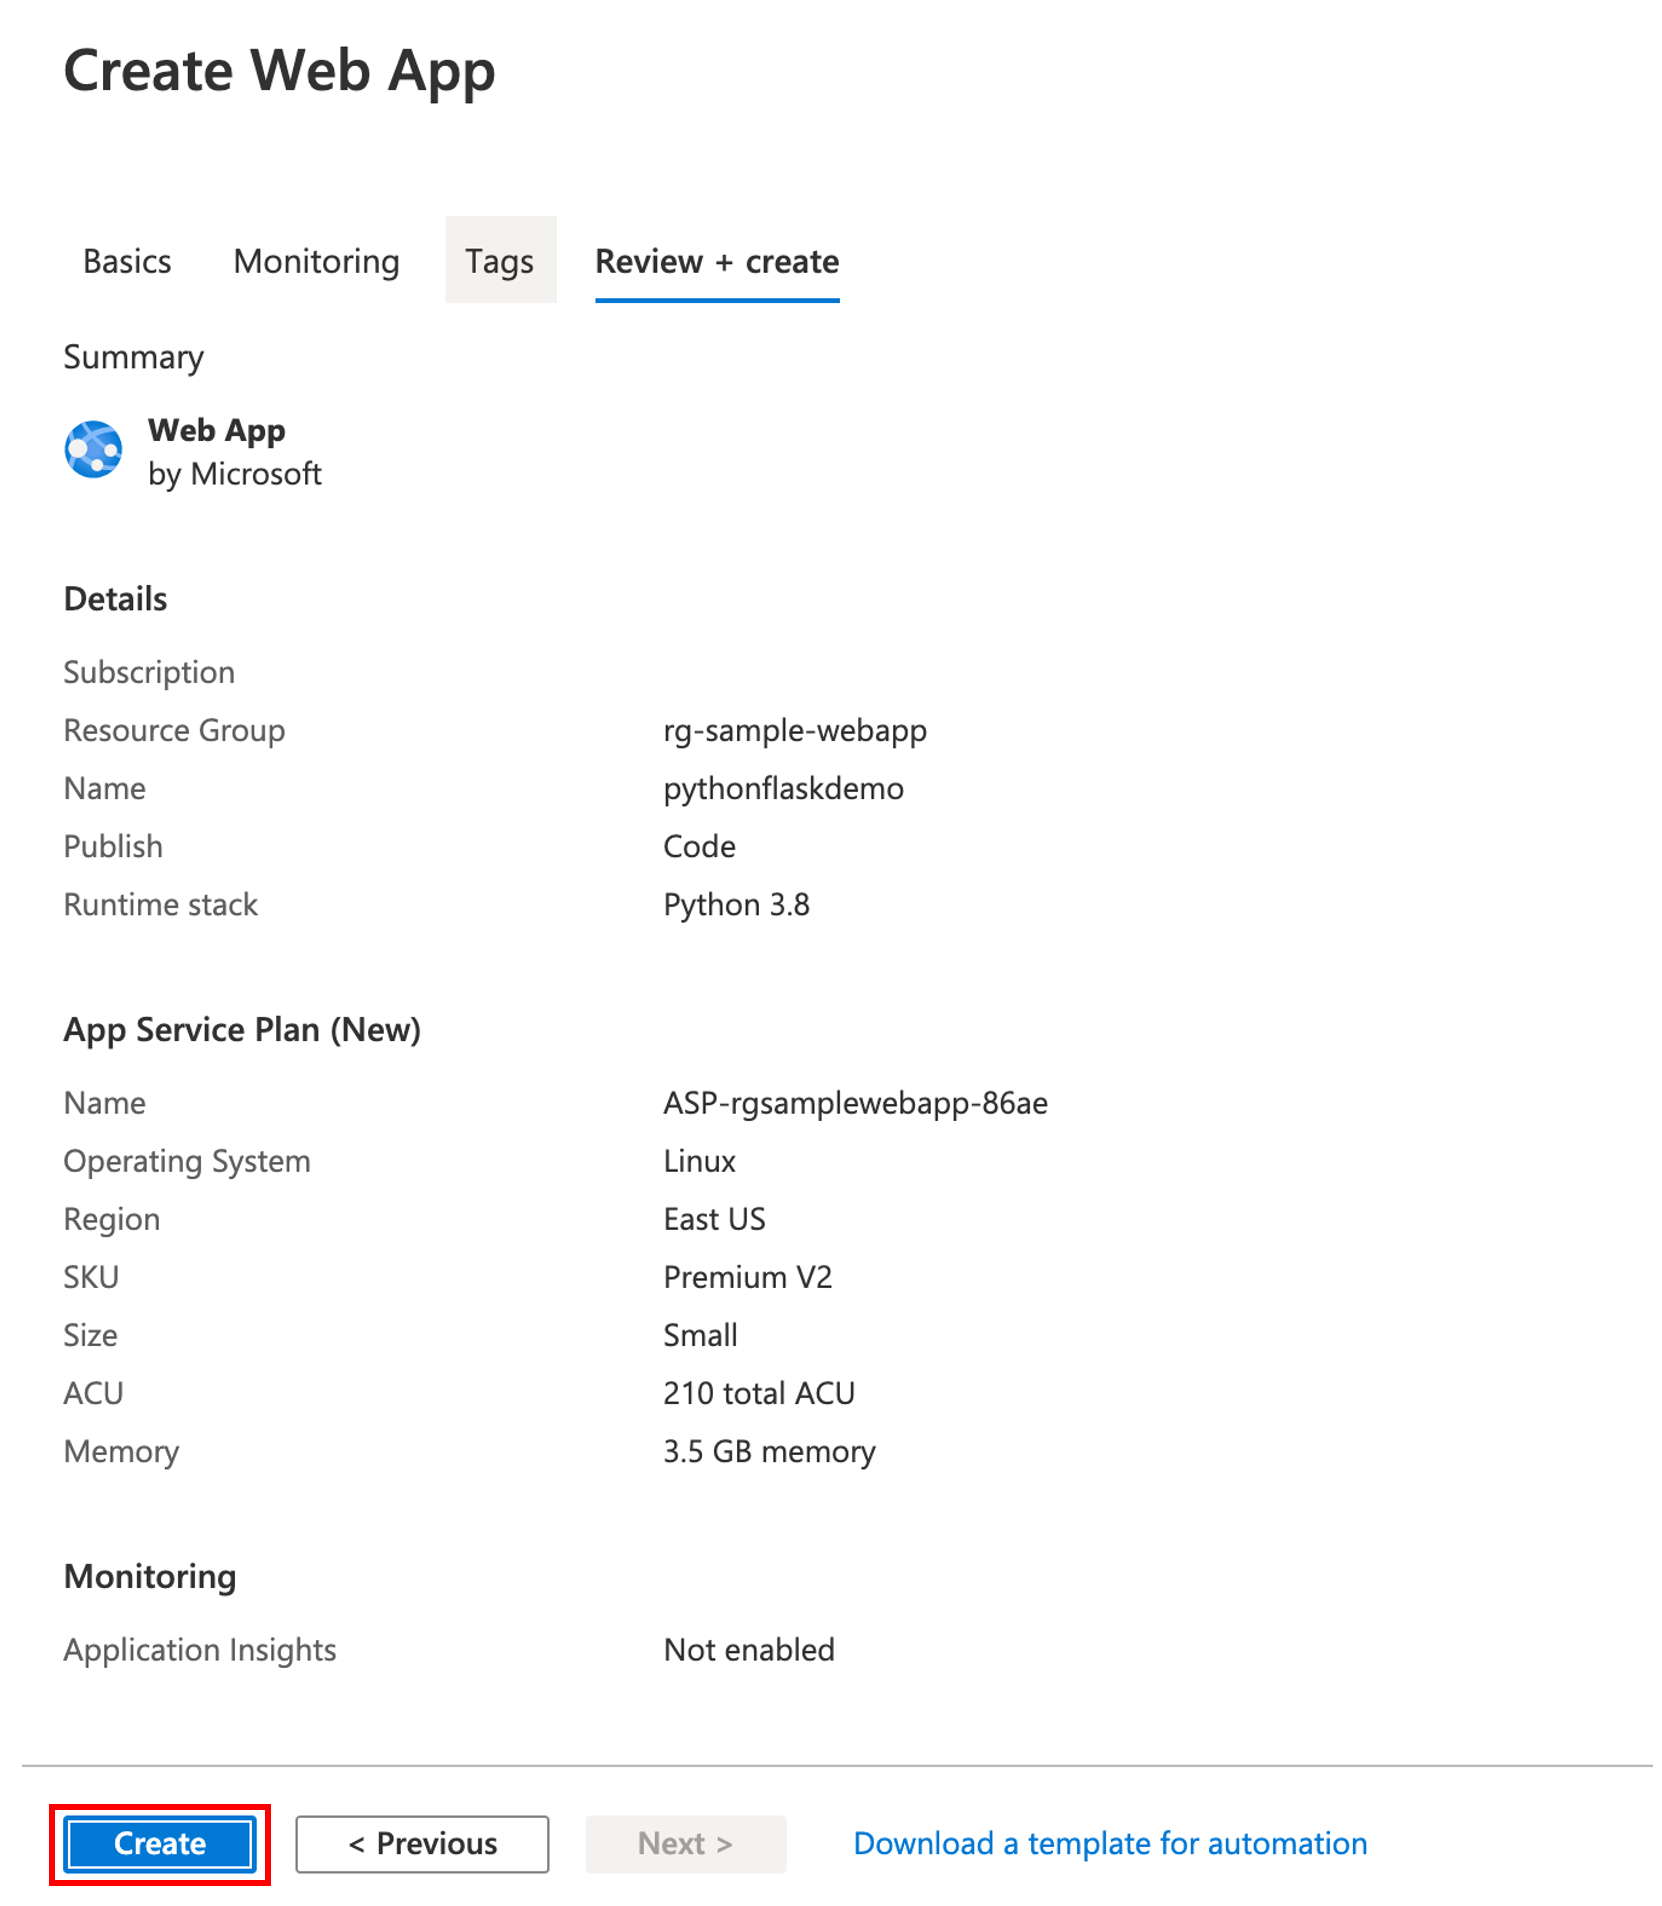
Click the Review + create button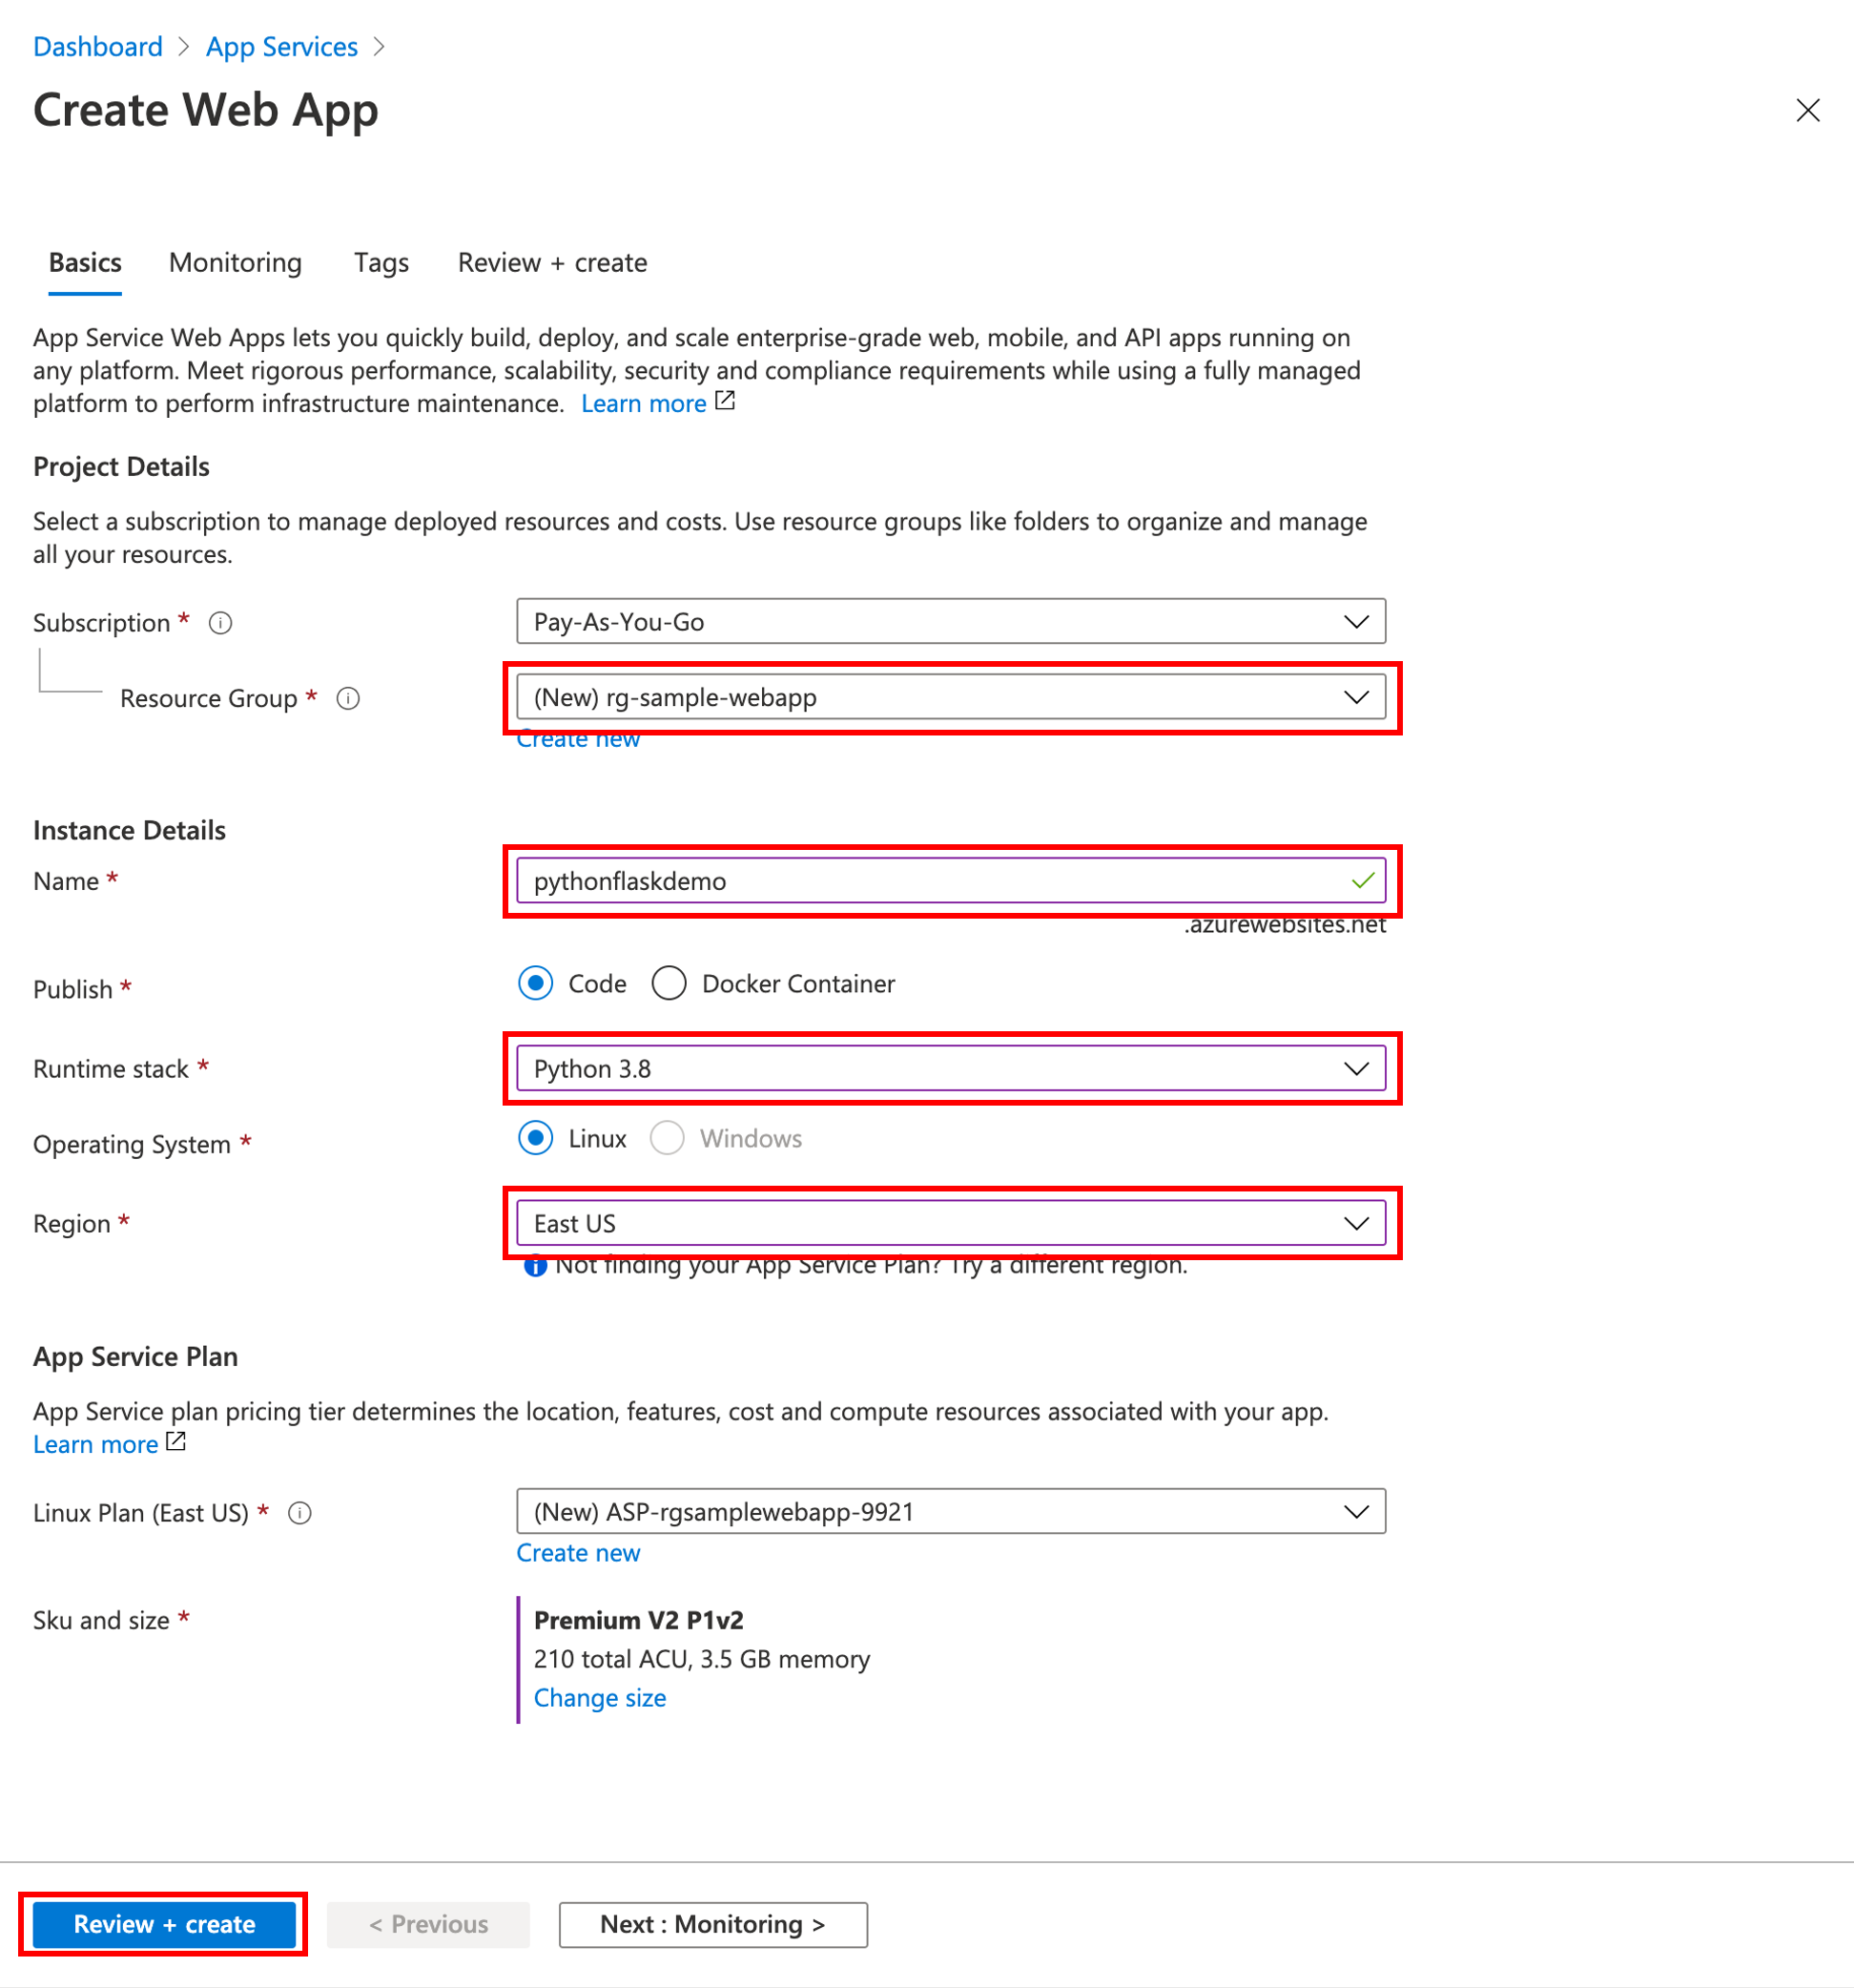
- Click the Create button.
- Once the deployment is complete, click the Go to resource button.
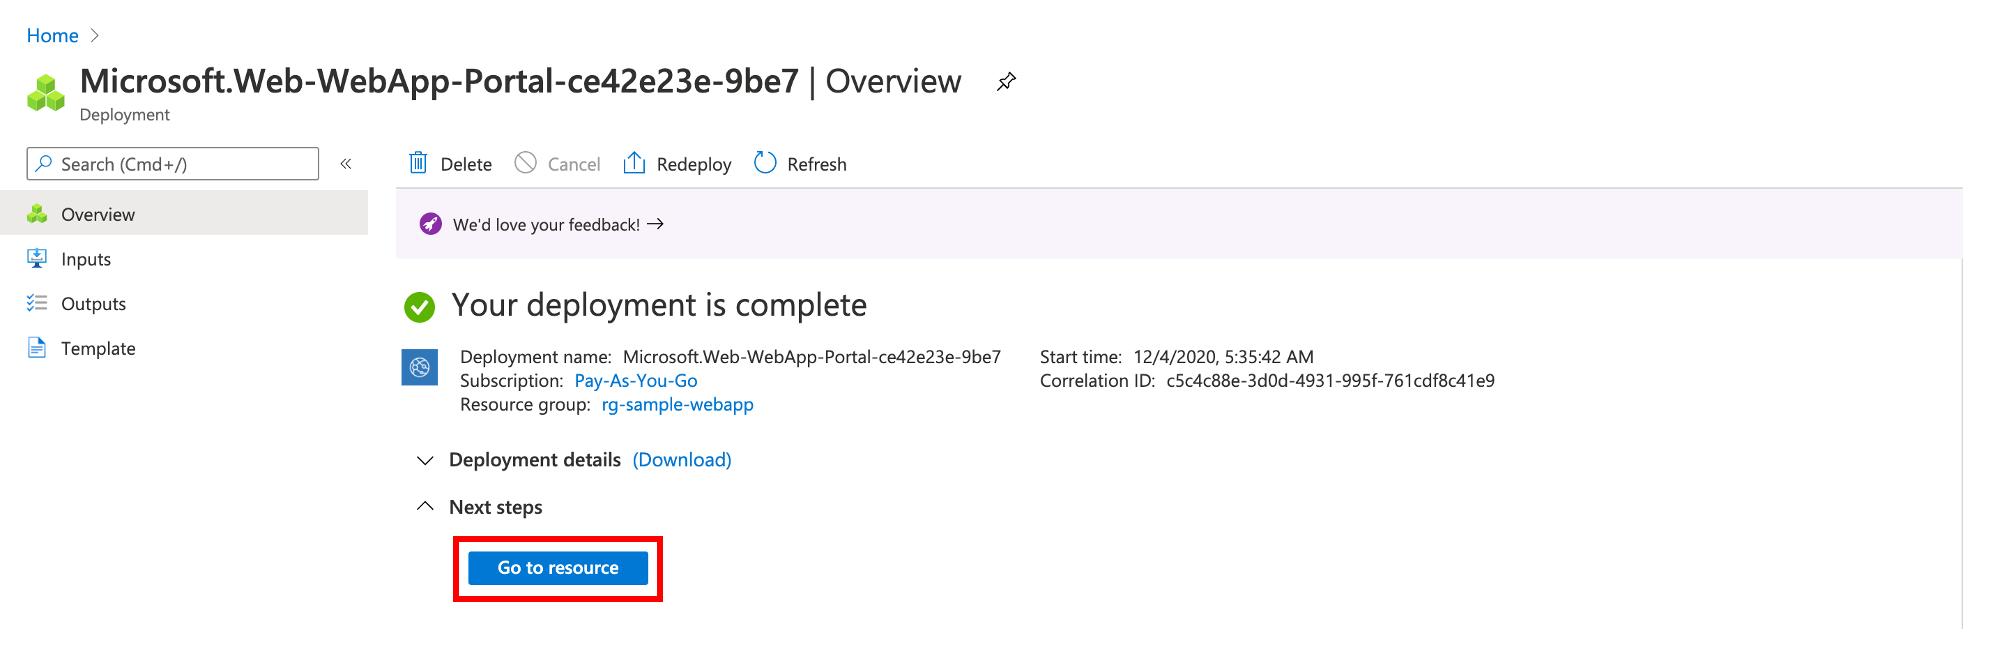
- You will be redirected to the overview page for your web app. Here you can access all the resources relating to your web app. If you click the URL, the default site for your web app will open in a new browser tab.


Deploying your Application
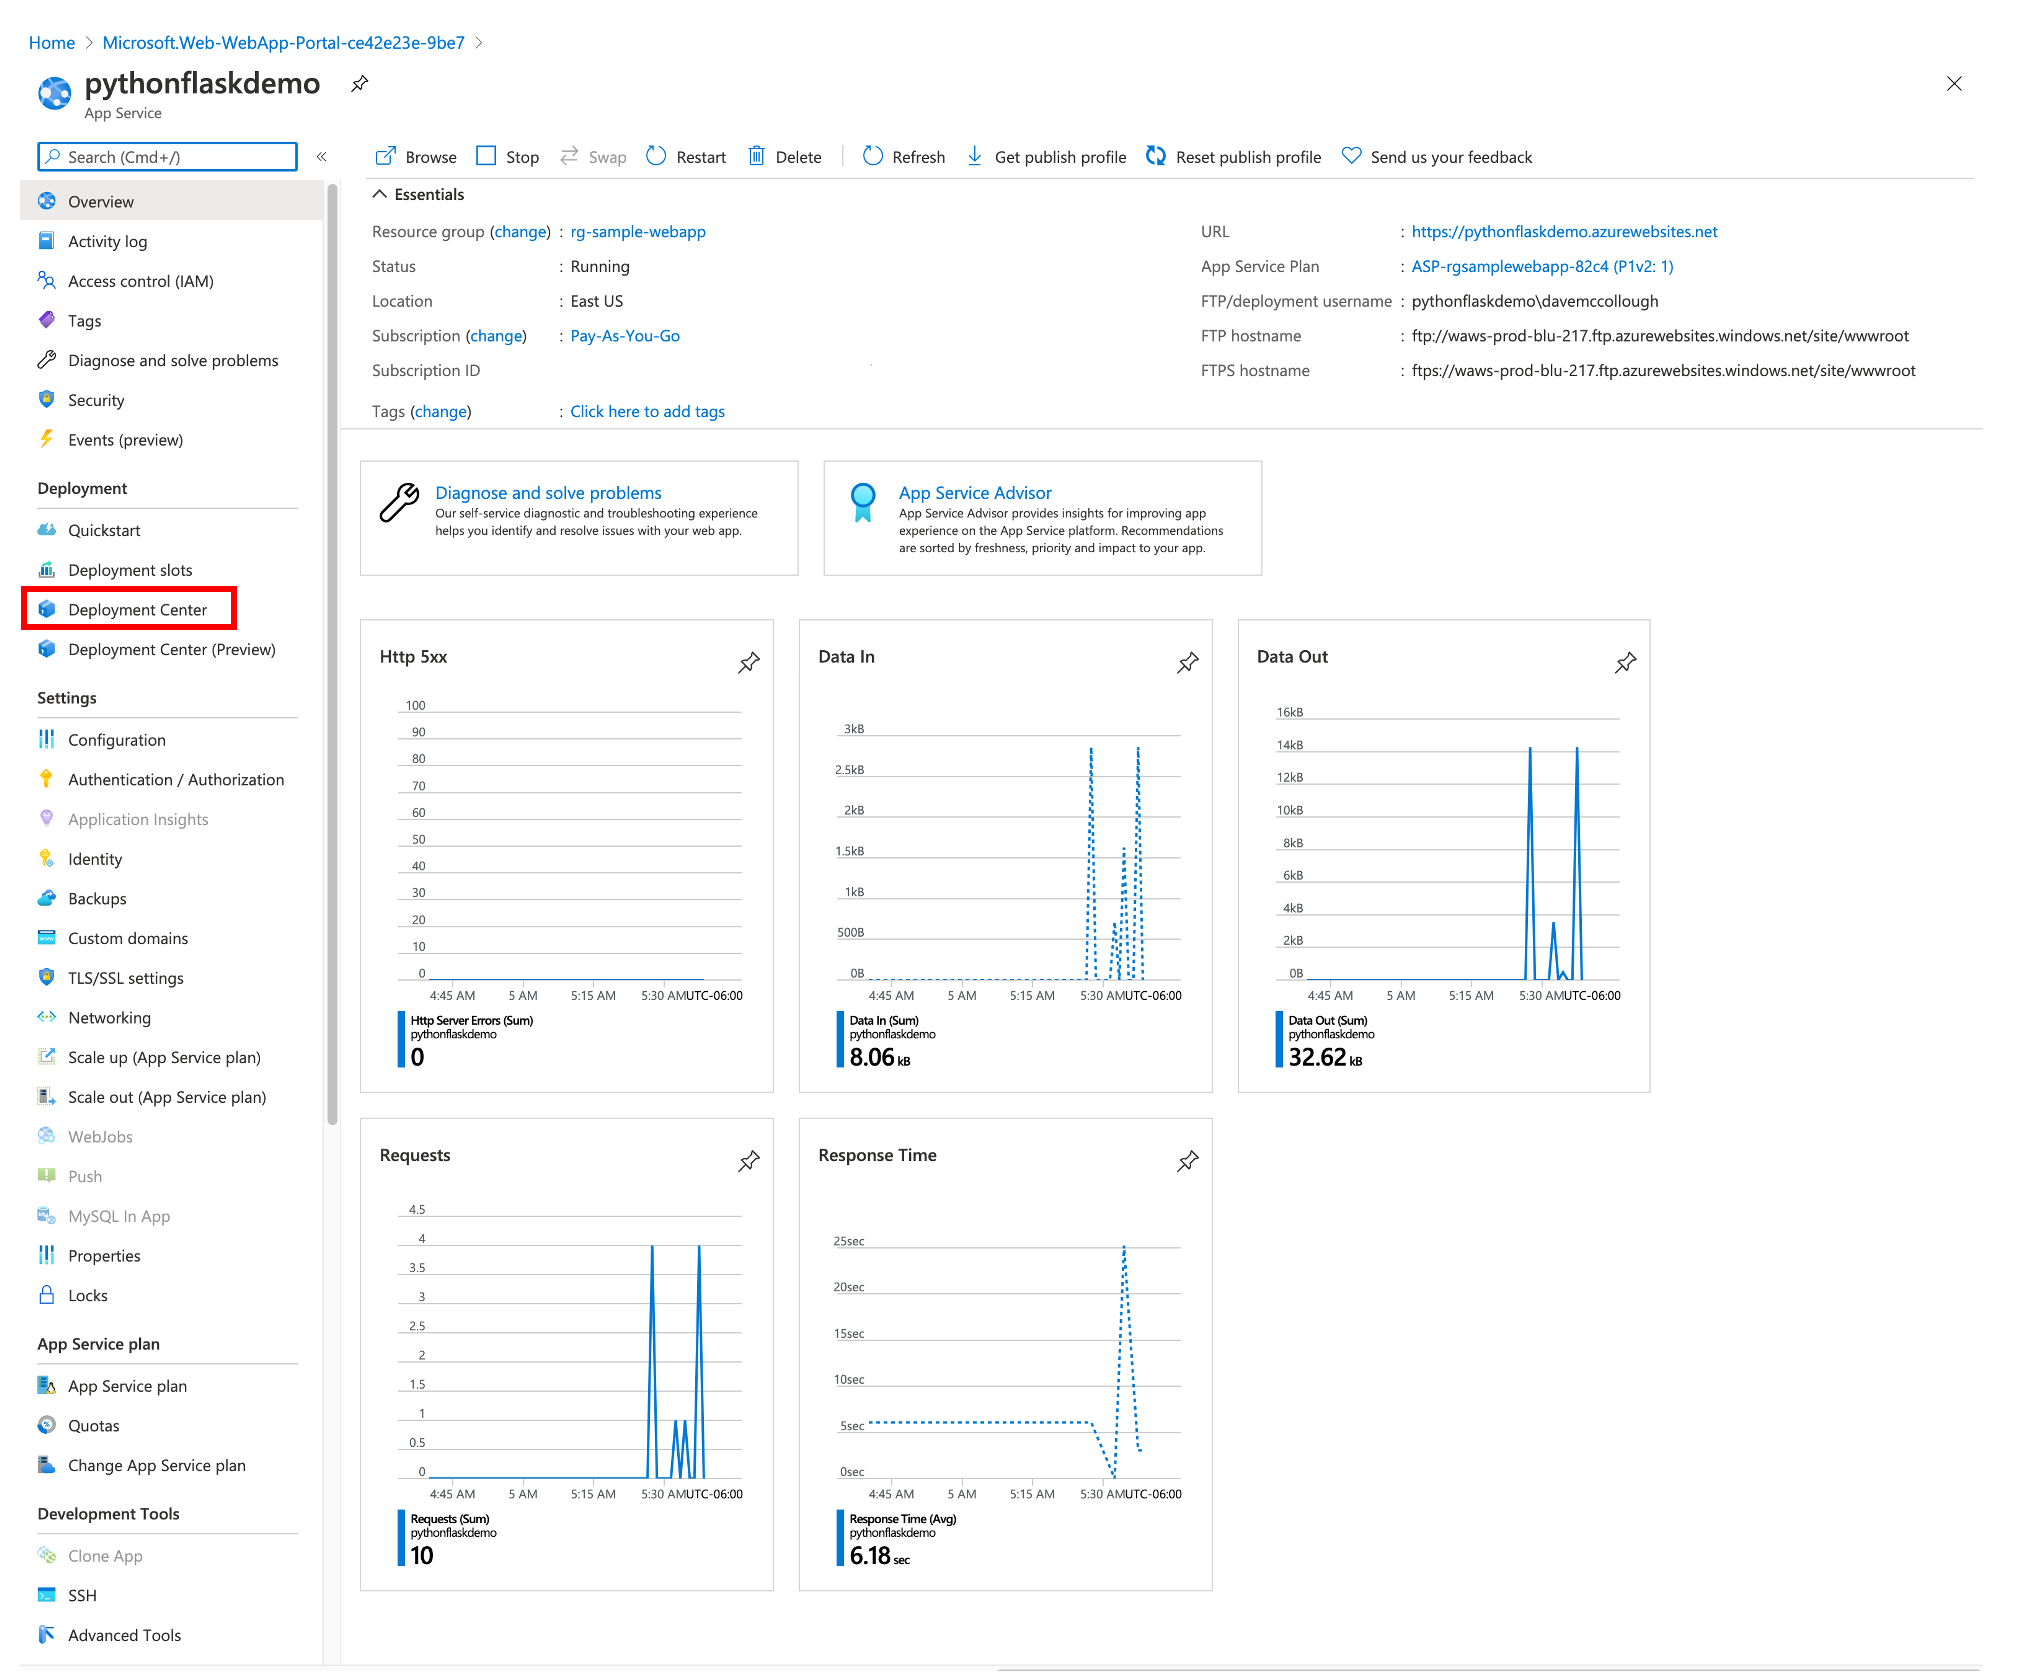
- On the App Service page, click Deployment Center.
- Click the GitHub container and the Continue button.
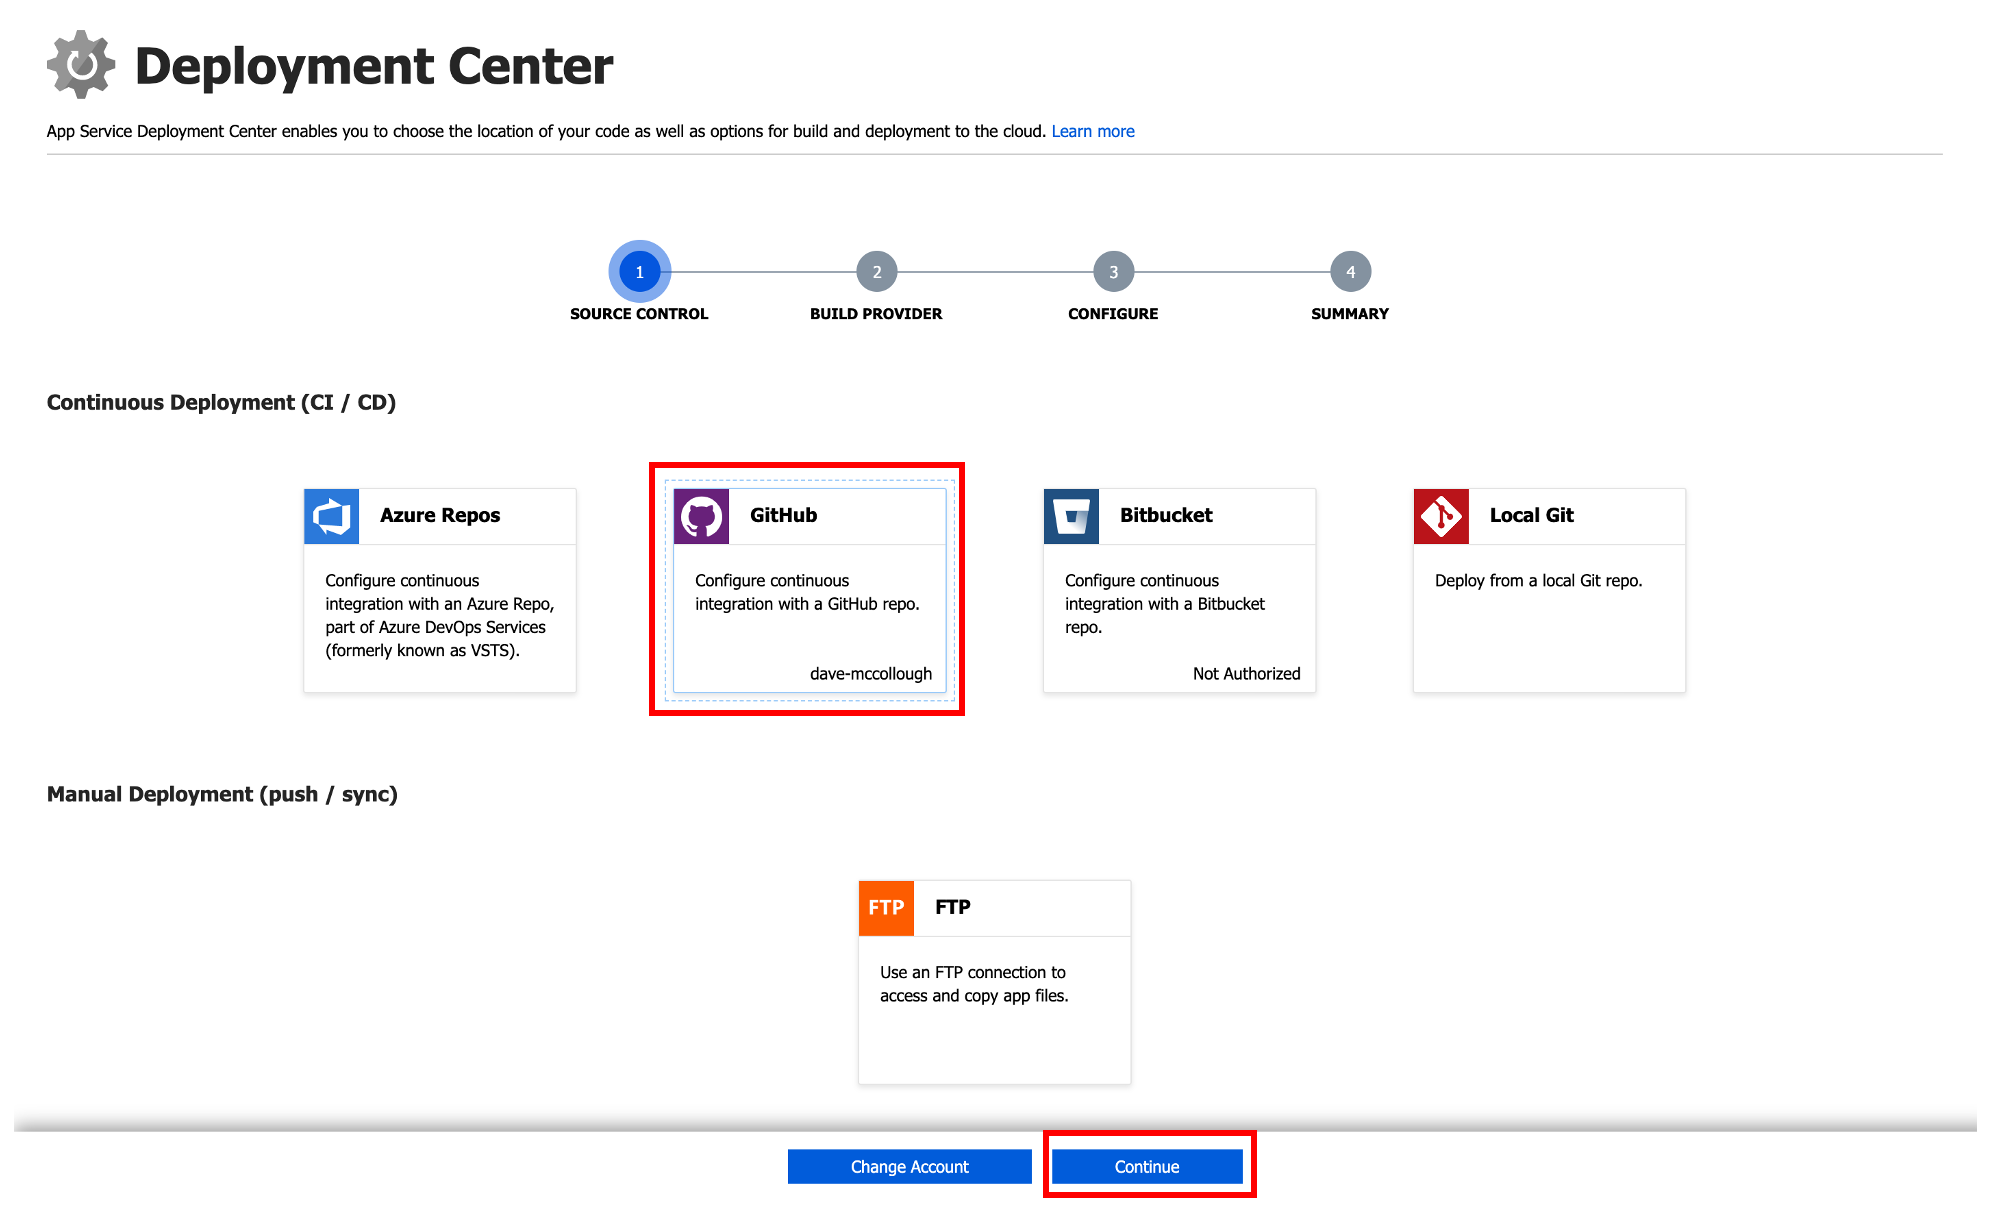
Note: If you’ve already authorized your GitHub account you account name will appear in the container, otherwise you’ll need to authorize your account. To authorize your account, just click the GitHub container and you will be prompted to log into your account.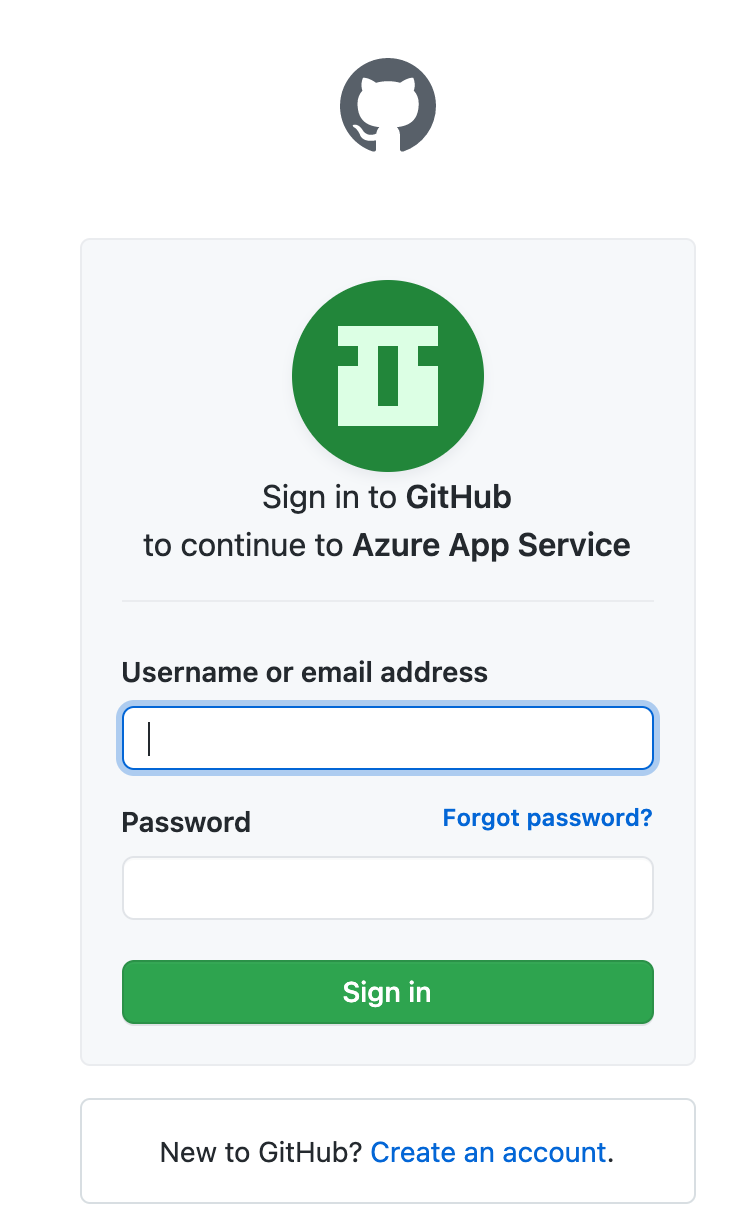
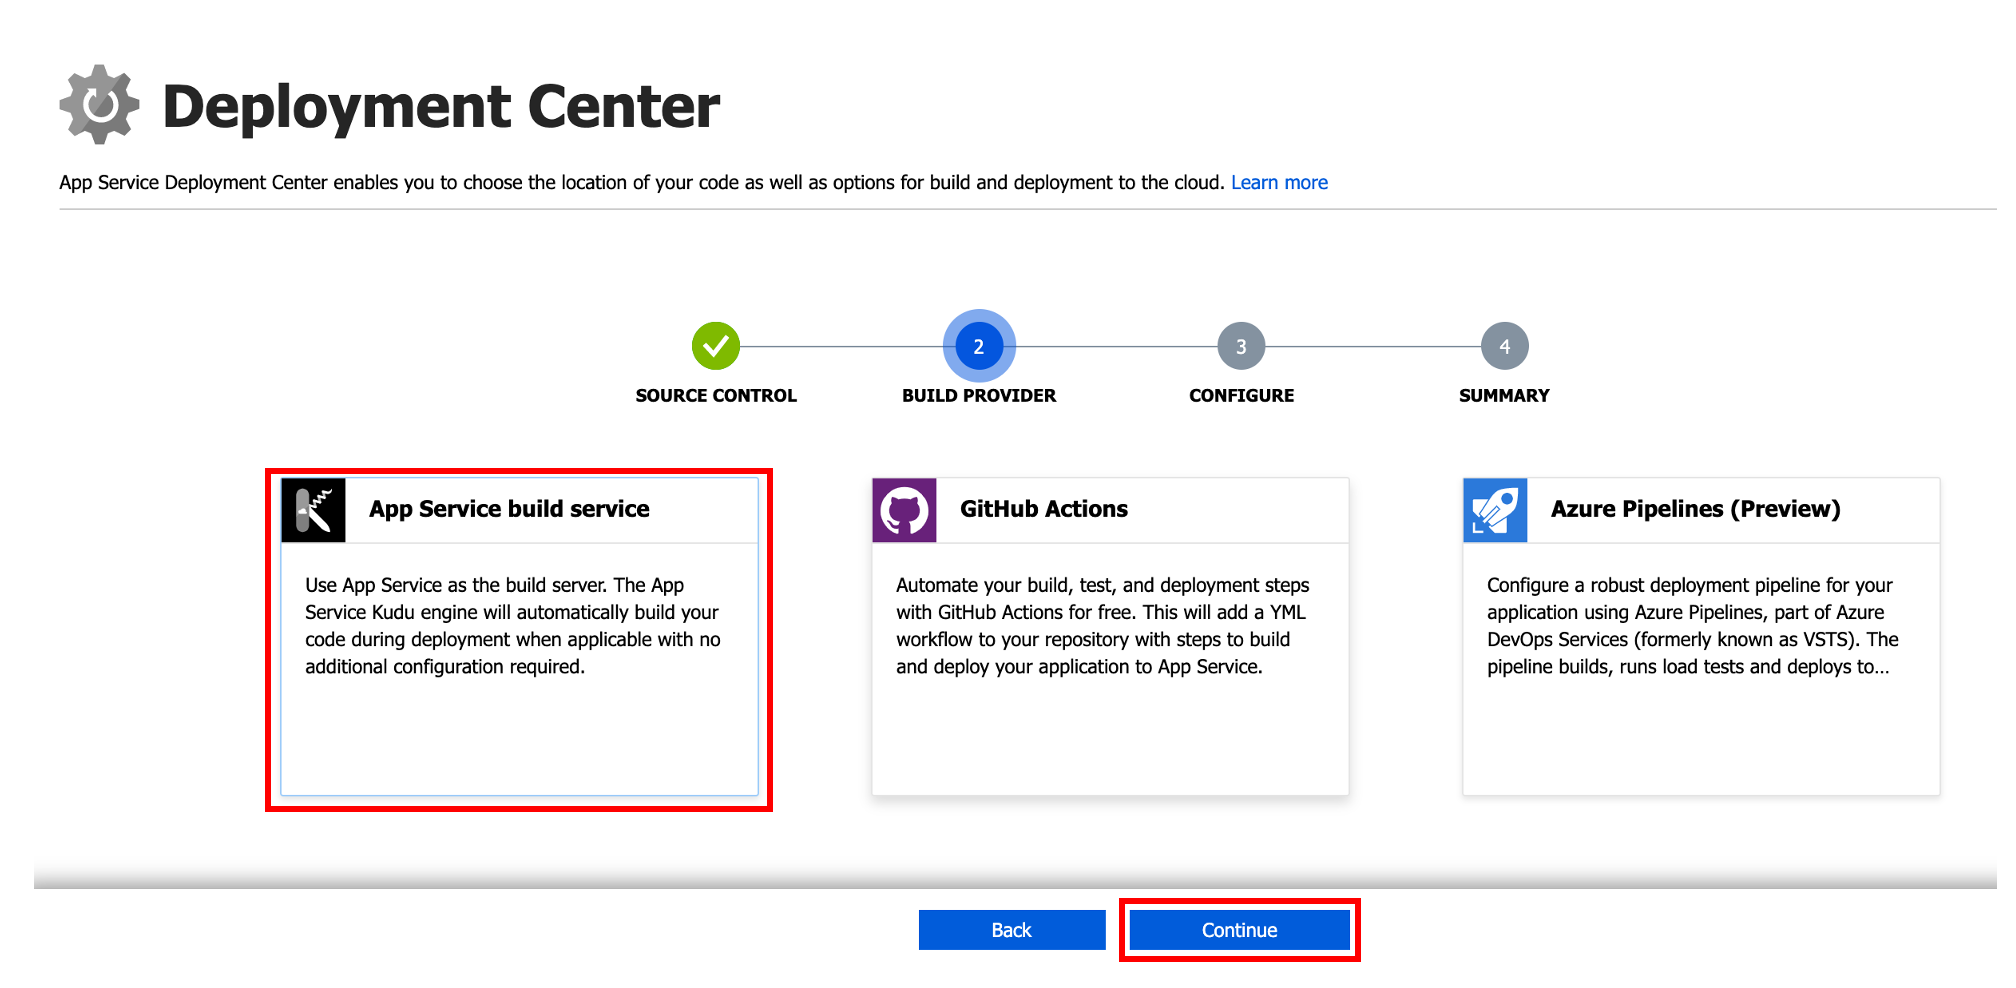
- Click the App Service build service container and the Continue button.
- Select the appropriate items from the dropdowns on the Configure blade.
Organization: Your GitHub account.
Repository: The repository you want to deploy to Azure App Service.
Branch: The branch from your repository you want to deploy.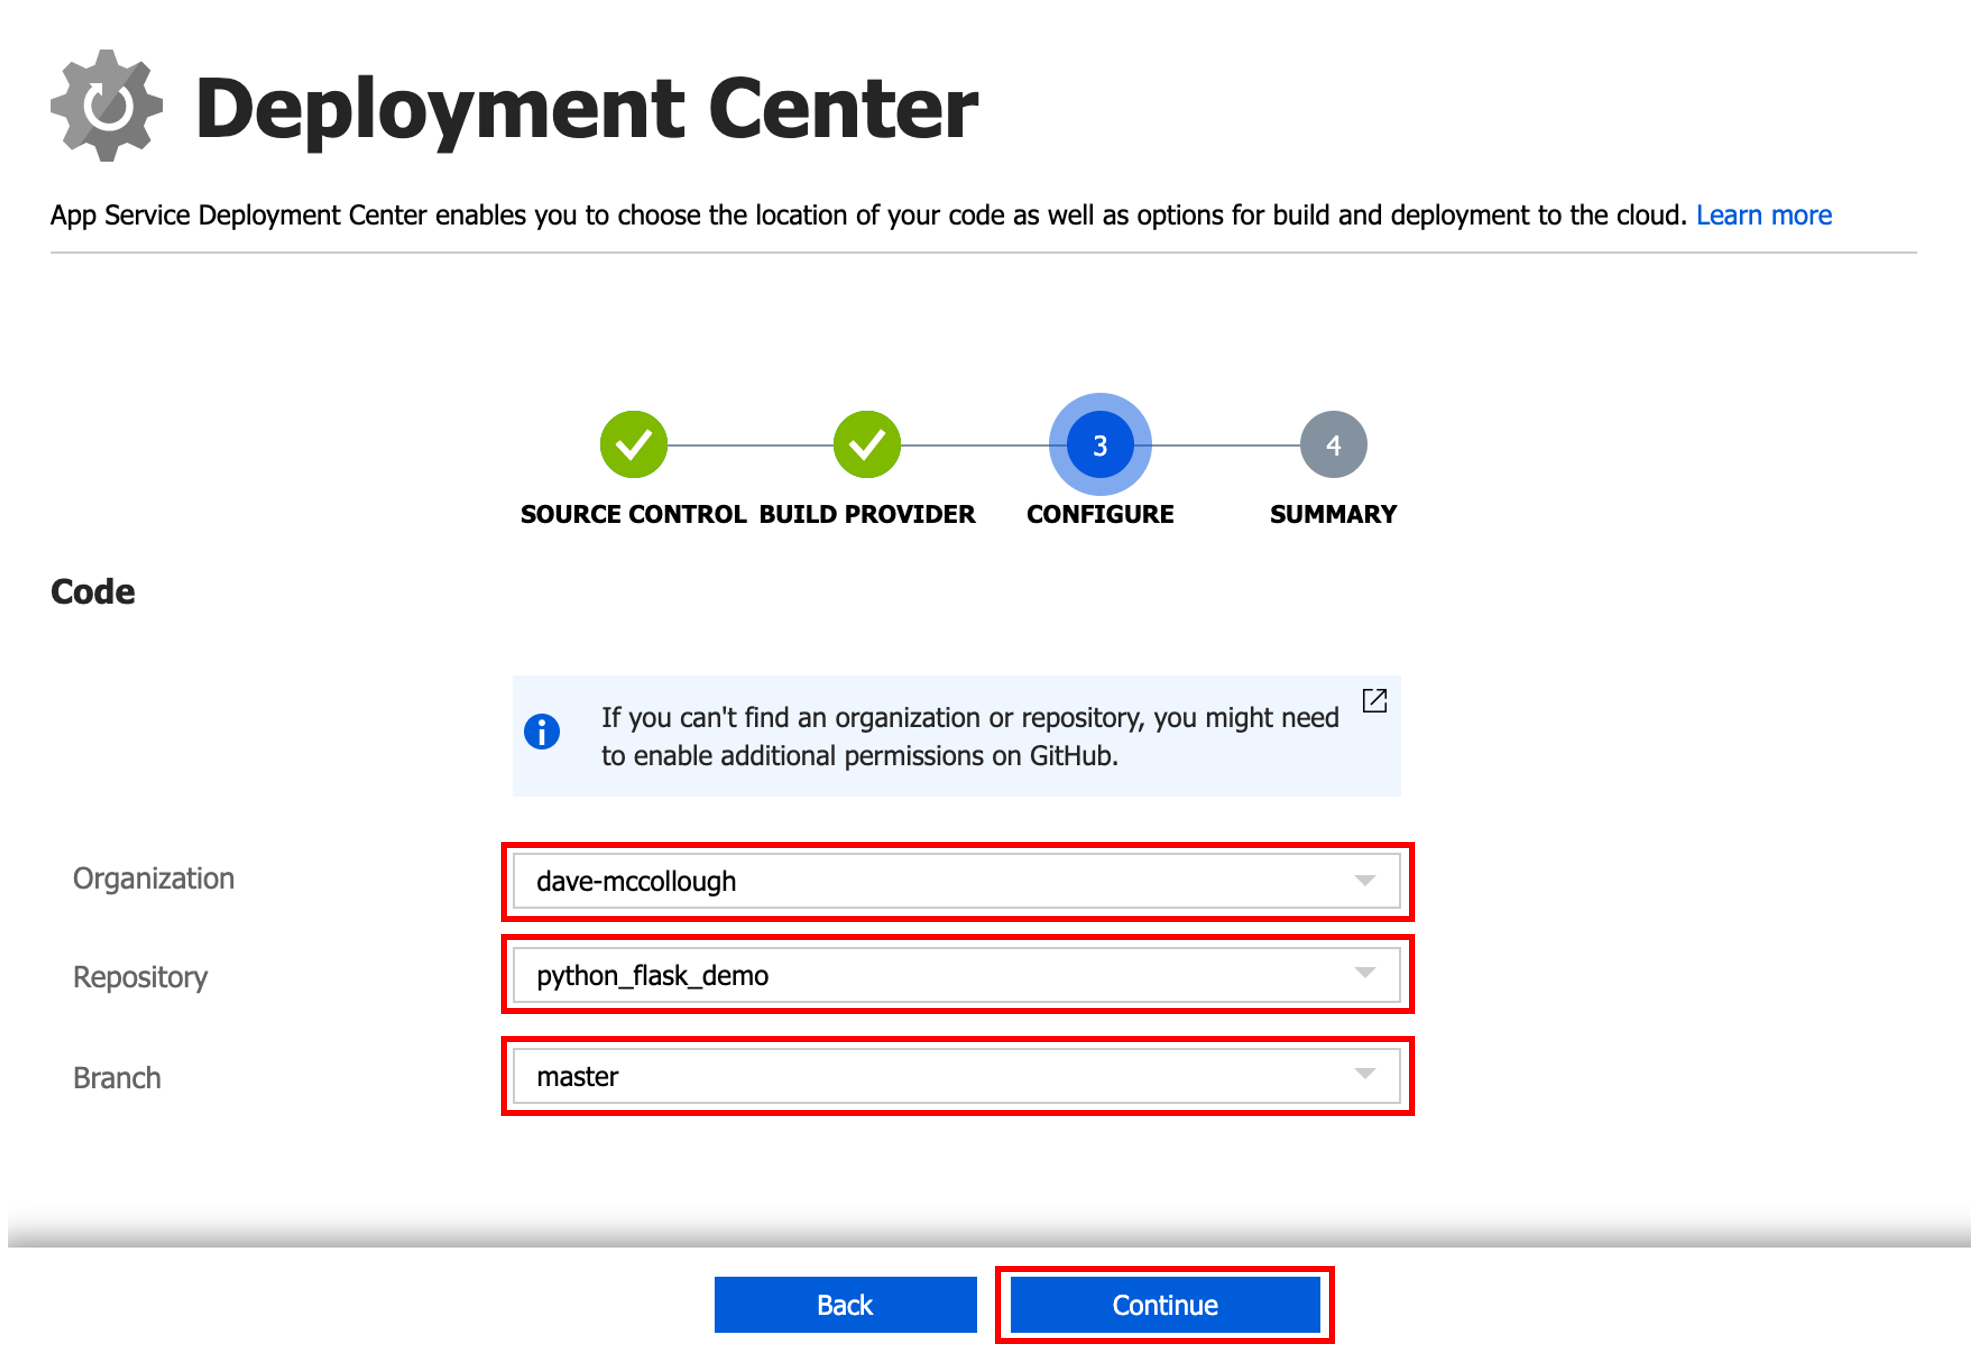
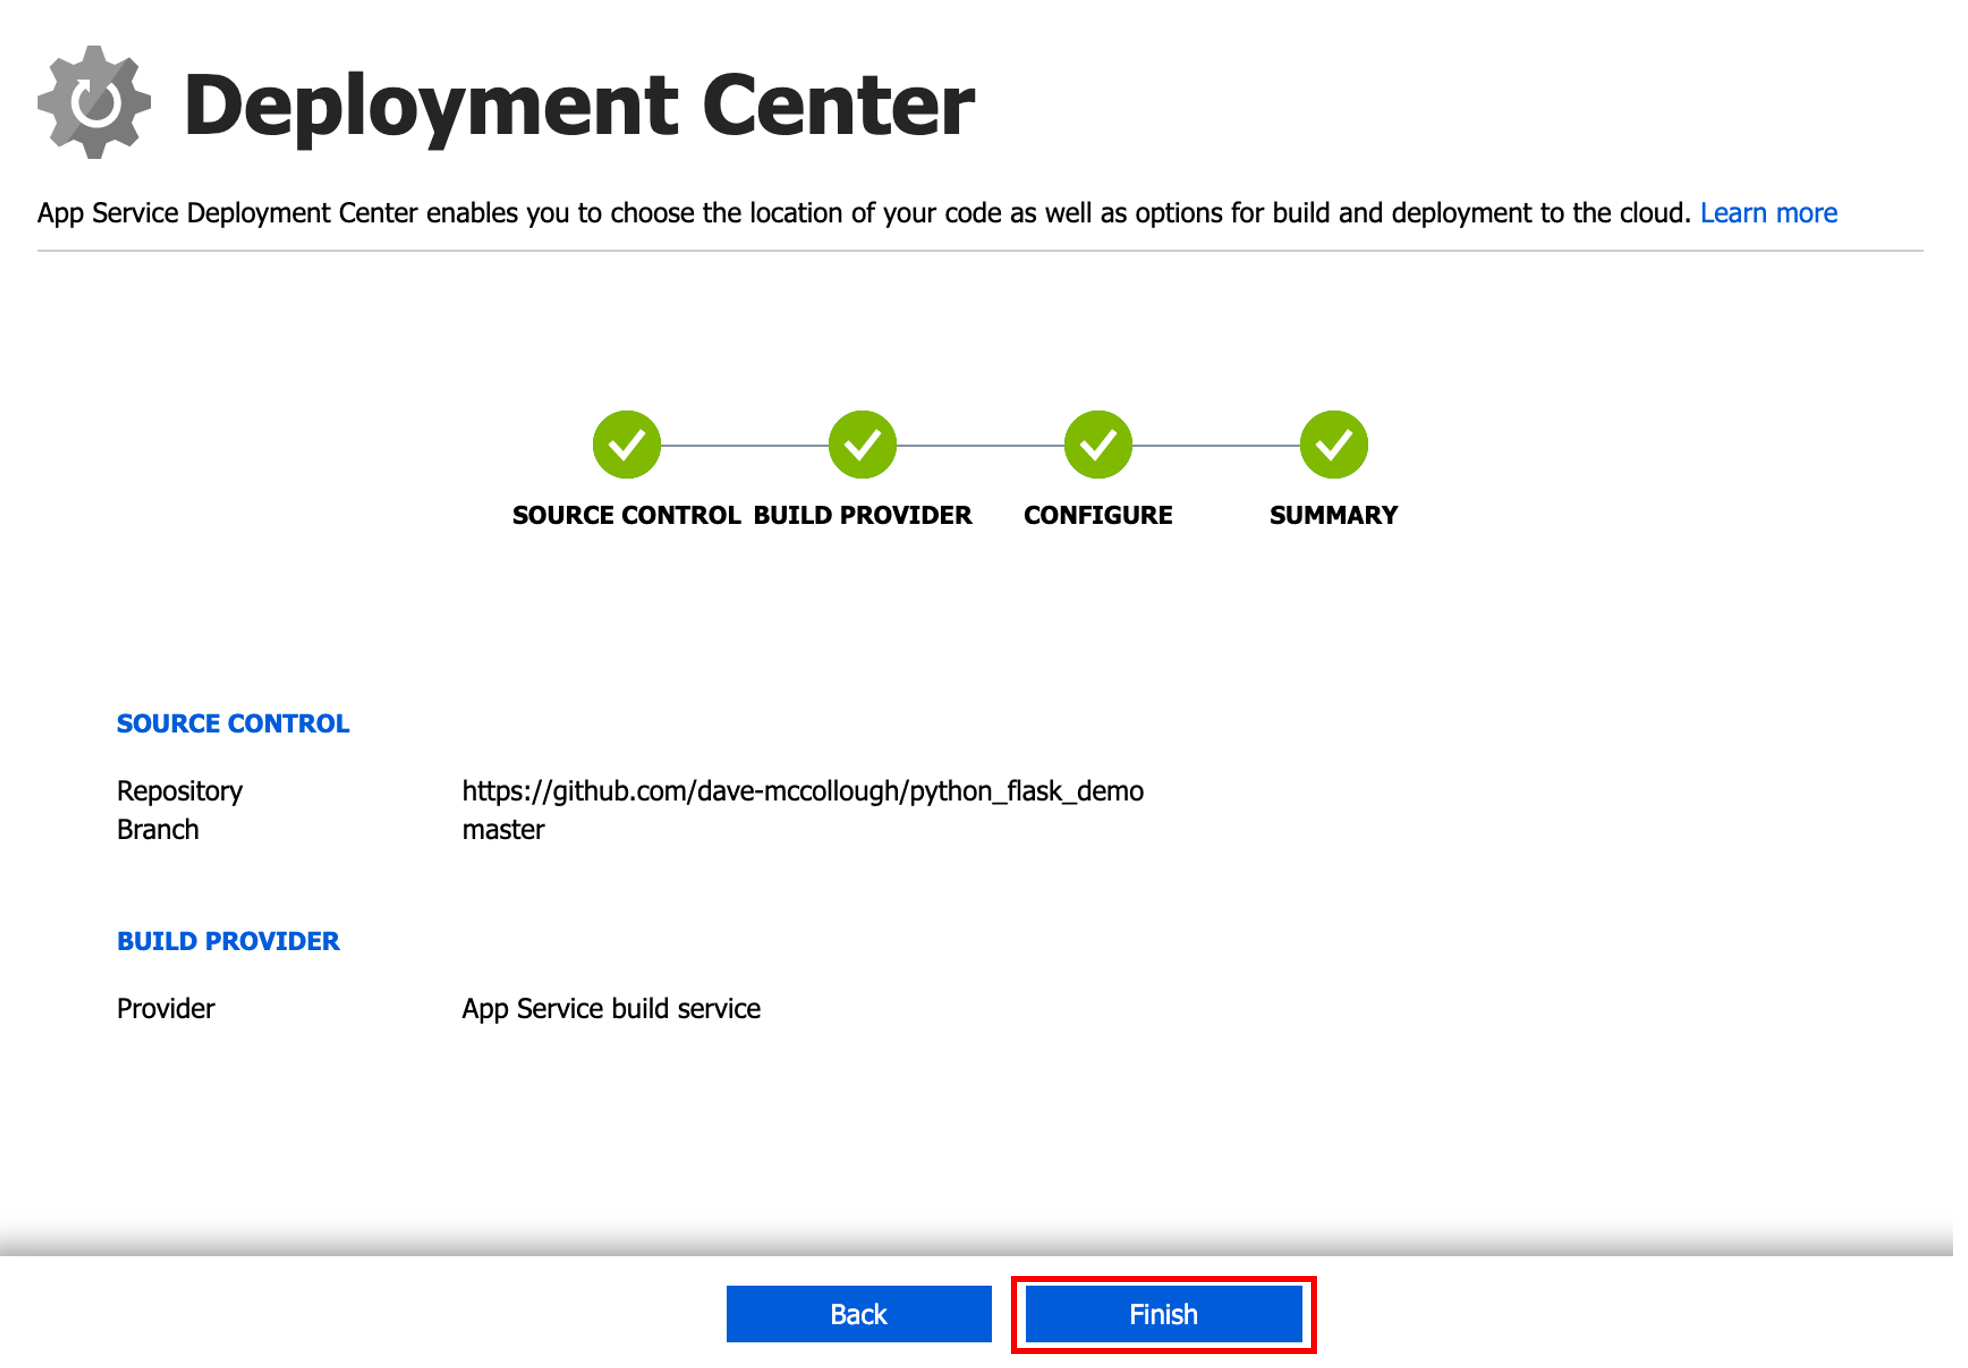
- Click the Finish button on the Summary page.
- Once the deployment is complete, browse back to the Overview page and click the URL to view your application.
Note: You may need to refresh your browser.
- It’s a good idea to clean up any resources related to your app service to avoid any unnecessary charges. You can do this by deleting the resource group you created for this application.
In the Azure portal, browse to the resource group you created for your app service.
Click Delete Resource Group
Enter the name of your resource group in the textbox
Click the Delete button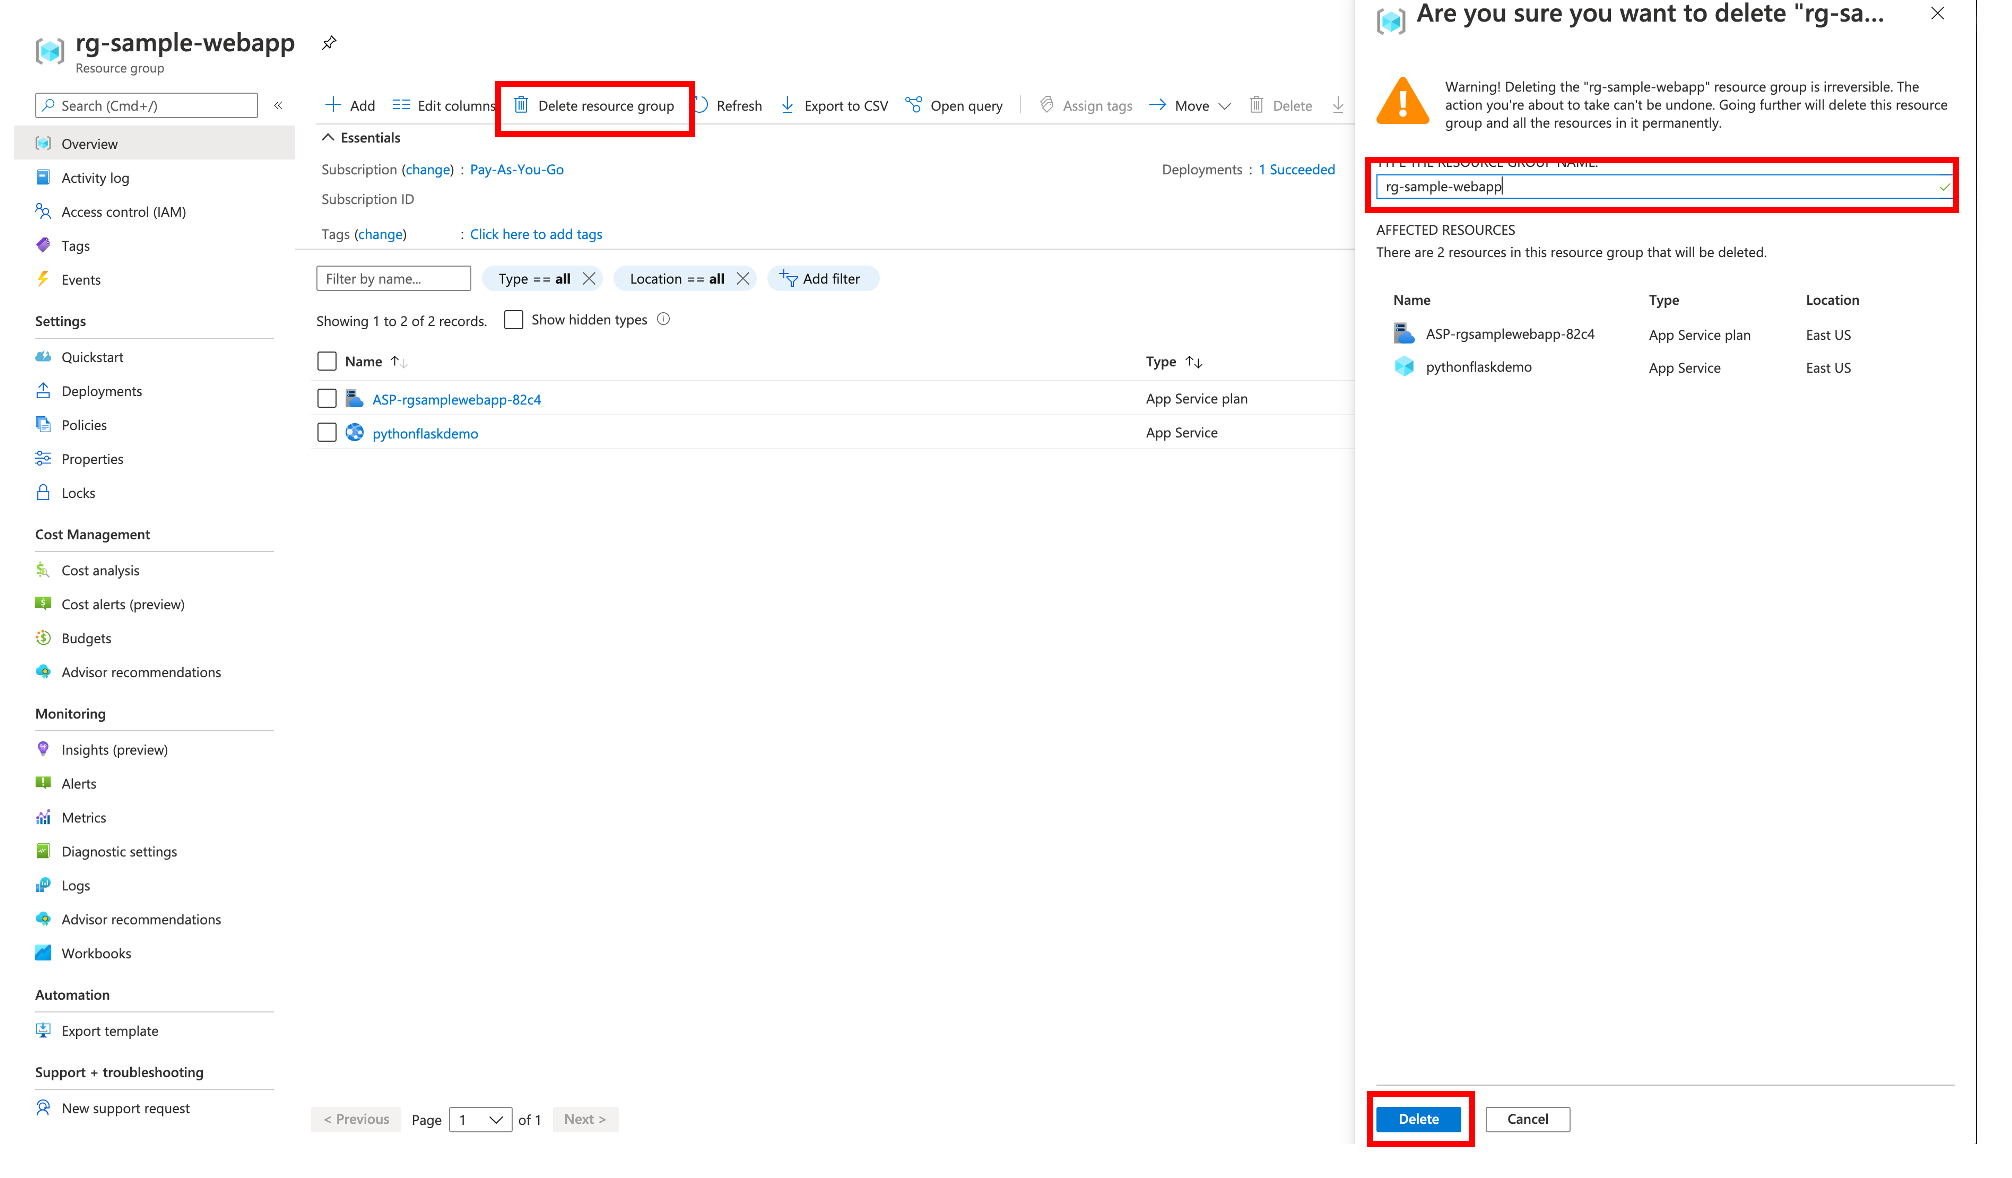
Summary
In this blog post we deployed a sample Python Flask application to Azure App service from a GitHub repository. In my next blog post, I’ll demonstrate how to deploy a containerized application to the Azure App Service.
Thank you for reading!
